Transferring your domain from another site to Kuroco
This tutorial explains how to transfer your domain from another site to Kuroco.
Transferring your domain
1. Register a custom domain on KurocoFront
In the left sidebar menu, click [Environment] -> [Custom domain/TLS certificate] and enter the domain you want to use in "Custom domain". Do not include any trailing slashes or directories at the end.
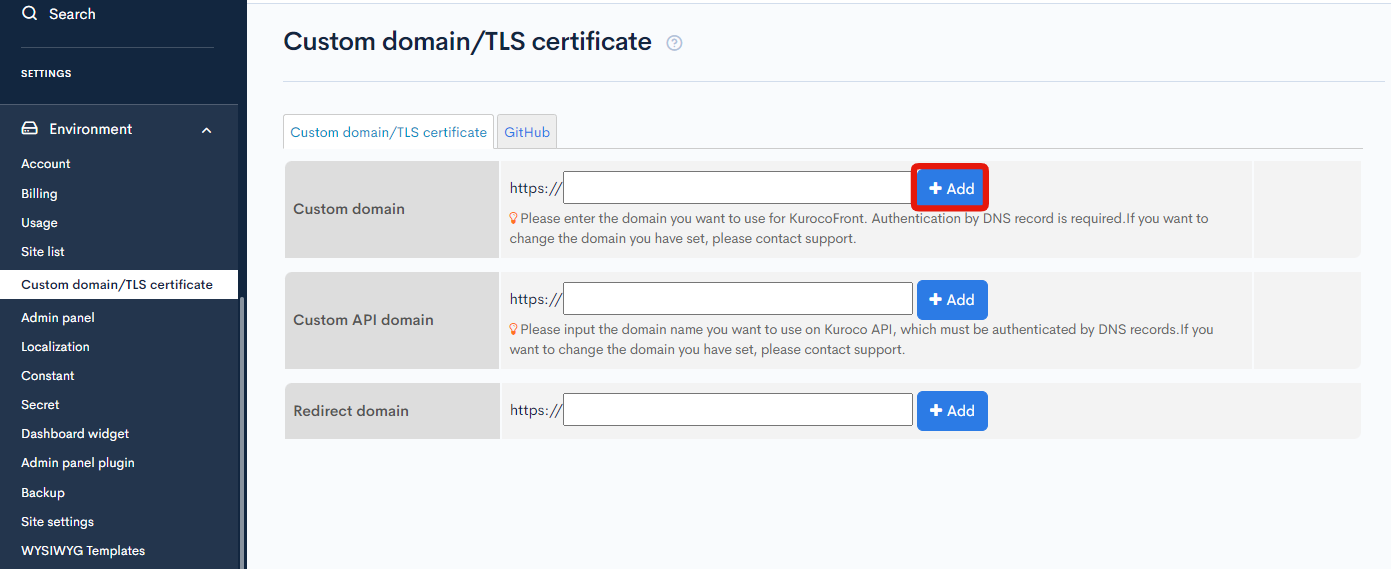
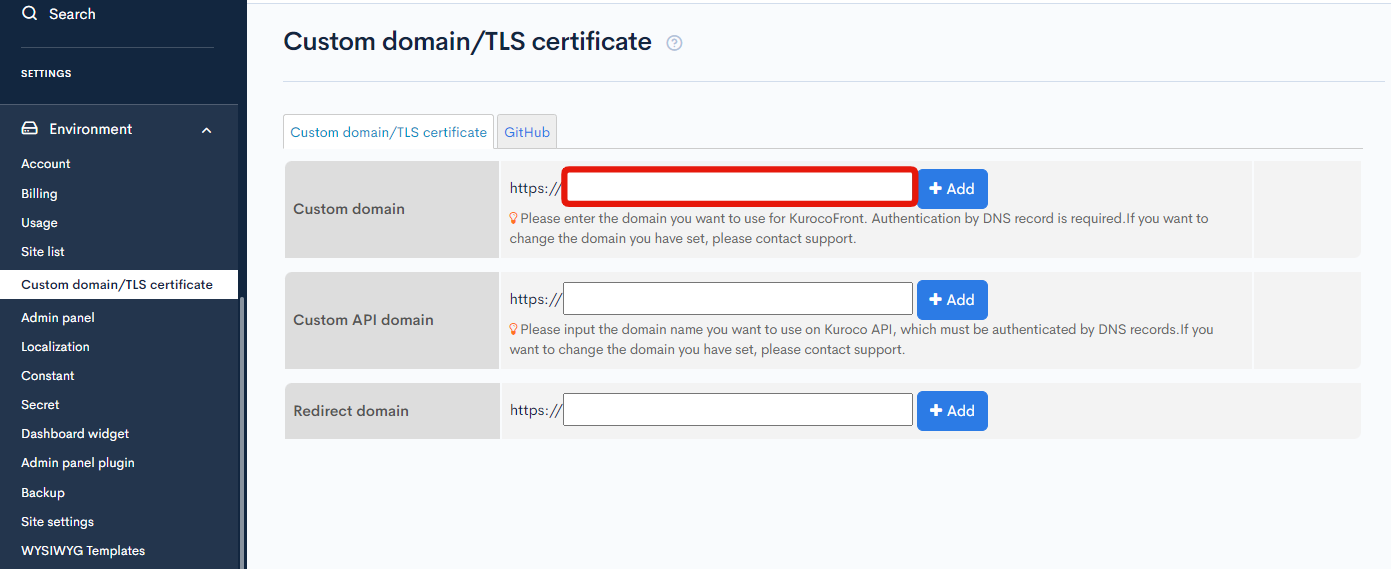 After entering your domain, click [Add].
2. Create a CNAME record
After the custom domain has been authenticated, the "Domain ownership verification" field will appear on the screen. Verify the DNS record in this field.
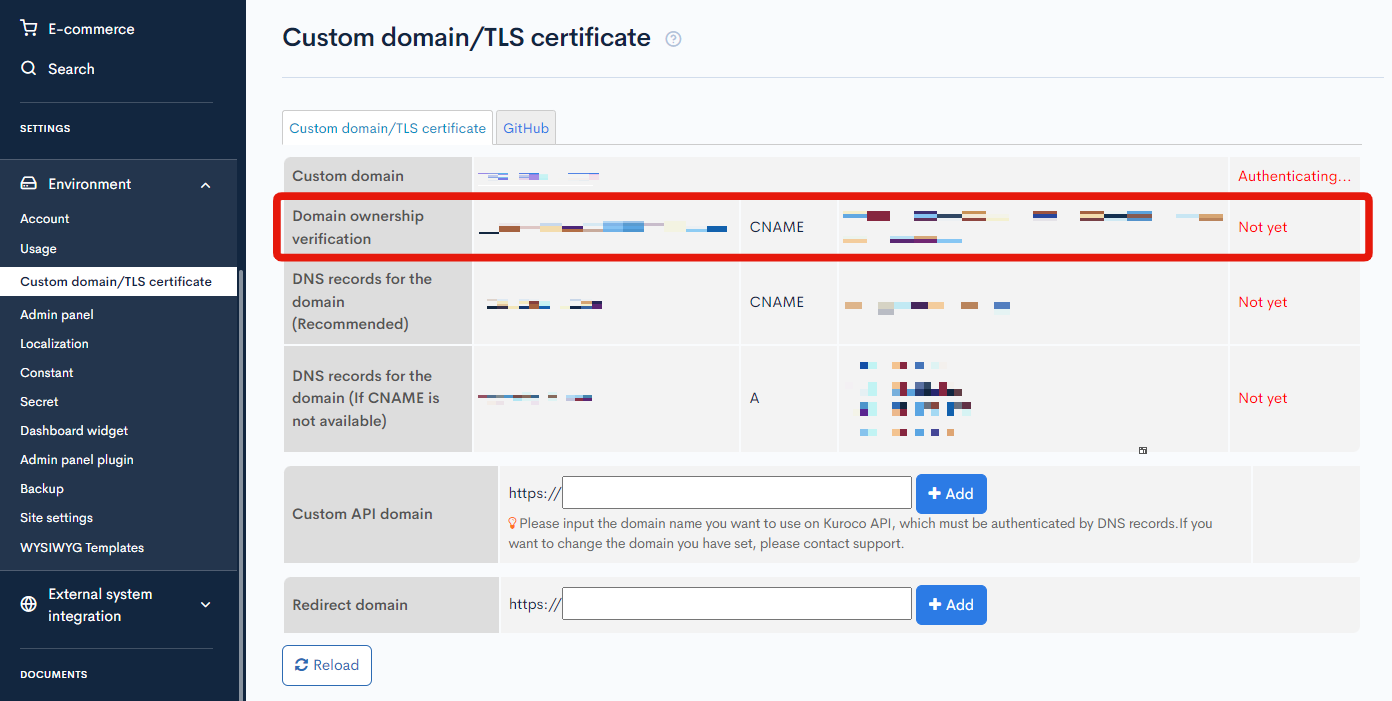 Configure the CNAME (canonical name) record according to the above information.
In this step, you will not set the "DNS records for the domain" yet. Please only set the DNS records for "Domain ownership verification".
Note: The configuration of the DNS record varies depending on your domain registrar. Refer to the links below and contact your domain registrar's customer support for more information.
3. Update the front-end domain in your account settings
Next, plug your custom domain into the front-end. Click [Environment] -> [Account] in the sidebar menu to go to the account settings screen.
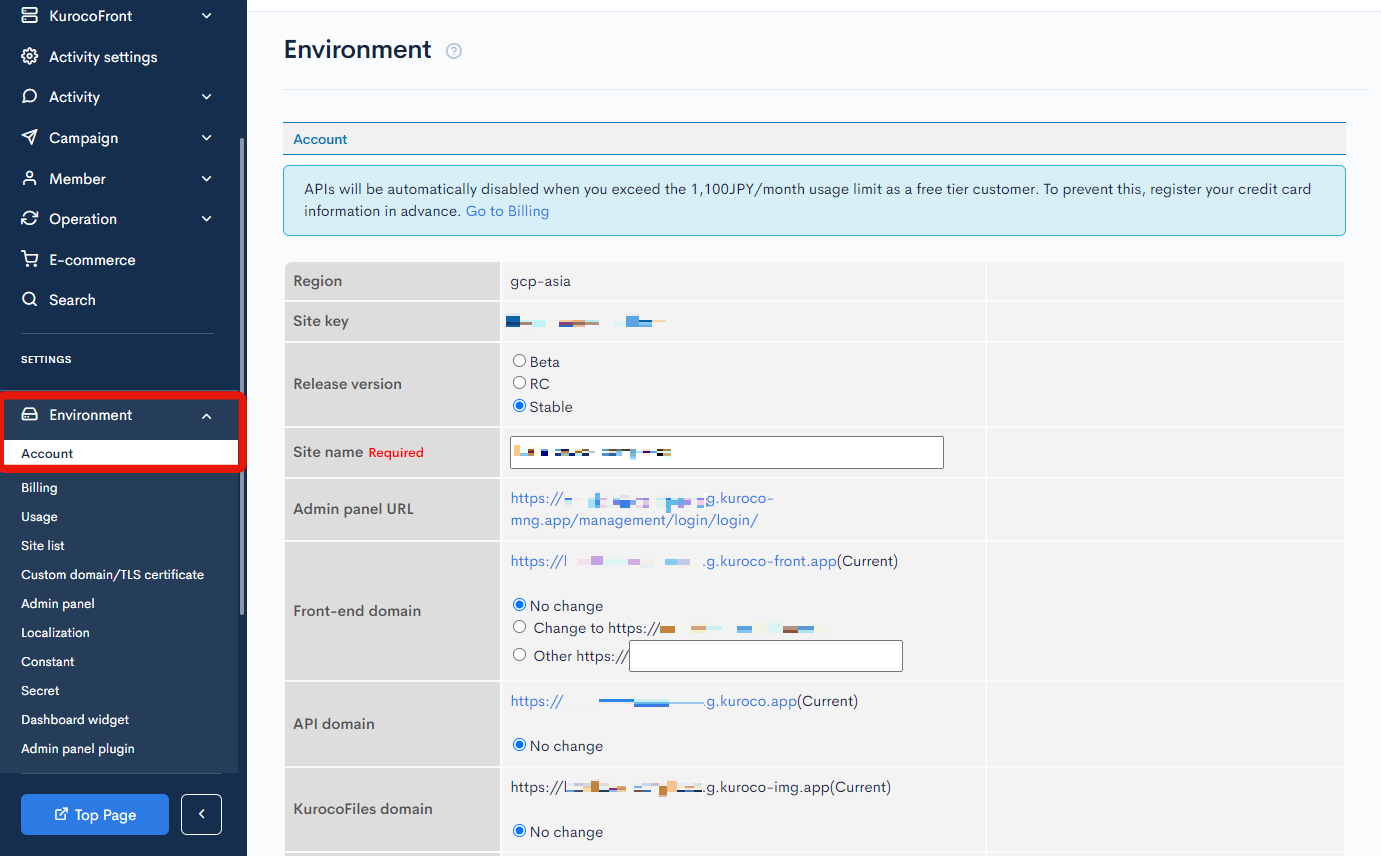 "Front-end domain" should now display an option to change to the custom domain you set up earlier. Verify and select this option, then click [Update].
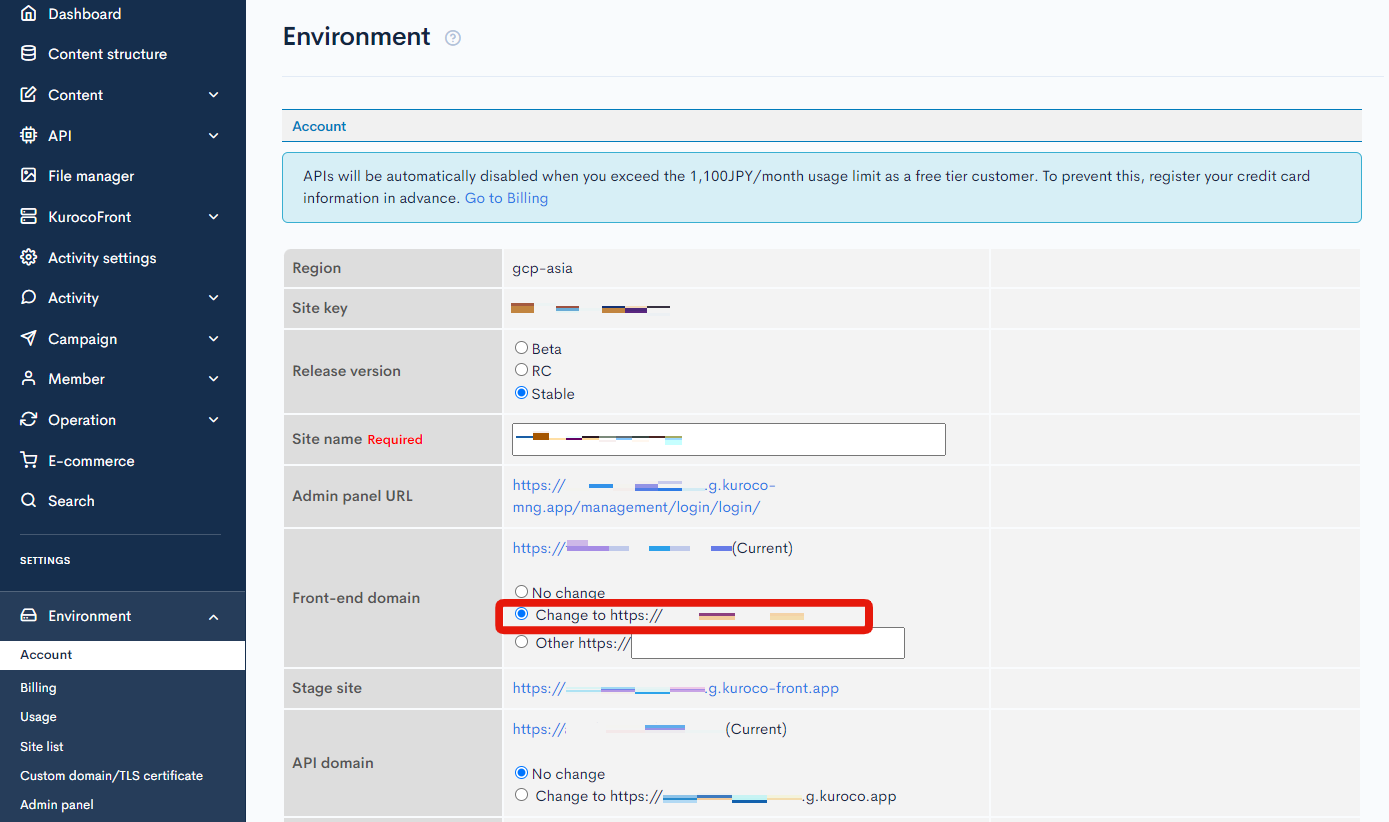
 Note: At this stage, you have not changed "DNS records for the domain", so your Kuroco-created site will not yet be displayed on your custom domain. Accessing the custom domain will direct you to your old site.
4. Register a custom API domain (if applicable)
This step applies if you are using cookies in [API] -> [Security]. Otherwise, skip to 5. Allow CORS for your custom domain.
In the sidebar menu, click [Environment] -> [Custom domain/TLS certificate] and enter the domain you want to use in "Custom API domain". Do not include any trailing slashes or directories at the end.
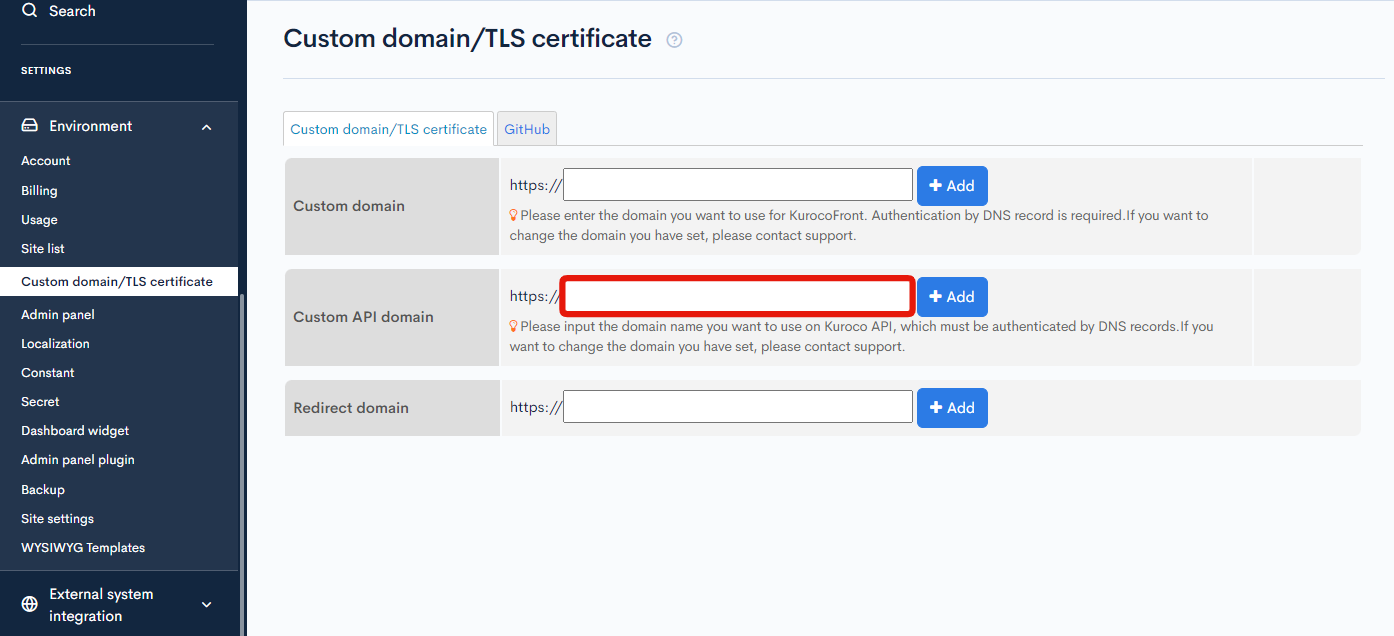 Note: The API domain must have a different sub-domain from the custom domain.
For example:
- Custom domain:
https://www.example.com - API domain:
https://api.example.com
After entering your custom API domain, verify the corresponding DNS records.
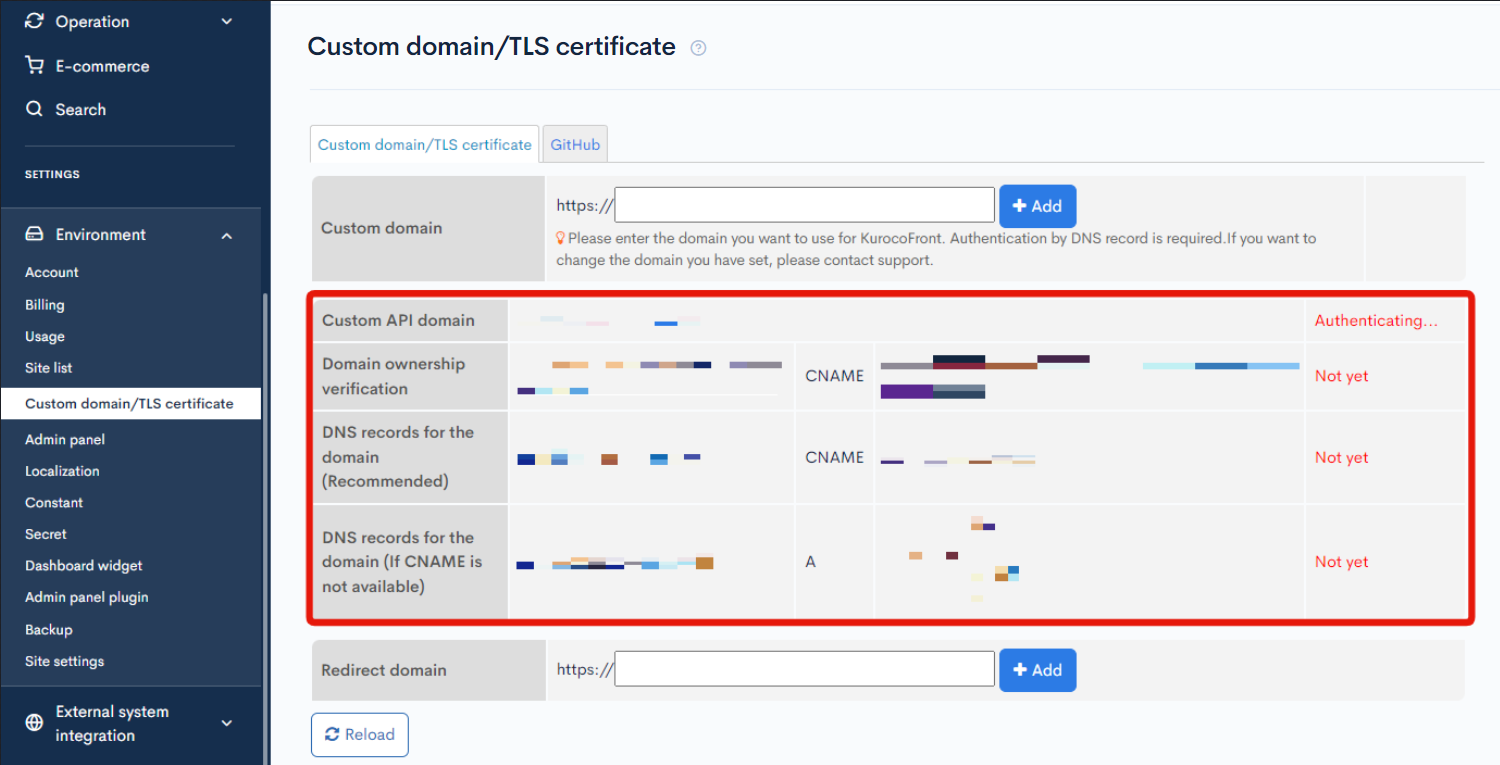 Configure the CNAME or address record accordingly.
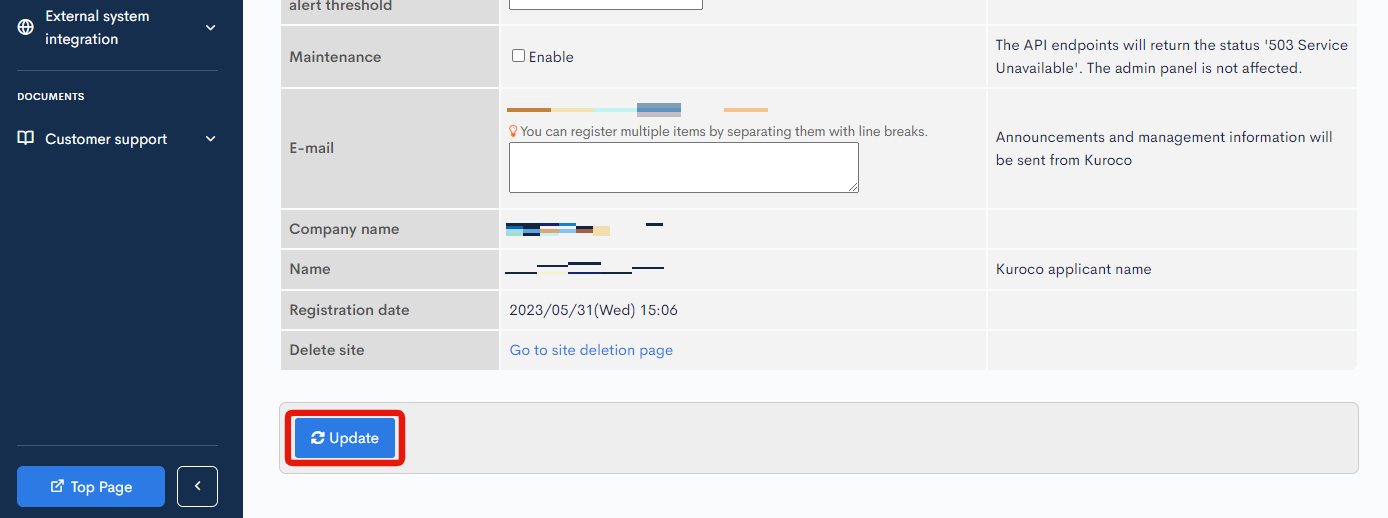
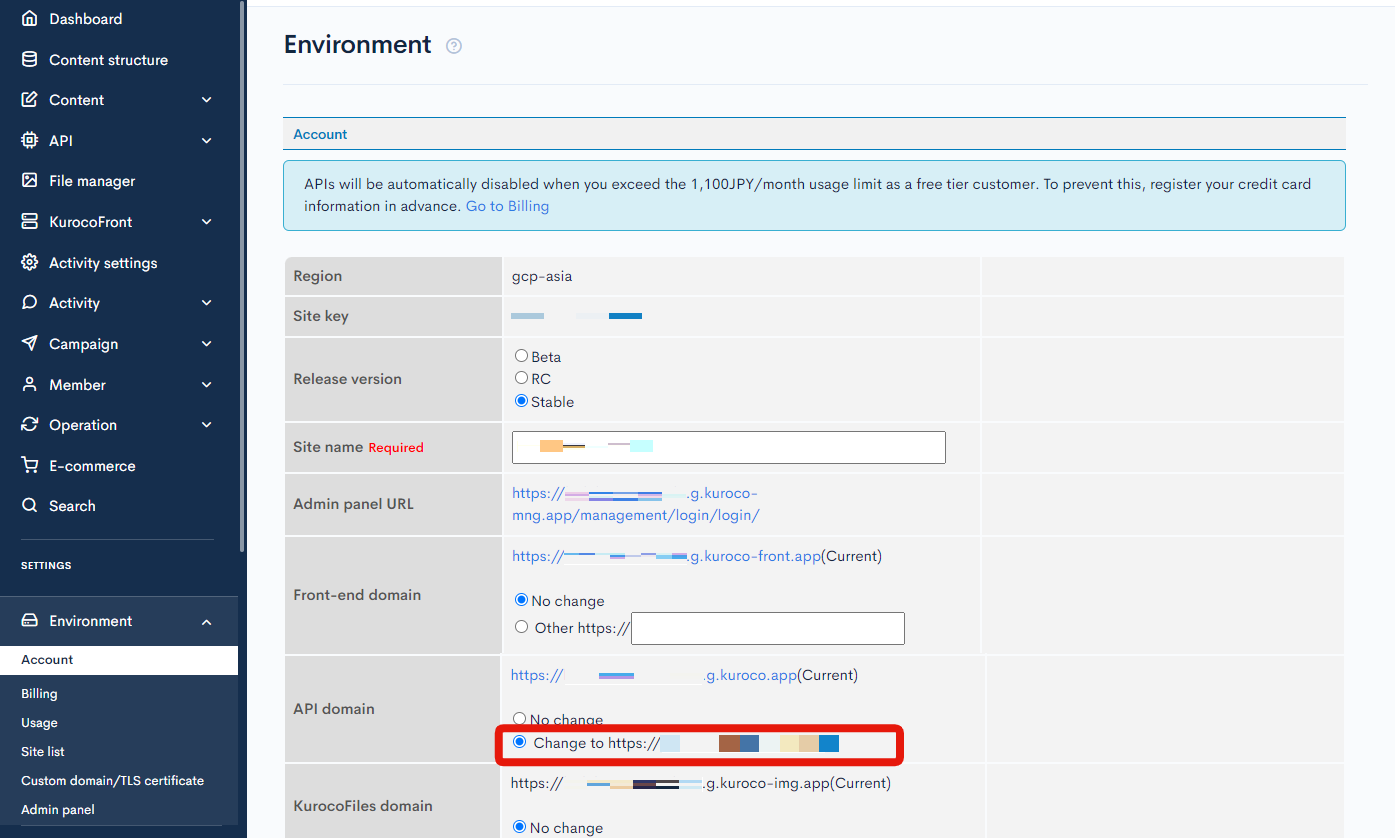
Next, update the API domain. Click [Environment] -> [Account] to go to the account settings.
Image from Gyazo
In the API domain field, select the API domain you added above and click [Update].
5. Allow CORS for your custom domain
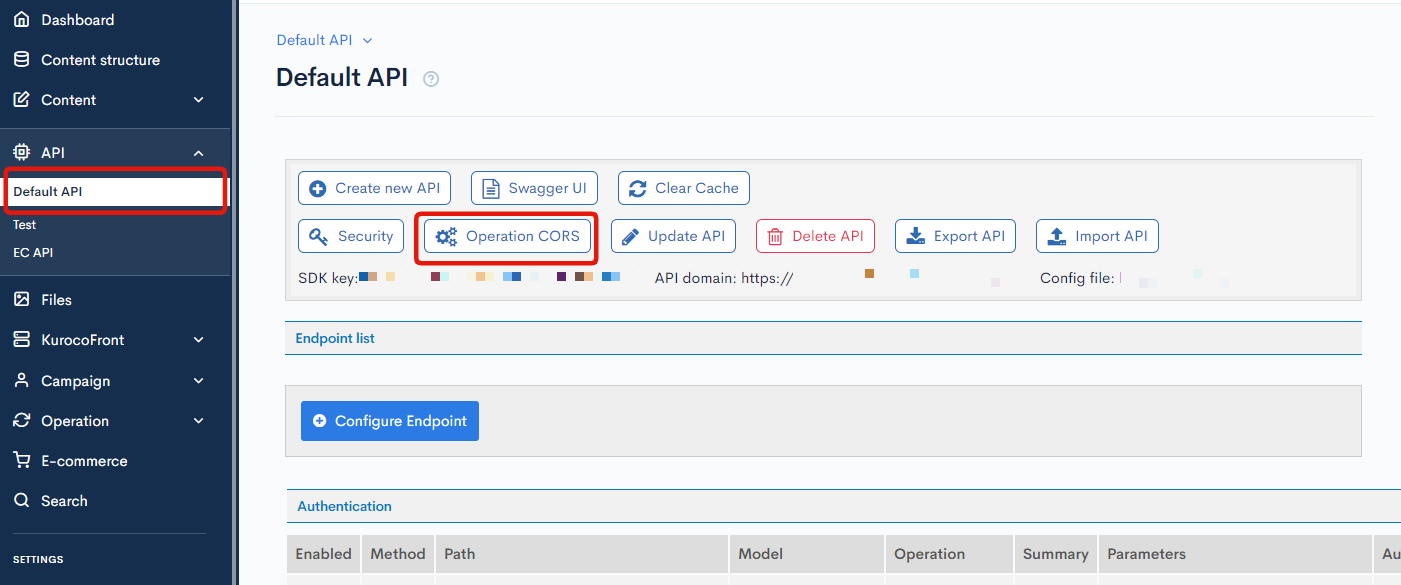
To add your custom domain to the API CORS settings, select the target API under the [API] dropdown list in the sidebar menu. Then, click [Operation CORS] on the API screen.
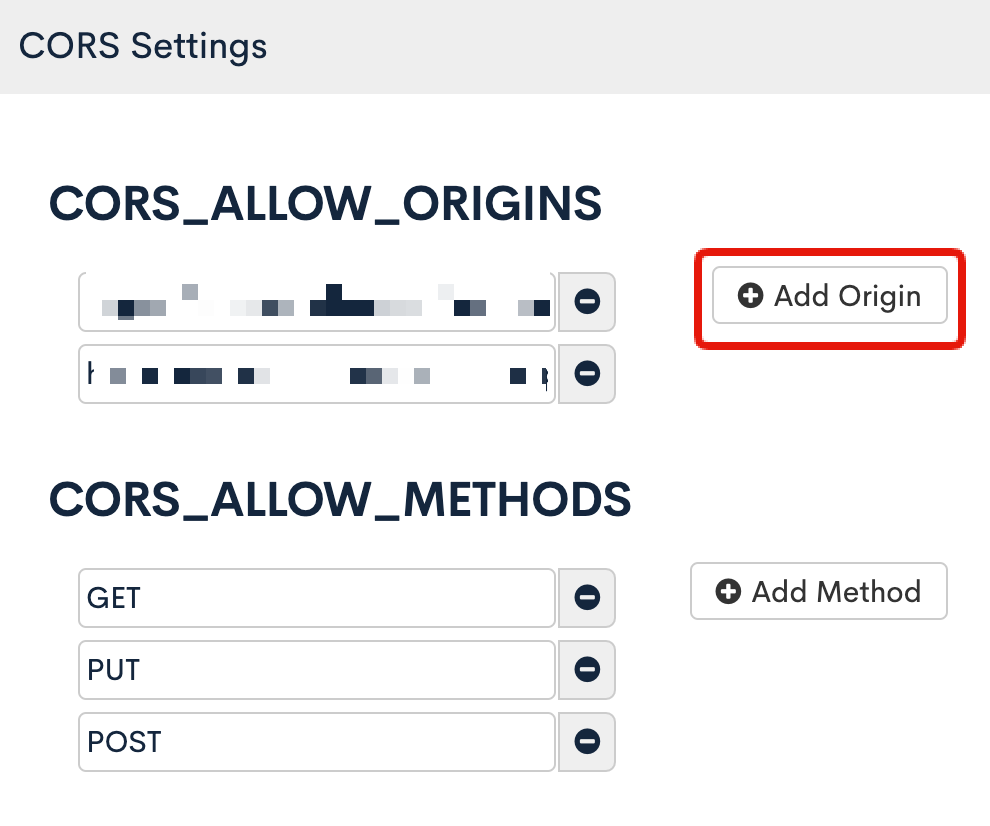
 In the CORS settings dialog, click [Add Origin] under the "CORS_ALLOW_ORIGINS" section.
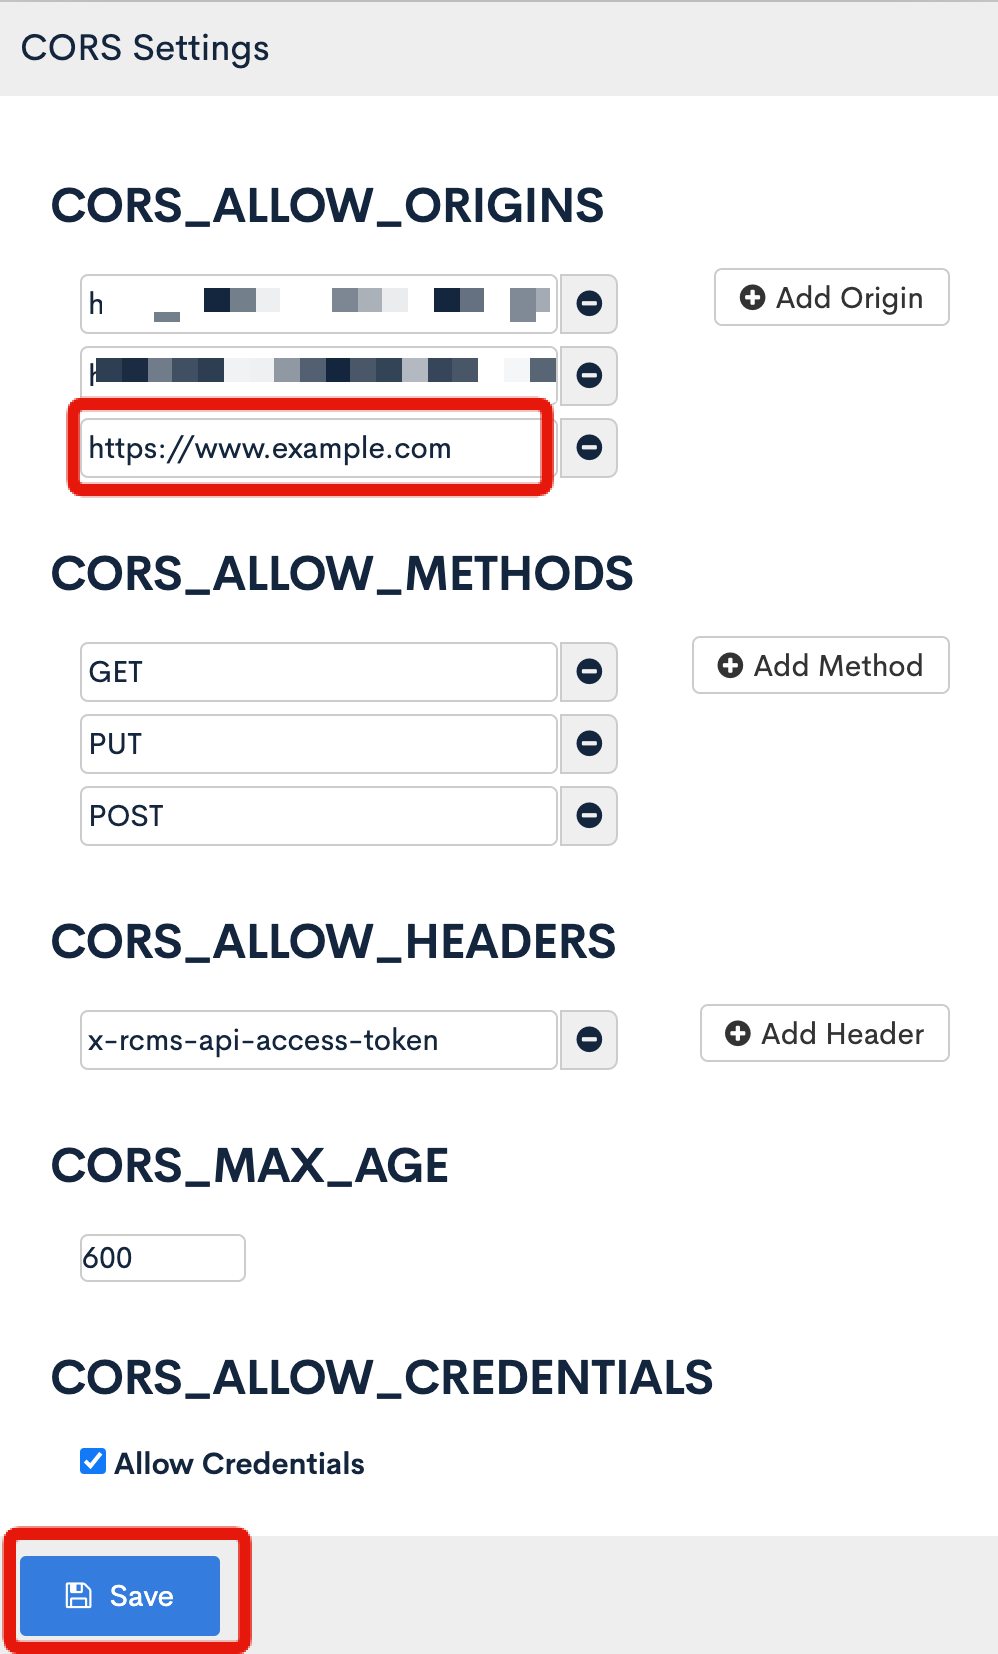
 Enter your custom domain in the new textbox that appears and click [Save].
6. Modify files that directly describe the domain
If you have files directly describing the domain in the integrated GitHub repository, they need to be modified.
GitHub Actions YAML file
The YAML file used to integrate with GitHub Actions includes the domain and should be modified. To do so, click [External system integration] -> [GitHub] in the sidebar menu and copy the contents in "Repository".
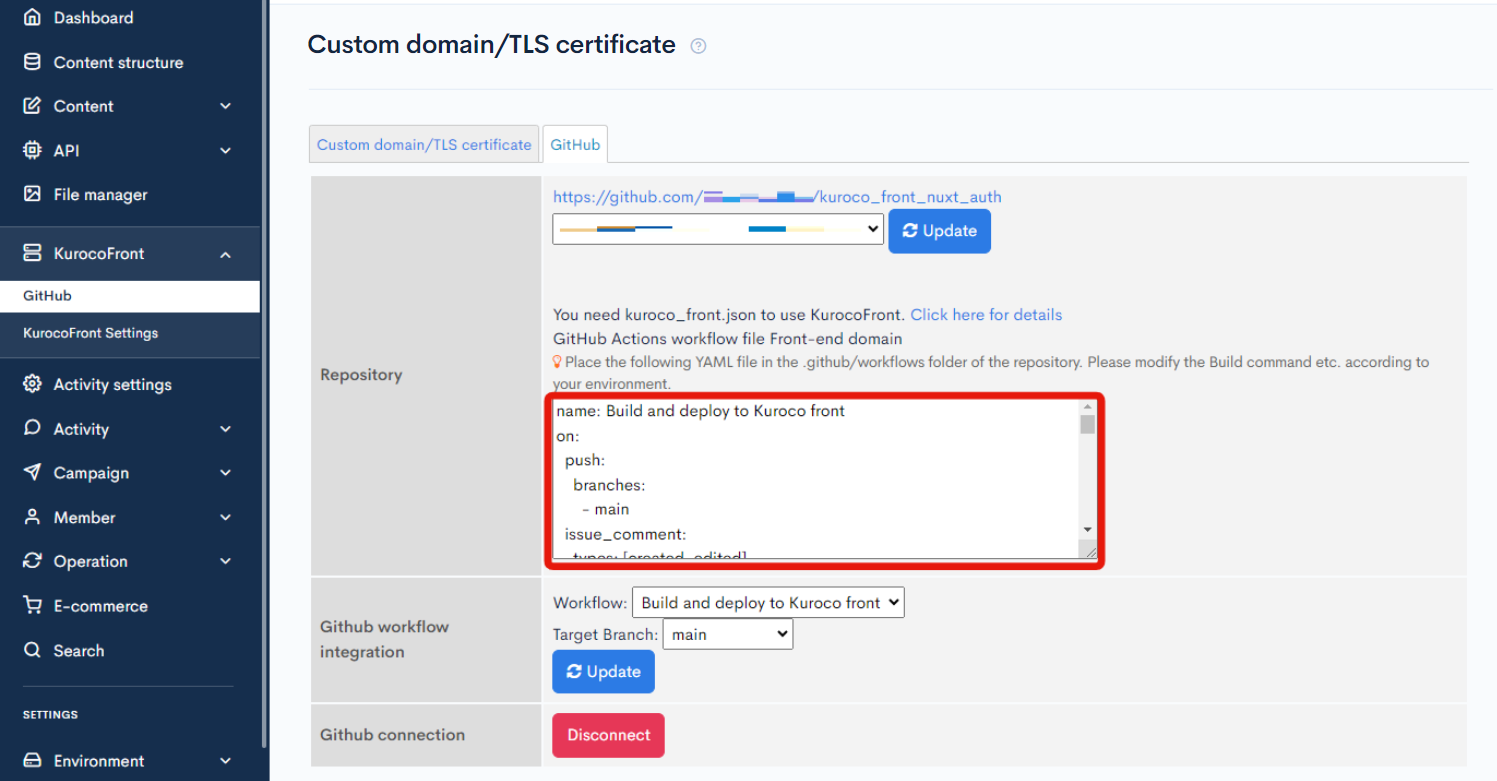
See: How to deploy the source from GitHub to KurocoFront - 4. Place YAML file under .github/workflows for more information.
.env file
If the root domain and/or API domain are written directly in the .env file, please modify it.
7. Modify the hosts file (optional)
As an optional step, you can modify the hosts file to verify your website display before updating the DNS records. Take note of the following points.
The address record for the hosts file can be found in the DNS records for the domain (If CNAME is not available) field in [Environment] -> [Custom domain/TLS certificate].
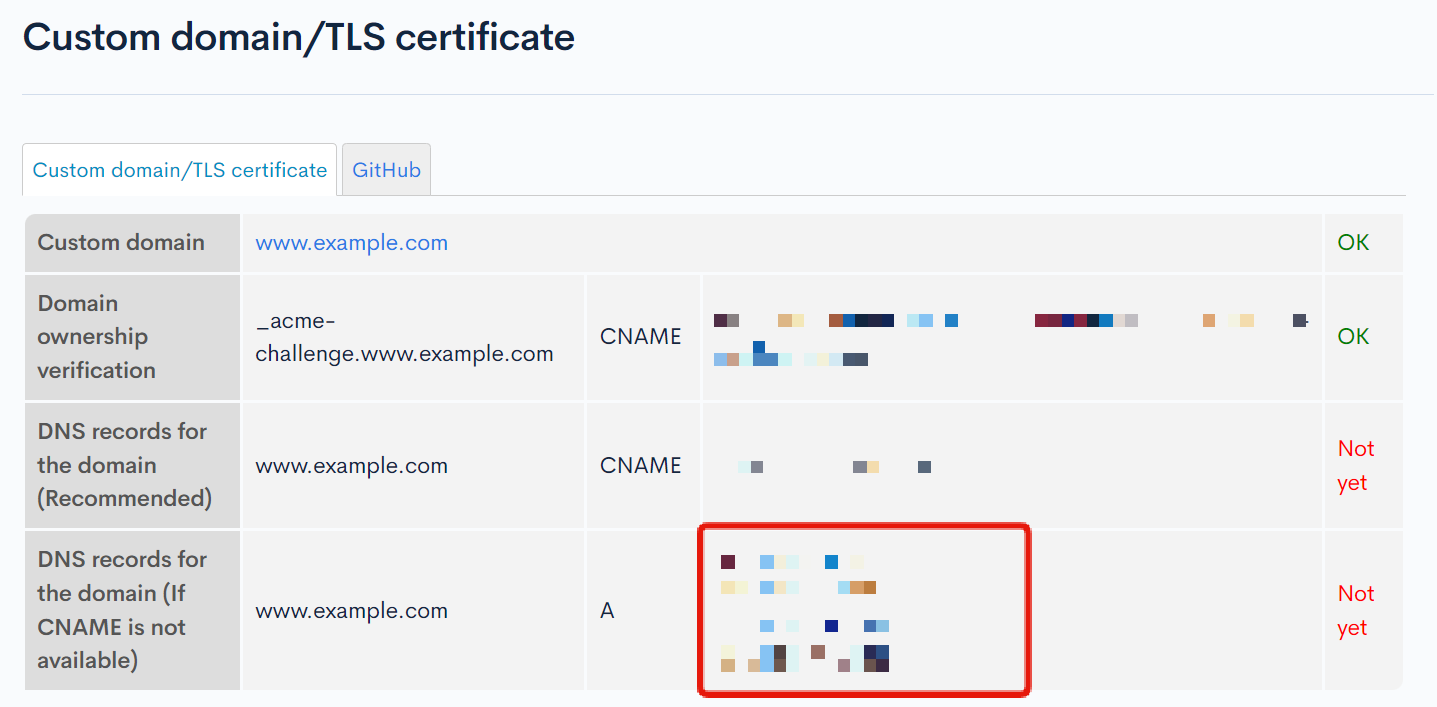 The above screenshot shows 4 address records, but you only have to enter 1 record in the hosts file.
151.101.XX.XXX www.example.com
After confirming the display, be sure to revert the hosts settings.
After verifying the site display, make sure to restore the original hosts settings.
If your website is not displaying correctly, see FAQ: The custom domain I set up is not displaying my site. What checks should I perform? for troubleshooting help.
8. Create DNS records to use your domain
In the left sidebar menu, click [Environment] -> [Custom domain/TLS certificate]. Verify the "DNS records for the domain (Recommended)" or "DNS records for the domain (If CNAME is not available)" field.
 Configure the CNAME or address record according to the above information.
Note: The configuration of the DNS record varies depending on your domain registrar. Refer to the links below and contact your domain registrar's customer support for more information.
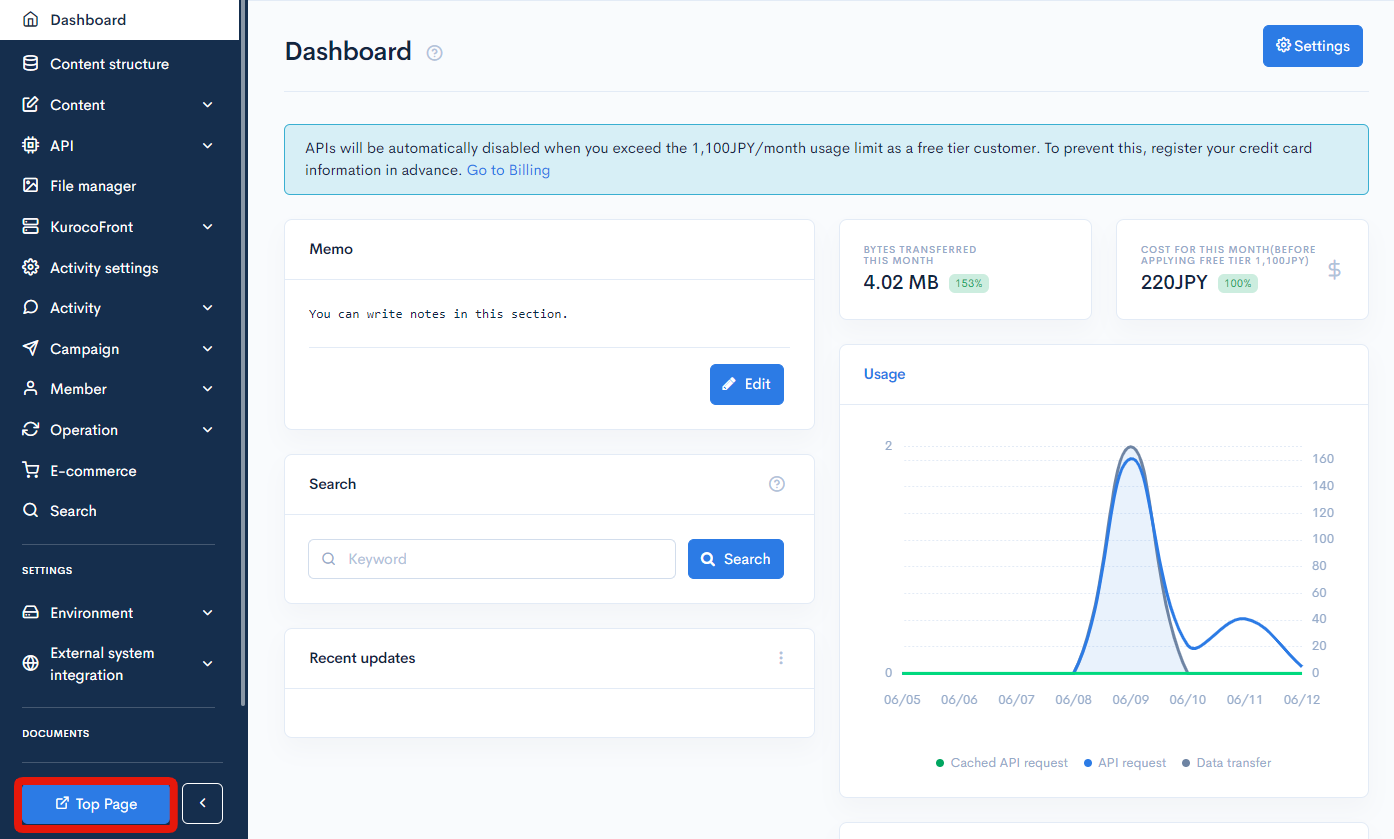
Once the DNS is reflected, you will be able to access the Kuroco website through your original domain by clicking [Top page] in the sidebar menu.
More information
To learn more about using original domains and KurocoFront, refer to the documents below:
Support
If you have any other questions, please contact us or check out Our Slack Community.