File credit and description information
Overview
Credit information helps to accurately attribute the creator or owner of a file for their work, while description makes it easier for others to understand the purpose and content of the file. In certain cases, including credit and description information may be legally required, particularly for copyrighted materials. Adding credit and description metadata to a file can be accomplished using the KurocoFiles(Database) resource/directory of the File Manager.
How to setup
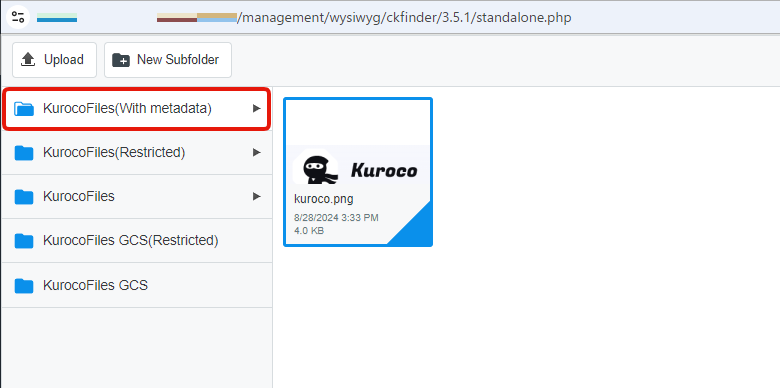
Click KurocoFiles(Database) from File manager
Note that, credit and description information can only be put to files in this directory.
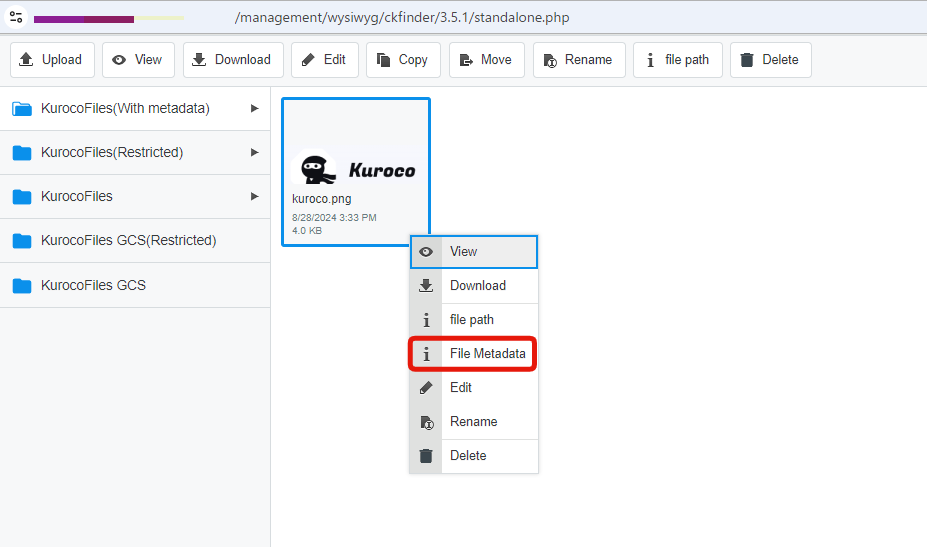
Right-click on the desired file that you wish to add the information to, and select "File Metadata" option.
In the "File Metadata" window, you can then can enter credit and description for the file.
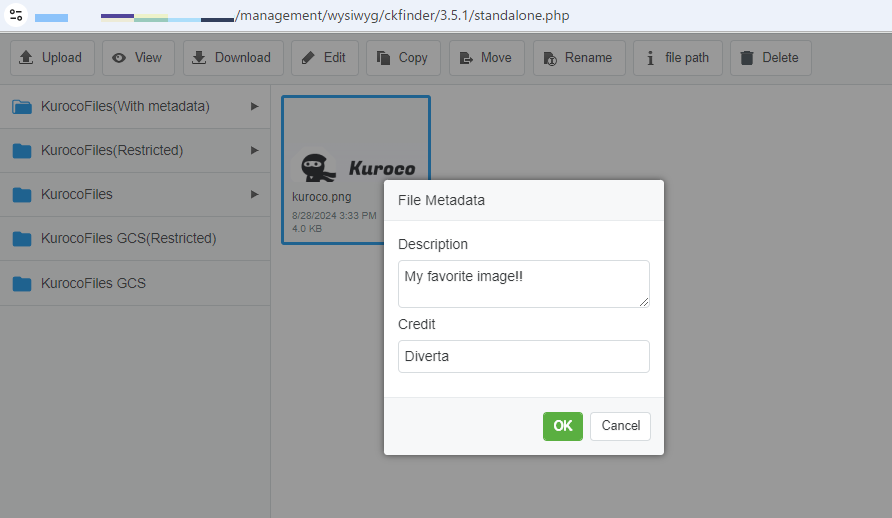
That's it. This information will be stored with the file and can be used to identify the source and purpose of the file.
Check credit and description
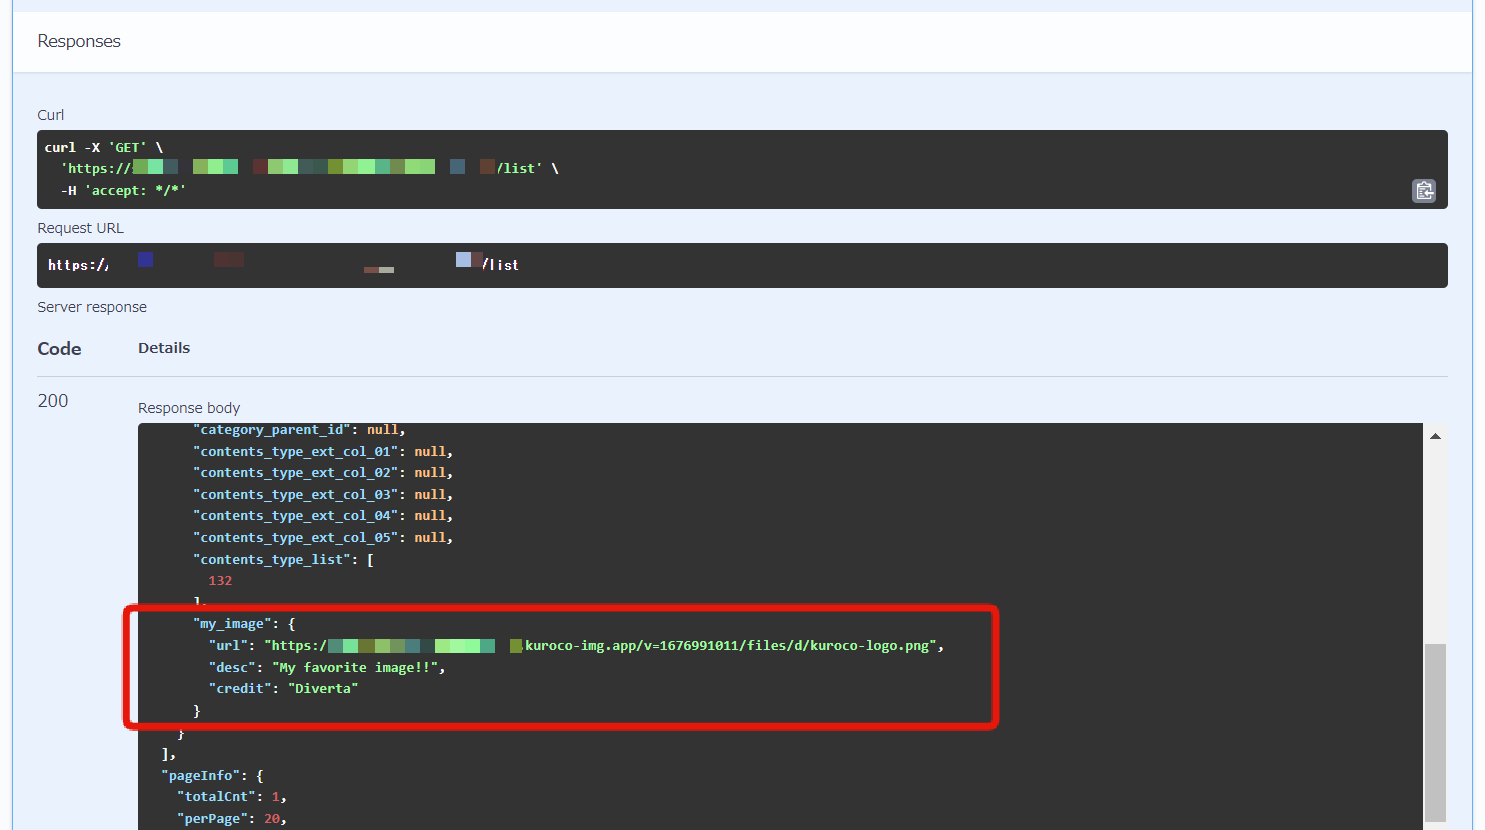
You can find the credit and description of your file in the Content API response.
Create content structure
First, let's have a content structure with an extension column with File (from File manager) type.
From the Content structure list, Click [Add].

Configure the following settings.
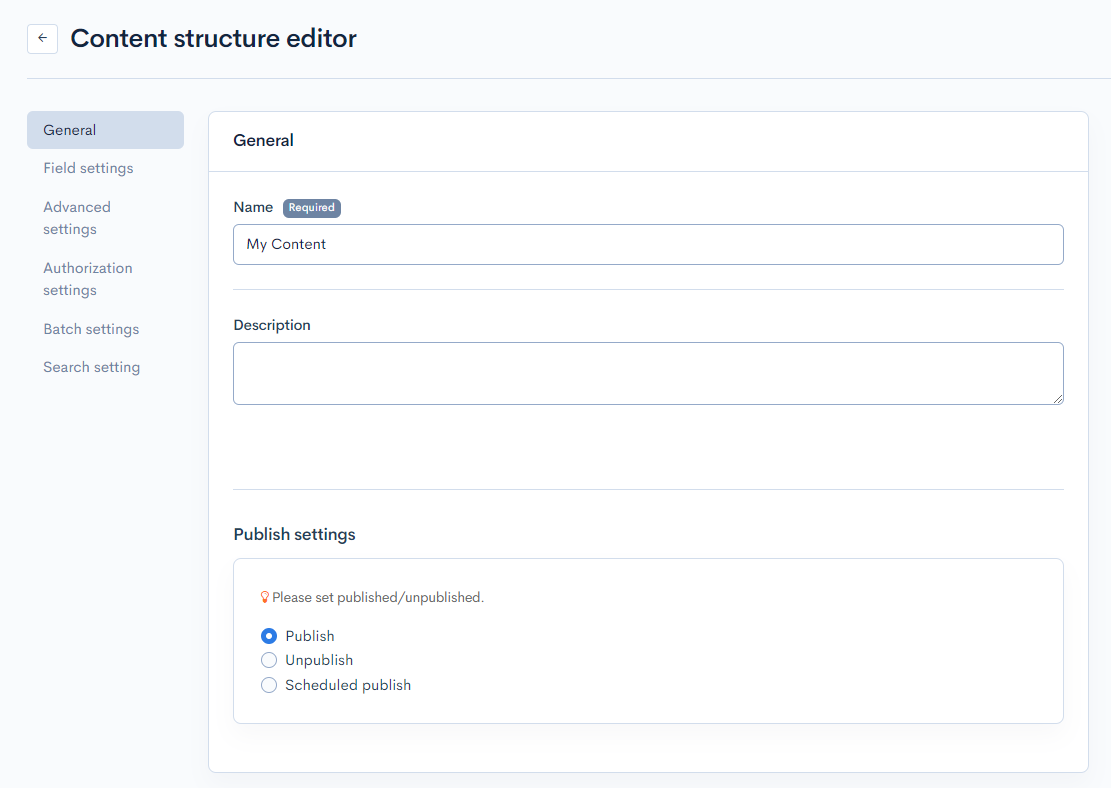
General
| Item | Settings |
|---|---|
| Name | My Content |
Field settings
| Item | Settings |
|---|---|
| Field name | My Image |
| Field settings | File (from File manager) |
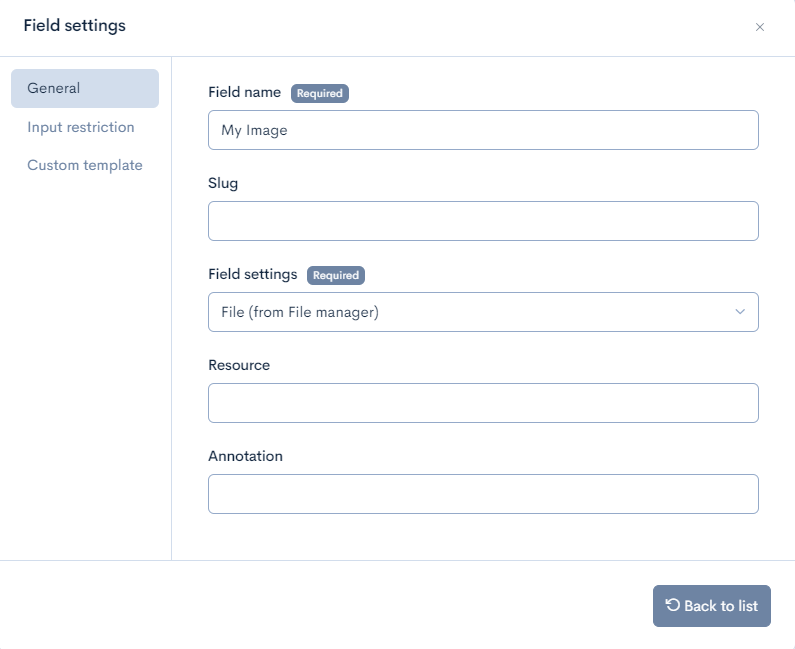
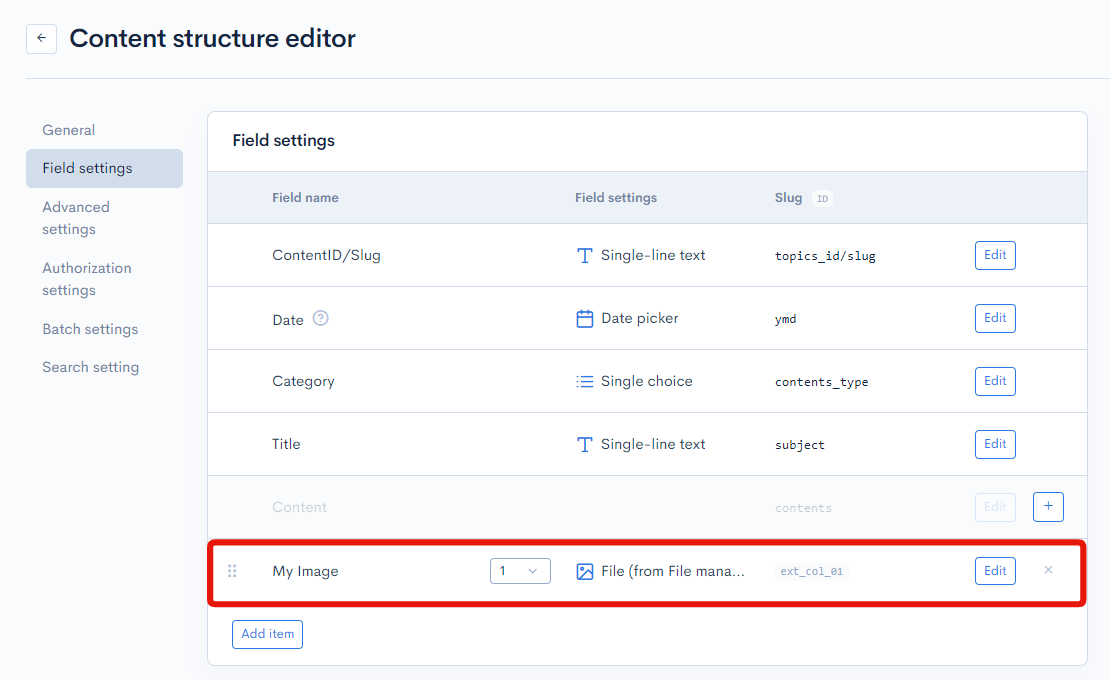
Once configured, click "Add" to add content structure.
Add content
Create a new content and attach the file to the extension column you created in the previous step.
From the Contents List screen, click [Add].

Enter the following and click [Add].
| Item | Value |
|---|---|
| Title | My Image |
| My Image | File with credits and description added |
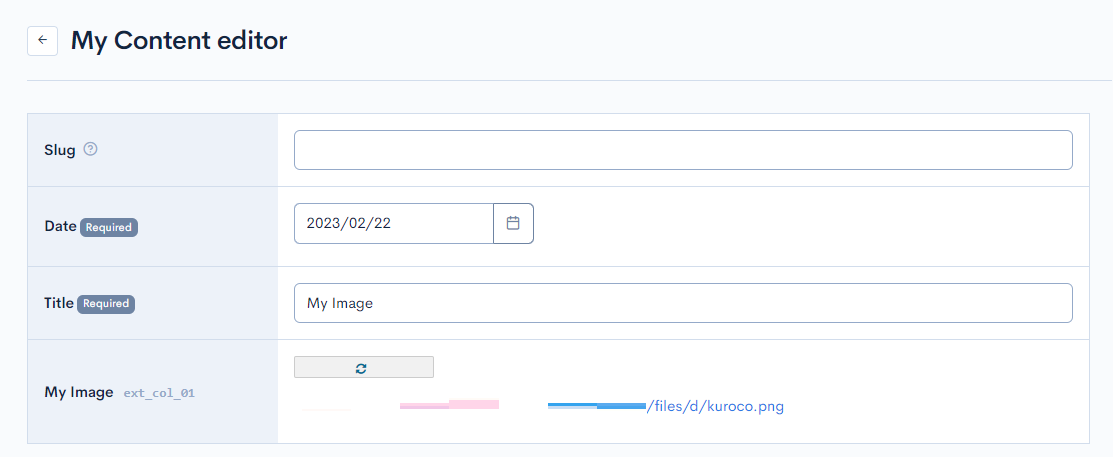
Create endpoint
Create an endpoint that fetches the content. This will allow you to retrieve the file and its associated metadata from the Content API.
From the API screen, click [Add new endpoint].

Create the following endpoint.
| Item | Value |
|---|---|
| Path | list |
| Category | Content |
| Model | Topics |
| Operation | list |
| topics_group_id | ID of content structure |
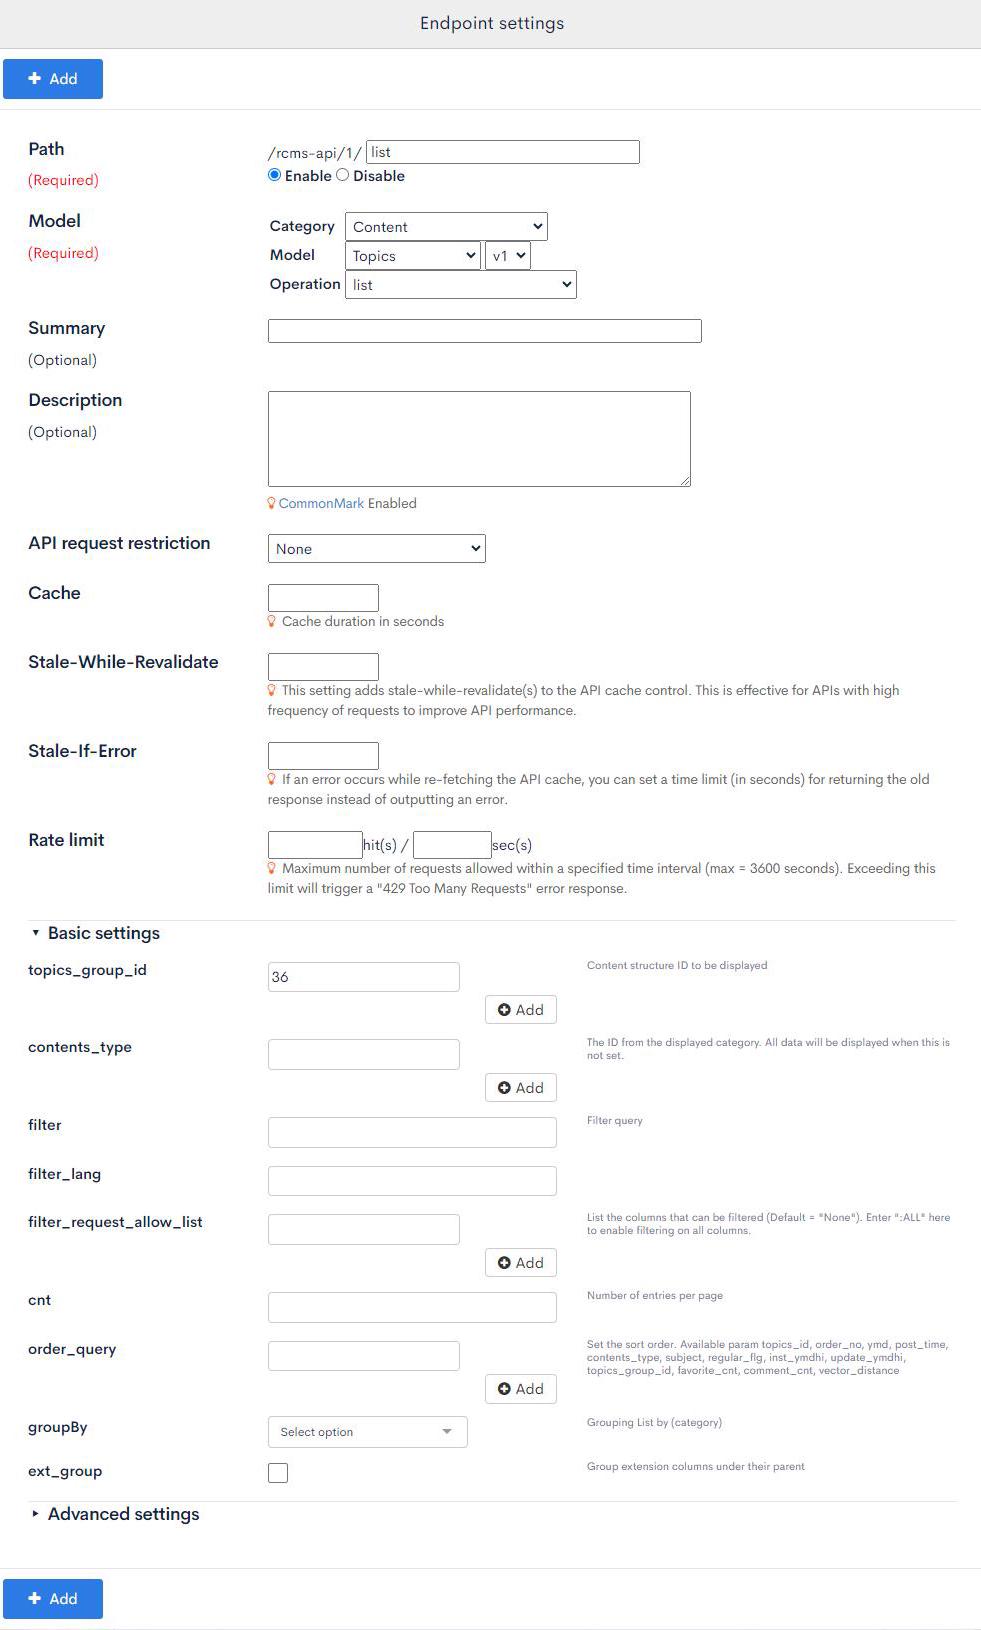
Once configured, click [Add] to add the endpoint.
Check the response in the Swagger UI
Click [Swagger UI] from the target API.

Click [Try it Out] on the Topics::list endpoint

Click [Execute].

You should receive an API response that includes the credit and description metadata for the file.
Support
If you have any other questions, please contact us or check out Our Slack Community.