Content
On the content list screen, you can access, add to, and update the list of content you have created.
Content list
Accessing the screen
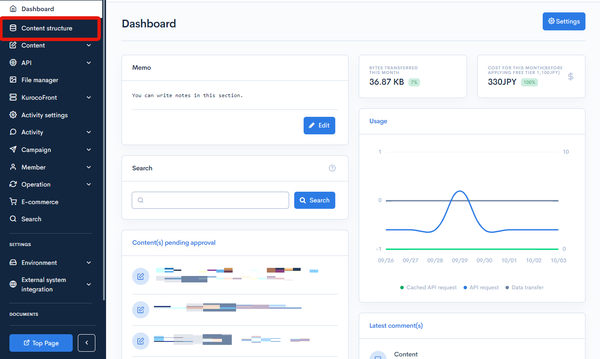
Click [Content structure] in the left sidebar menu.
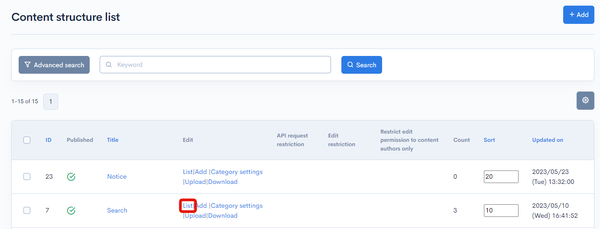
On the content structure screen, under the edit column, click [List] for the group you want to look at.
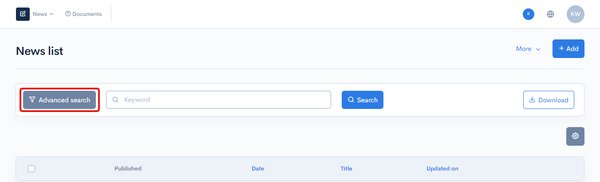
Advanced search
Click on the [Advanced search] button to open the advanced search panel.
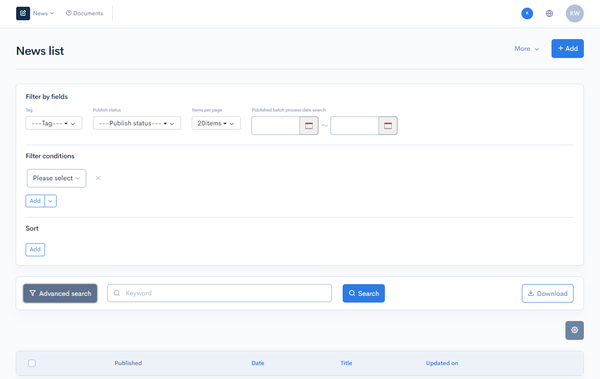
You can set up the filter conditions and sorting criteria.
Display field settings
Click on the gear symbol in the top right-hand corner of the contents list to open the display field settings dialog.
You can set the fields to be displayed in the contents list.
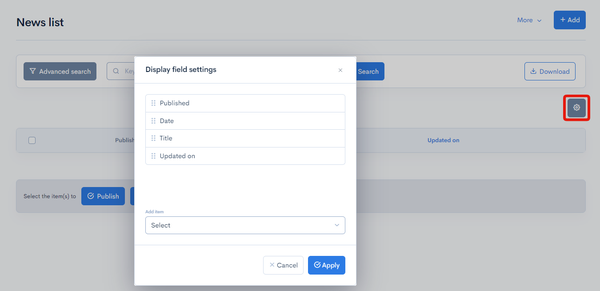
| Field | Description |
|---|---|
| Display field | Drop and drop the fields to rearrange the sort order. |
| Select | Select and add from a list of fields to be displayed in the content list. |
| Cancel | Cancel any changes made to the settings. |
| Apply | Apply the configured settings. |
Field settings
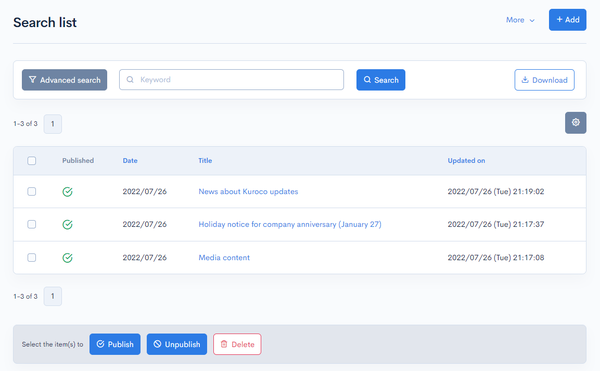
| Field | Description |
|---|---|
| Search | You can search the content in this list by applying different filters. |
| Download | Downloads the content data. |
| Display fields settings (gear icon) | You can configure the fields to be displayed in the content list. |
| Published | Publishing status of the topic list. : Published : Published : Restricted : Restricted : Unpublished : Unpublished |
| Date | The date that has been set for the topic. |
| Title | Title of the topic. |
| Update on | Date and time of the latest update of the topic. |
Batch actions
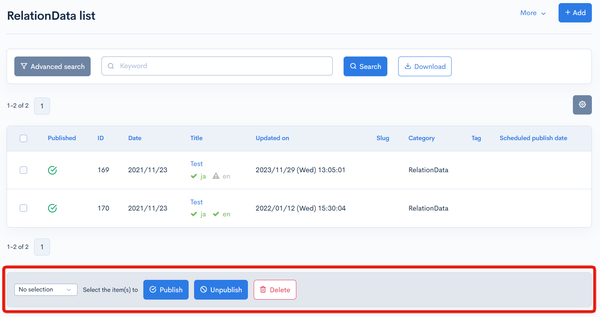
You can perform the following batch actions by selecting multiple topic groups using the checkboxes in the left-most column.
When the approval workflow is selected, a bulk request will be submitted to update the statuses.
| Field | Description |
|---|---|
| Publish | Publishes the selected entries. |
| Unpublish | Retracts any previously published entries selected. |
| Delete | Deletes the selected entries. |
Saved drafts

When there are drafts of content, "Saved draft" is displayed at the top of the content list. Click [Display] to show the list of drafts.
The list shows drafts of content that has never been published, limited to those you have permission to view.
| Field | Description |
|---|---|
| Checkbox | Select the drafts to delete. Use the checkbox in the header row to select/deselect all drafts. |
| Title | Title of the draft. Click it to open the draft in the content editor. |
| Updated on | Date and time the draft was saved. |
| Updated by | Name of the member who saved the draft. |
| Update comment | Update comment entered when the draft was saved. |
| DeleteRelease version: βversion | Deletes all checked drafts at once. It cannot be clicked while no draft is selected. Clicking it displays a confirmation dialog; click [OK] to delete. |
- Only the drafts are deleted. If the content that a draft is based on exists, that content is not deleted.
- As when deleting drafts one by one, the Before deleting content saved as draft and After deleting content saved as draft triggers run for each draft, and files attached to the drafts are also deleted.
Changelog
Click the [More] in the upper right corner of the Content list screen, then click [Changelog] to see a list of the history of editing each content.
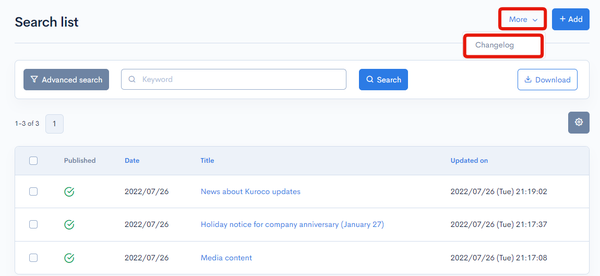
Changelog of the contents
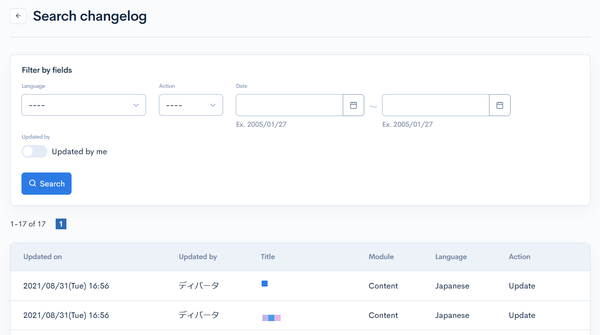
| Field | Description |
|---|---|
| Updated on | Displays the date and time the content was updated. |
| Updated by | Displays the name of the member who updated the content. |
| Title | Displays the comment title. |
| Module | Displays the module name of the content. |
| Language | Displays the comment language. |
| Action | Displays the type of processing performed. There are six types of statuses as follows
|
Content editor
Accessing the screen
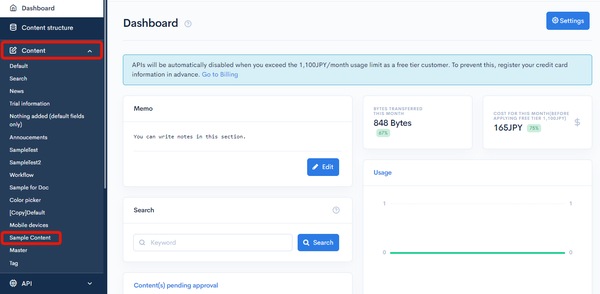
In the left sidebar menu, click [Content] and select the title of the topic group you want to look at.
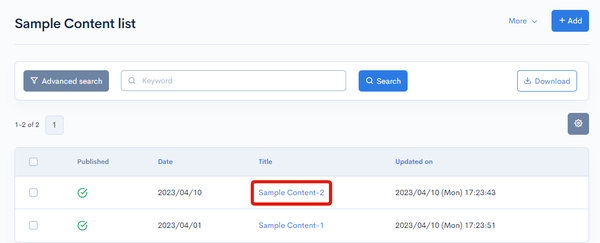
On the topic list screen, click the title of the topic you want to edit.
Field settings
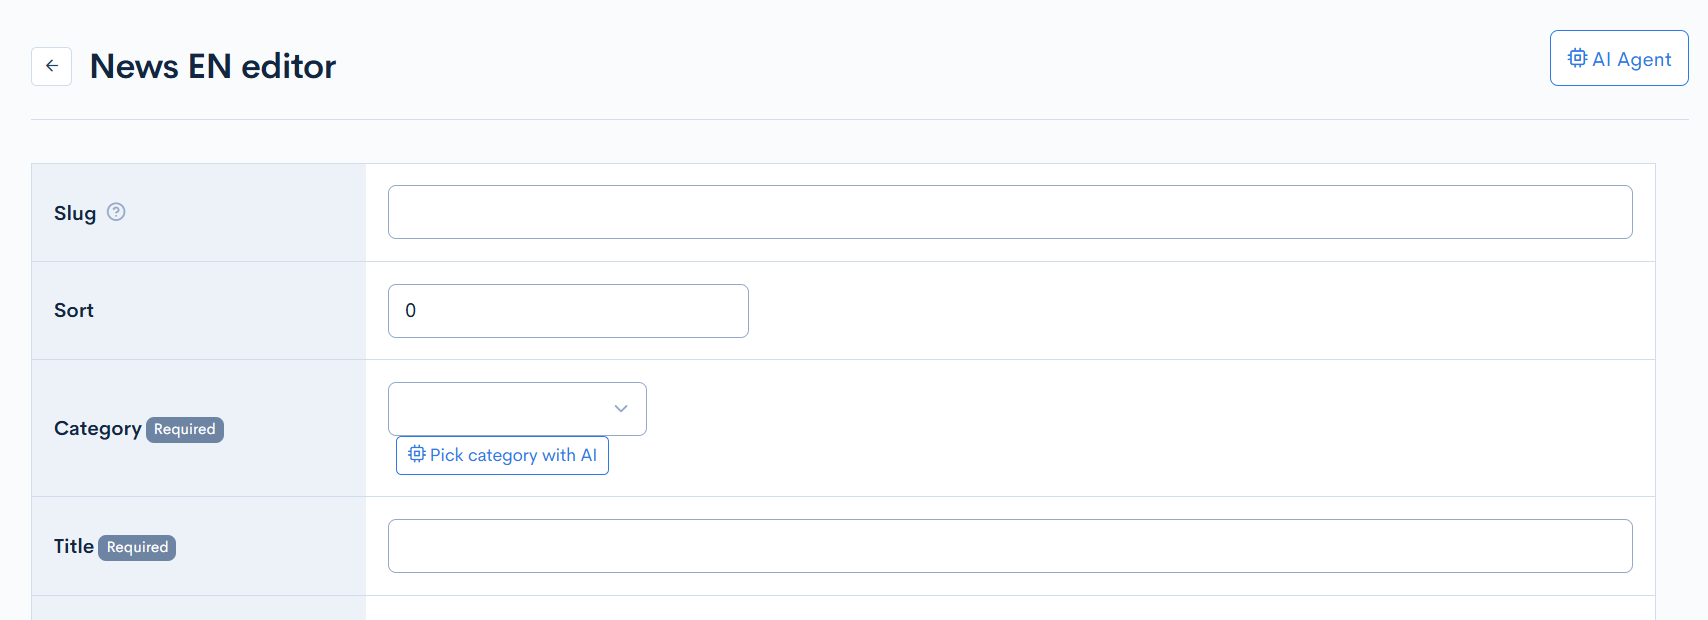
| Field | Description |
|---|---|
| Slug | Slug of the topic. The field name (ID:) displays the content ID that was automatically assigned when the content was newly created. The following characters can be used for Slugs:
|
| Date | Date and timestamp for the topic. |
| Category | Category of the topic. This field is not displayed if there is only one selectable category. Clicking [Pick category with AI] next to the category field lets AI pick the category that best matches the title, content, and text-type extension fields you have entered, and sets it in the category field.
|
| Title | Title of the topic. |
The contents of extension fields configured in the content structure editor are also displayed here.
If you have the permission to create a new API, the field name (the value of default "ext_x" or the Slug if it is set) will be displayed next to the additional extension fields that you have configured.

[Pick category with AI] and [Pick tags with AI] are displayed when [AI] in [AI] -> [Vector Data] is enabled (see Vector Data) and you are editing the content in the primary language. Both buttons only fill in the form, so review the values and click [Update] ([Add] when creating new content) to save.
Copying Content
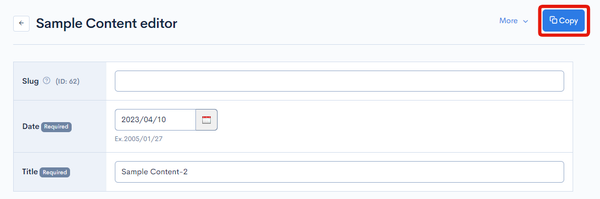
Click [Copy] in the upper right corner of the content editing screen to copy content and create new content.
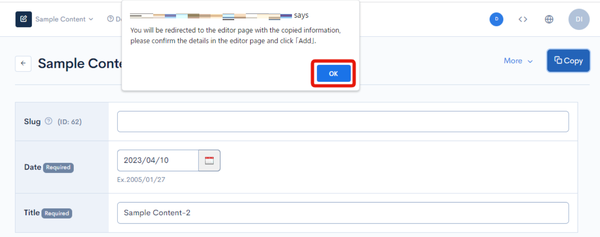
Click the [OK] button on the displayed message.
The editing screen for the newly copied content will open.
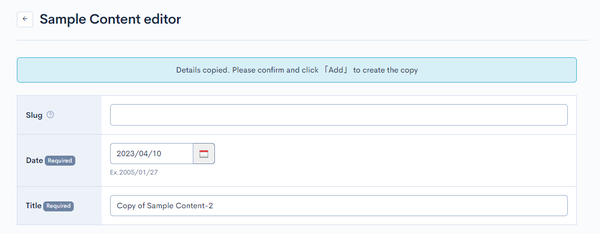
Click [Add] to save the content after editing the copied content.

Advanced settings
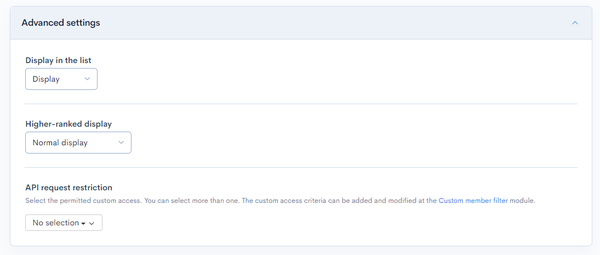
| Field | Description |
|---|---|
| Display in the list | Option to display this topic on the topic list screen. |
| Higher-ranked display | Option to display this topic as a higher-ranked item on the topic list screen. |
| API request restriction | Sets access restrictions based on custom member filter. |
Tags
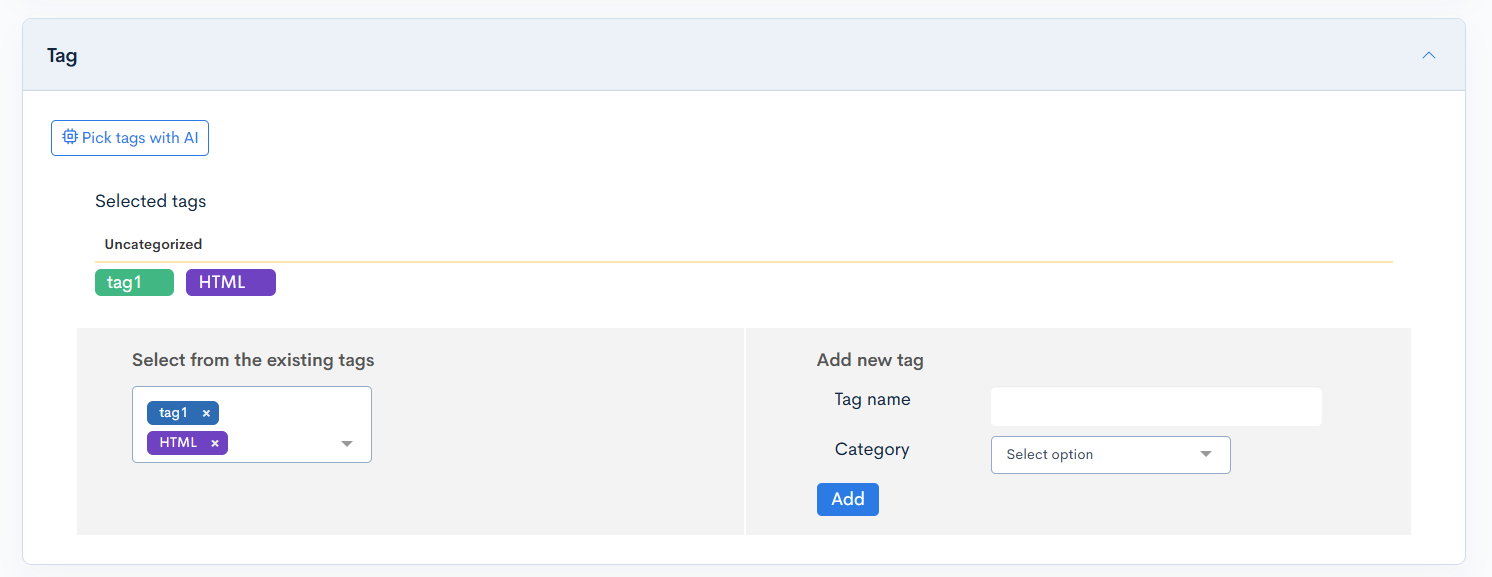
Configures the topic tags. Click on an existing tag to link it to the current topic, or add a new one by clicking [Add new tag].
Clicking [Pick tags with AI] adds up to 10 tags that match the content you have entered, from the tags that can be set for the content definition. Tags that are already selected remain selected. Tags added by AI are shown in purple, and "Tag added by AI" appears when you hover over them. Removing the tag clears the purple display. The purple display is only a visual distinction and does not affect the saved data.
Linkage settings on publication
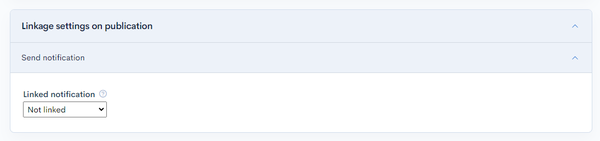
| Field | Description |
|---|---|
| Linked notification | Option to deliver e-mail notifications with the current topic. If you have linked notifications enabled, adding/updating content will redirect you to the notification editor screen . |
Publish settings
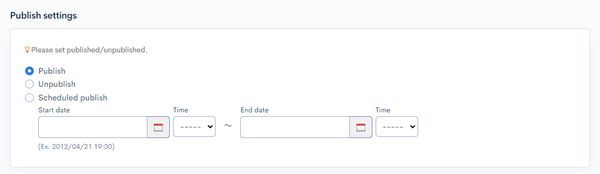
| Item | Description |
|---|---|
| Publish | Publishes the current content. |
| Unpublish | Retracts the current content. |
| Scheduled publishing | Specifies the start and end dates/times for publishing the current content. |
GitHub

| Field | Description |
|---|---|
| Workflow | Configures actions performed on the linked GitHub repository.
|
Approval workflow settings
It is displayed when specified as content to be approved in the approval workflow.
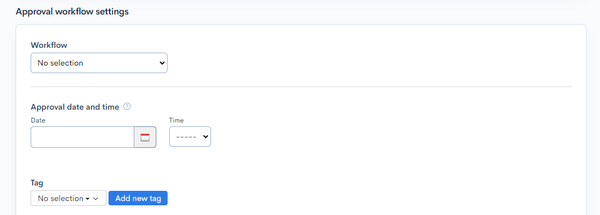
| Field | Description |
|---|---|
| Workflow | Select an approval workflow. |
| Approval date and time | Set the date and time when the approval will take effect. |
| Tag | Select tags. You can add using the [Add new tag] button, or add or delete on the Approval workflow tag List screen. |
Other actions
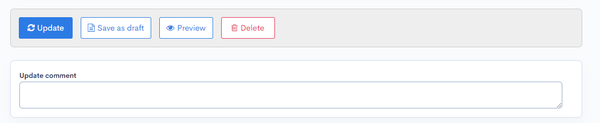
| Field | Description |
|---|---|
| Update | Applies any changes made in this editor. |
| Save draft | Saves any changes made in this editor. |
| Preview | Opens up the preview page. (See: Building a preview page with Kuroco and Nuxt.js on how to configure previews.) |
| Delete | Deletes the current content. |
| Update comment | Comment field for any changes made to the content. |
Changelog
Click the [More] in the upper right corner of the Content Edit screen, then click [Changelog] to see a list of the history of editing each content.
Changelog of the contents
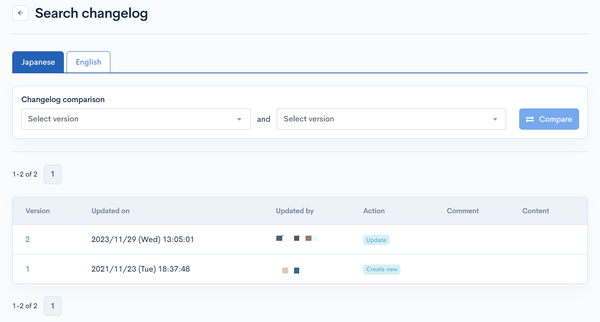
A list of update histories will be displayed.
You can also select two different histories and click [Compare] to view the differences.
| Field | Description |
|---|---|
| Version | Displays the version. You can see the target version after clicking the version link. |
| Updated on | Displays the date and time the content was updated. |
| Updated by | Displays the name of the member who updated the content. |
| Action | Displays the type of processing performed. There are six types of statuses as follows
|
| Comment | Displays the comments at the time of update. |
| Content | Displays the updated contents. |
Related documents
- Changing the display of the content editor screen
- Scheduling updates for published contents
- Auto Executing Github Actions with update on Contents data
- How to use CKEditor Placeholder feature with API and Custom Function
- Implementing Custom Validation in Content Structure with Custom function
- Send automated notifications for new content using a custom function
- Prepare a keyword search string
- The WYSIWYG editor
- About the search function on the Kuroco Administration page
- Creating content page with Kuroco and Nuxt.js
- Splitting your contents list into multiple pages using Kuroco and Nuxt.js
- Integrating preview page with Kuroco and Nuxt.js
- How can I add all the information of the content selected in the relational data selection to the response?
- Can I change the time selection interval for the content publication date and time settings?
- How can I use custom templates?
- Can I modify the display of the content editor screen?
- Can I set my content publishing status to "Unpublish" by default?
Support
If you have any other questions, please contact us or check out Our Slack Community.