How to implement SAML based SSO using Auth0
This tutorial explains the steps to implement SSO with SAML authentication using Auth0.
It involves using Auth0 as IdP and Kuroco as SP for SAML authentication.
Prerequisites
This tutorial assumes that you have an account with Auth0.
Creating an App in Auth0
Logging in to Auth0
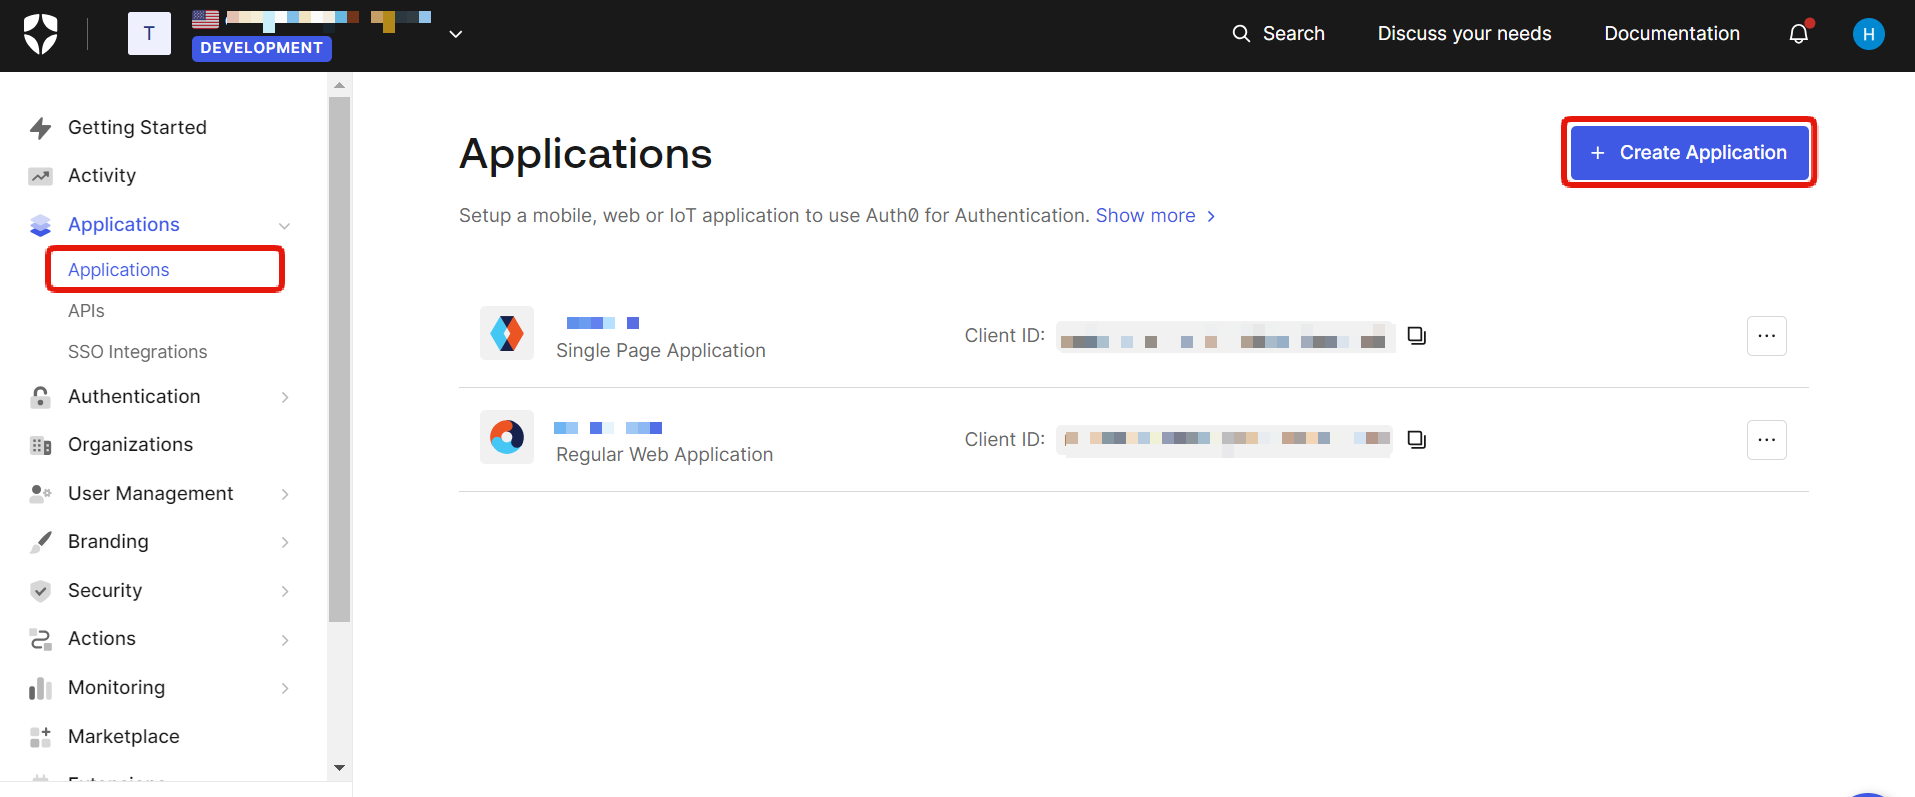
Log in to Auth0 here and click on the [Create Application] button at the top right of the screen under the [Applications] menu.
Creating an App
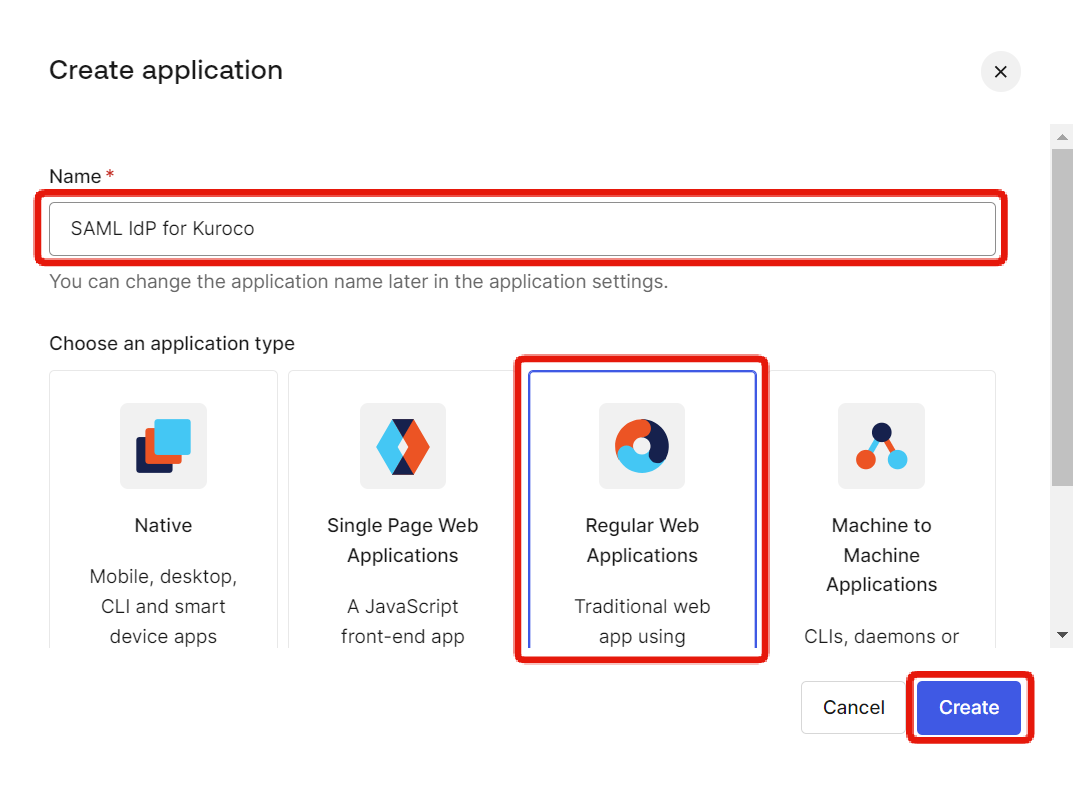
Enter a name of your choice, select "Regular Web Applications," and click [Create].
Getting Configuration Information
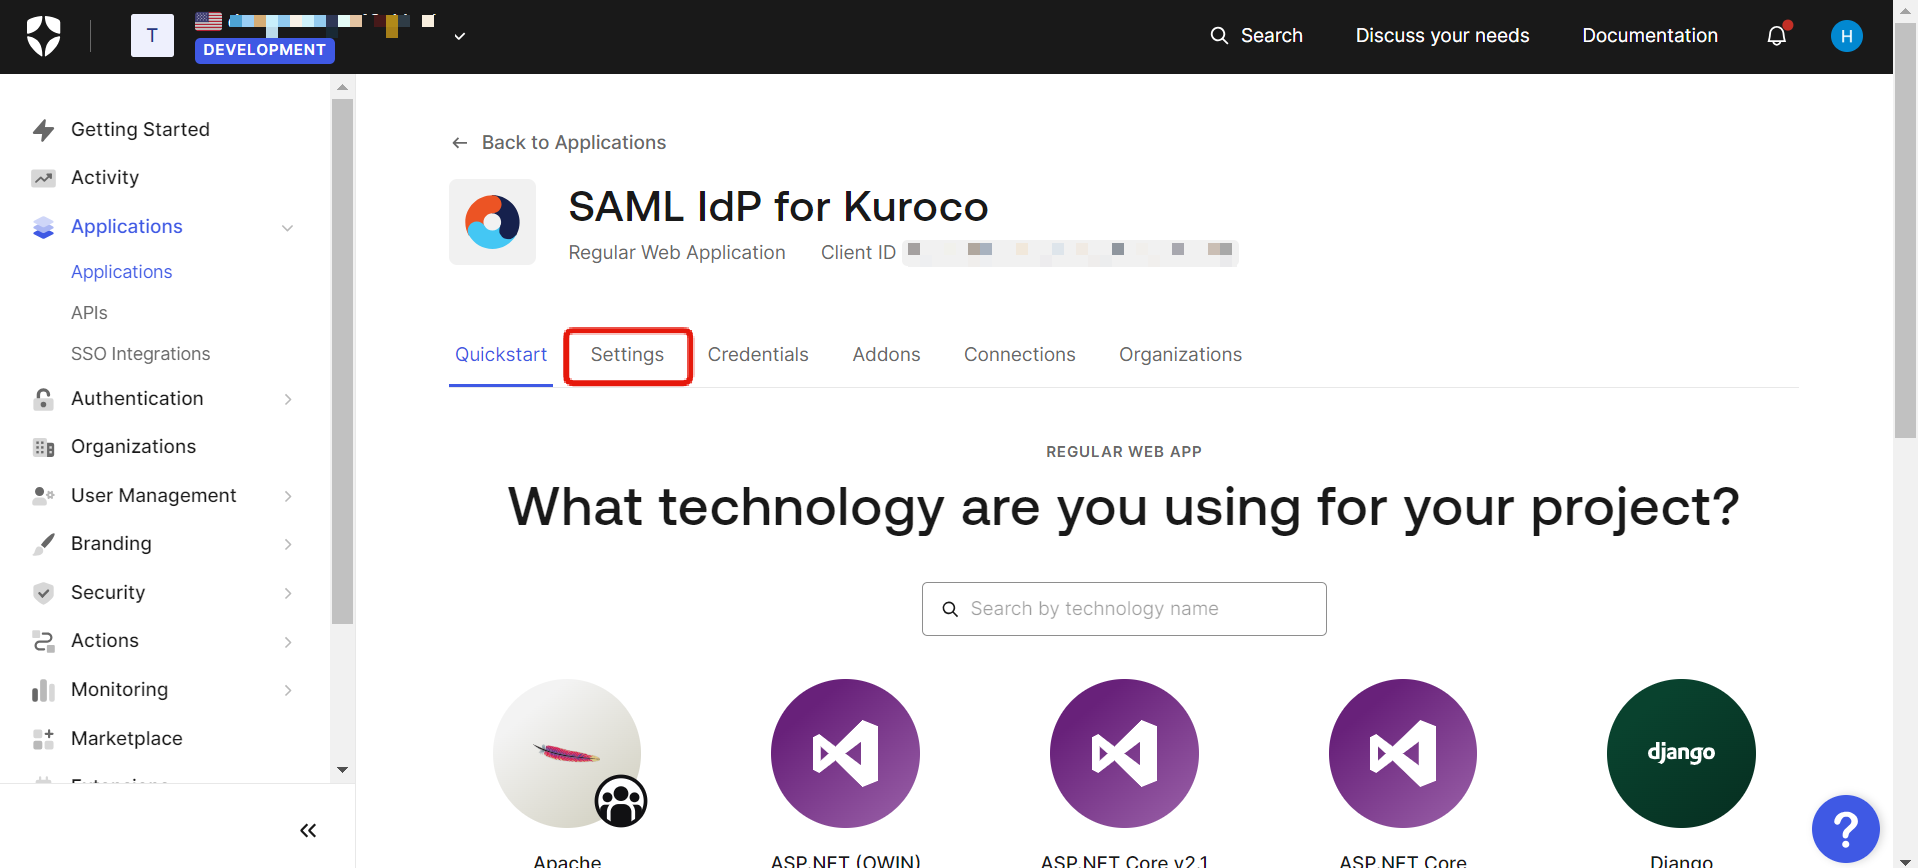
Once the app is created, navigate to the [Settings] tab.
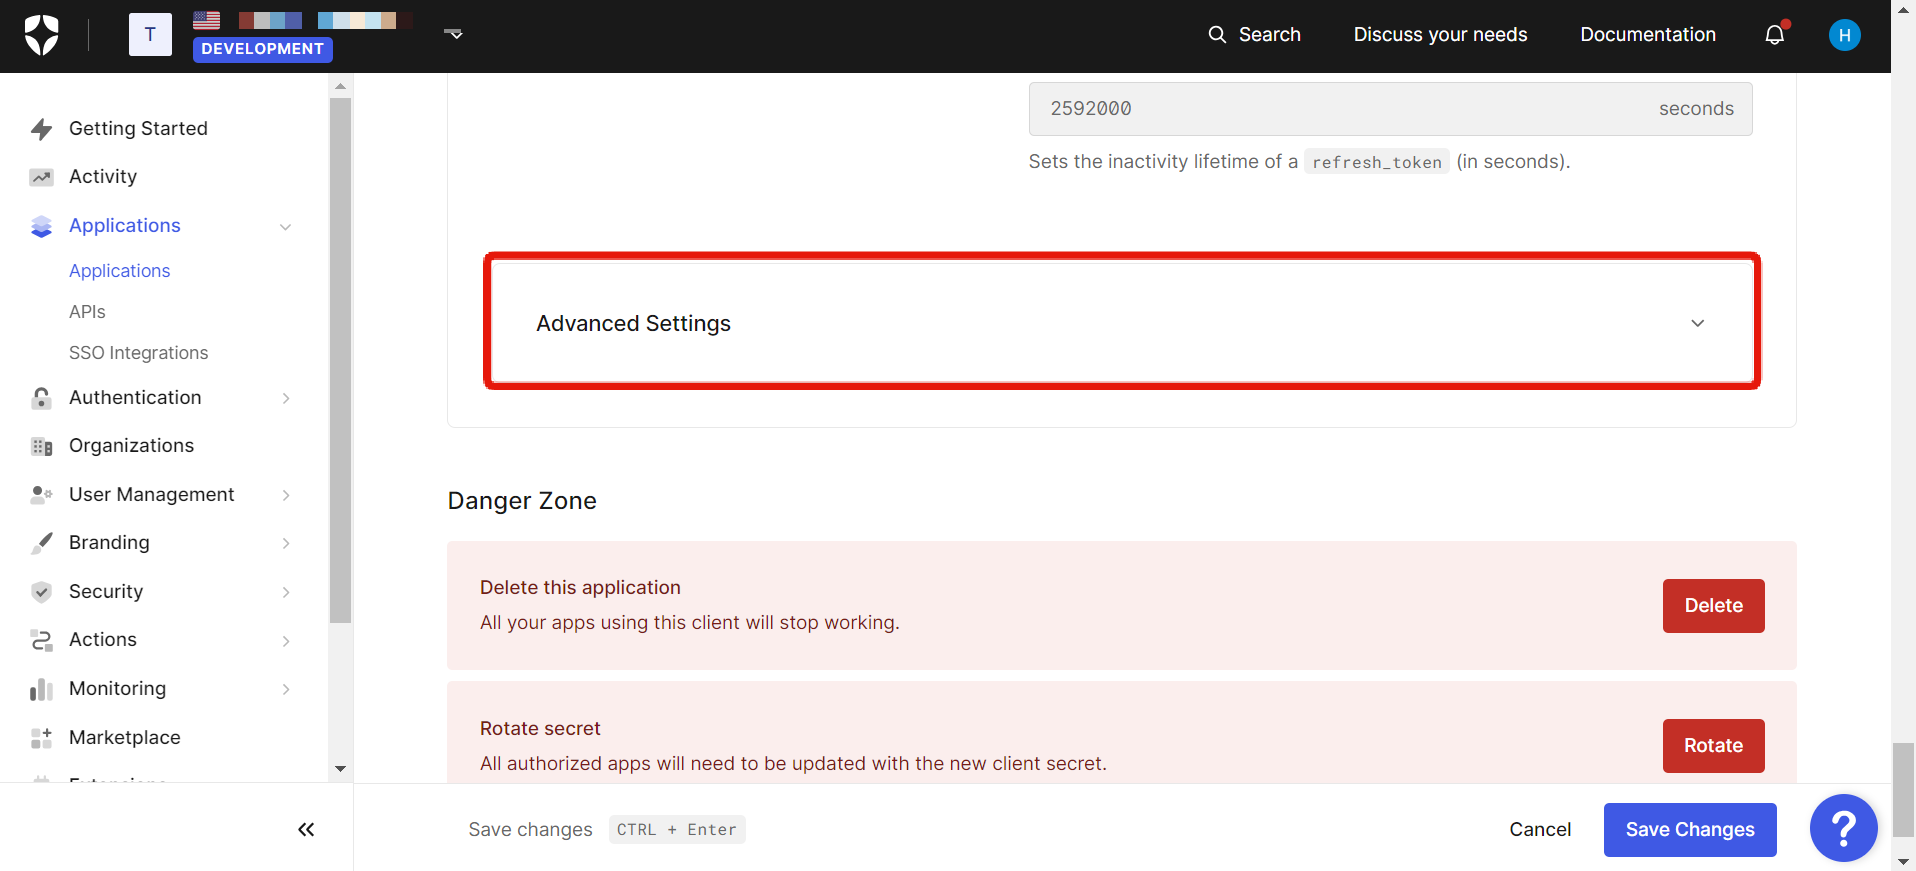
Scroll down to the bottom of the page and open [Advanced Settings].
Downloading the Certificate
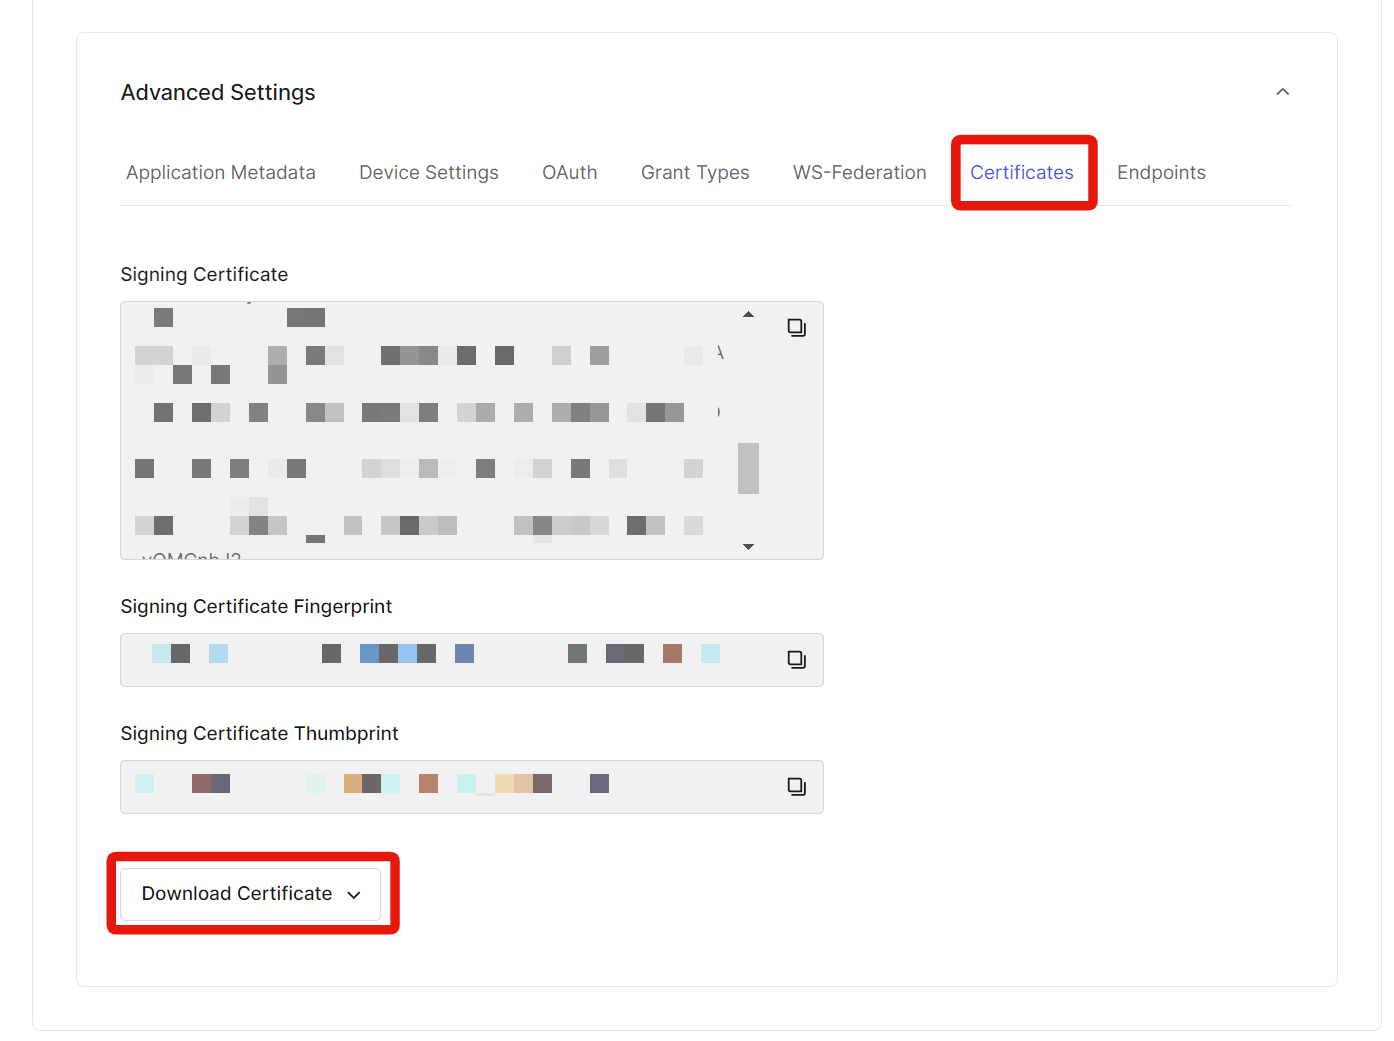
Open the [Certificates] tab, click [Download Certificate] to download the certificate.
Choose the PEM file format.
Getting the SAML Protocol URL
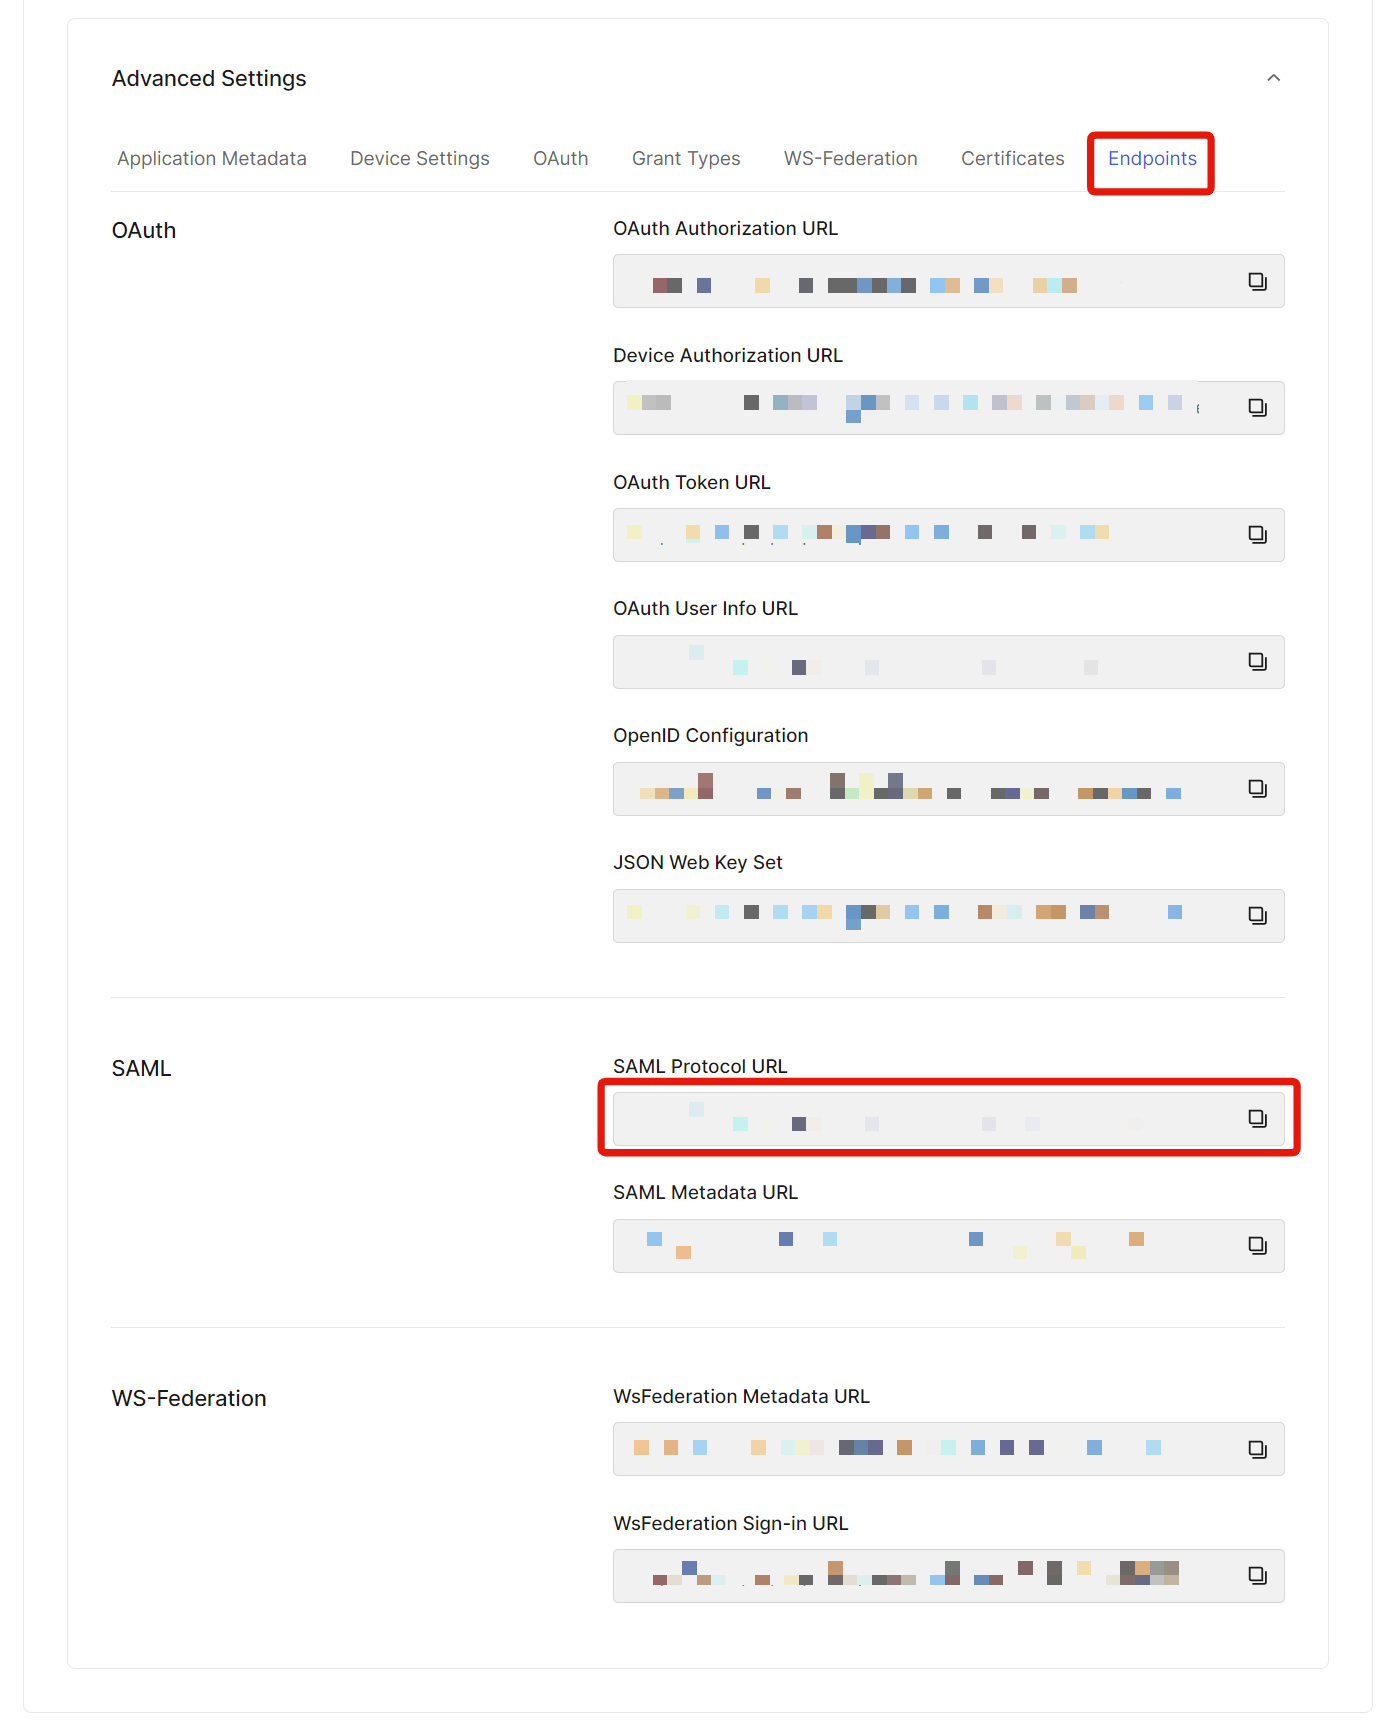
Open the [Endpoints] tab and copy the SAML Protocol URL under the SAML section.
Configuring Kuroco
Adding SAML SP
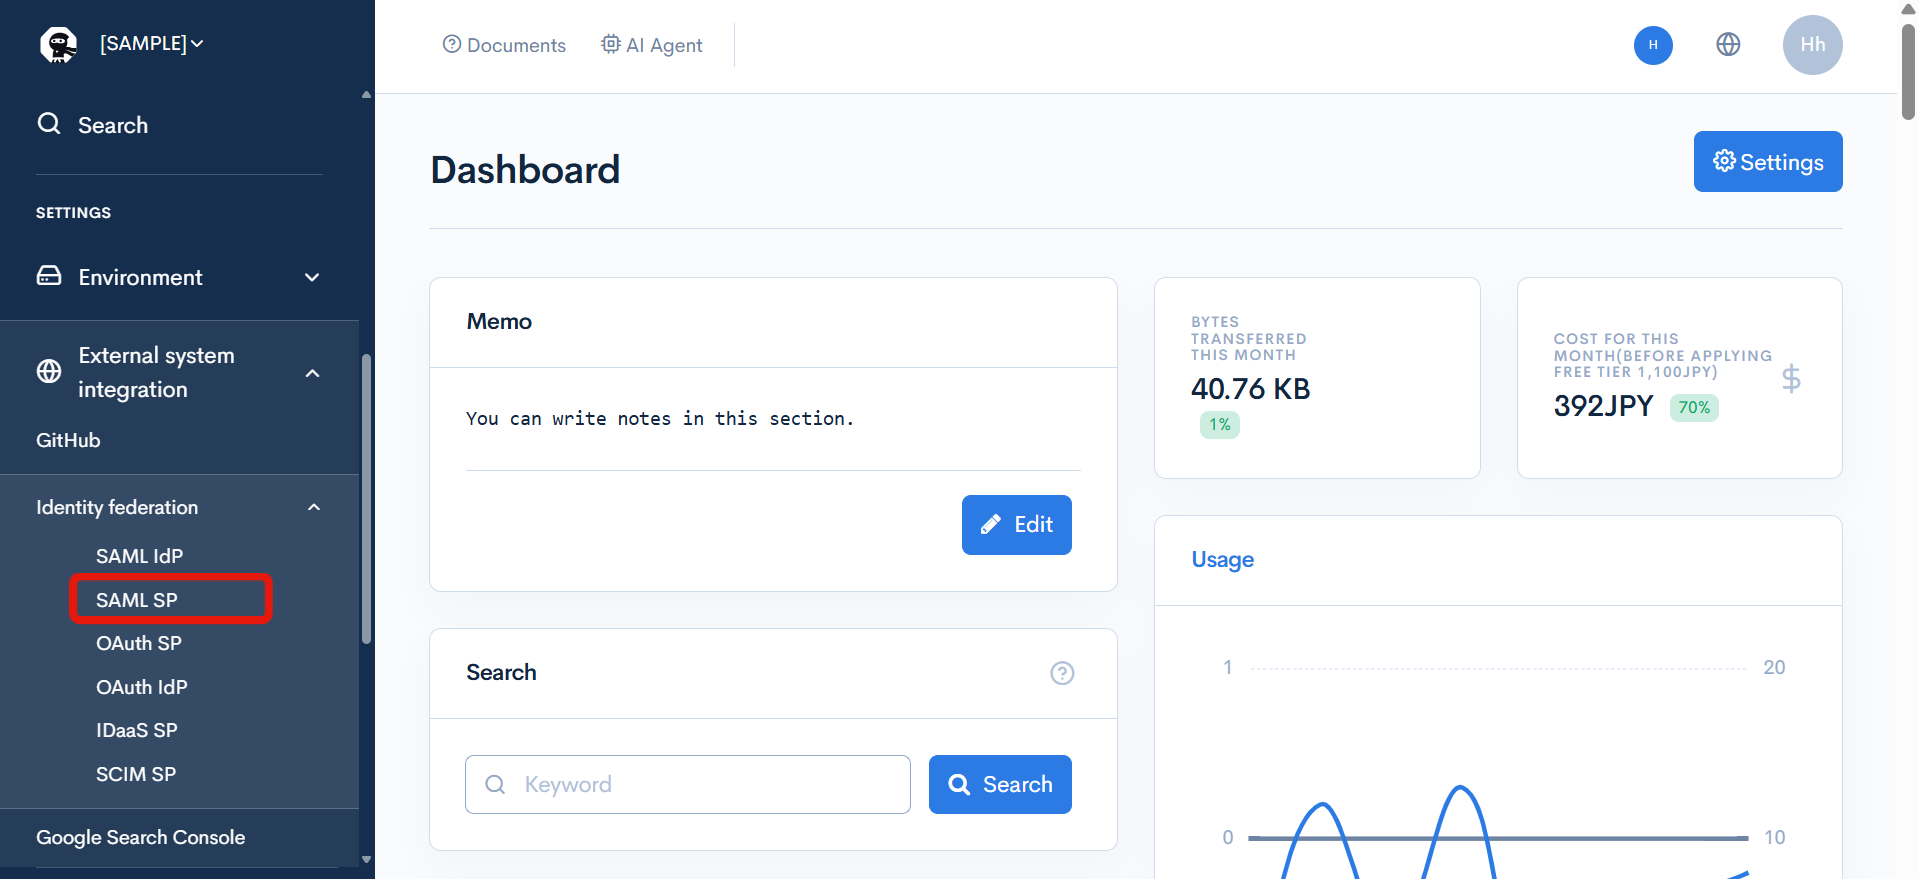
Click on [External System Integration] -> [Identity federation] -> [SAML SP] in the Kuroco admin panel.
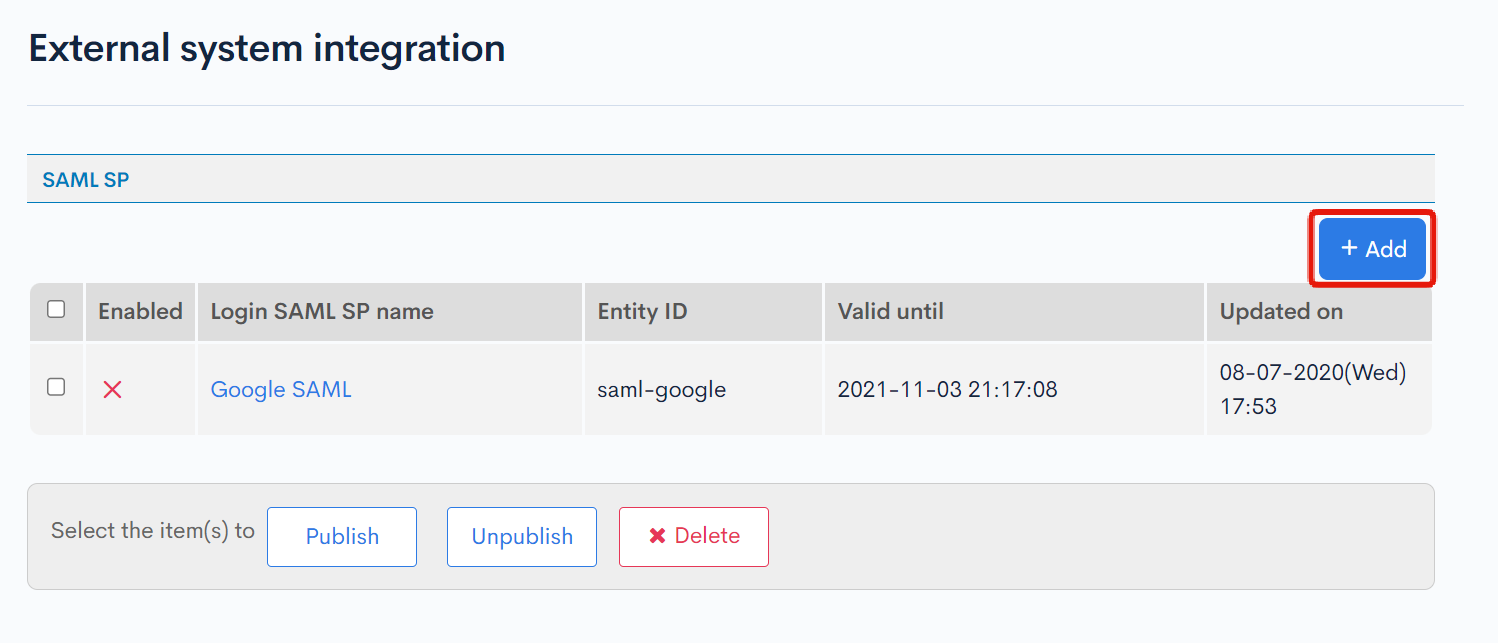
Click on [Add].
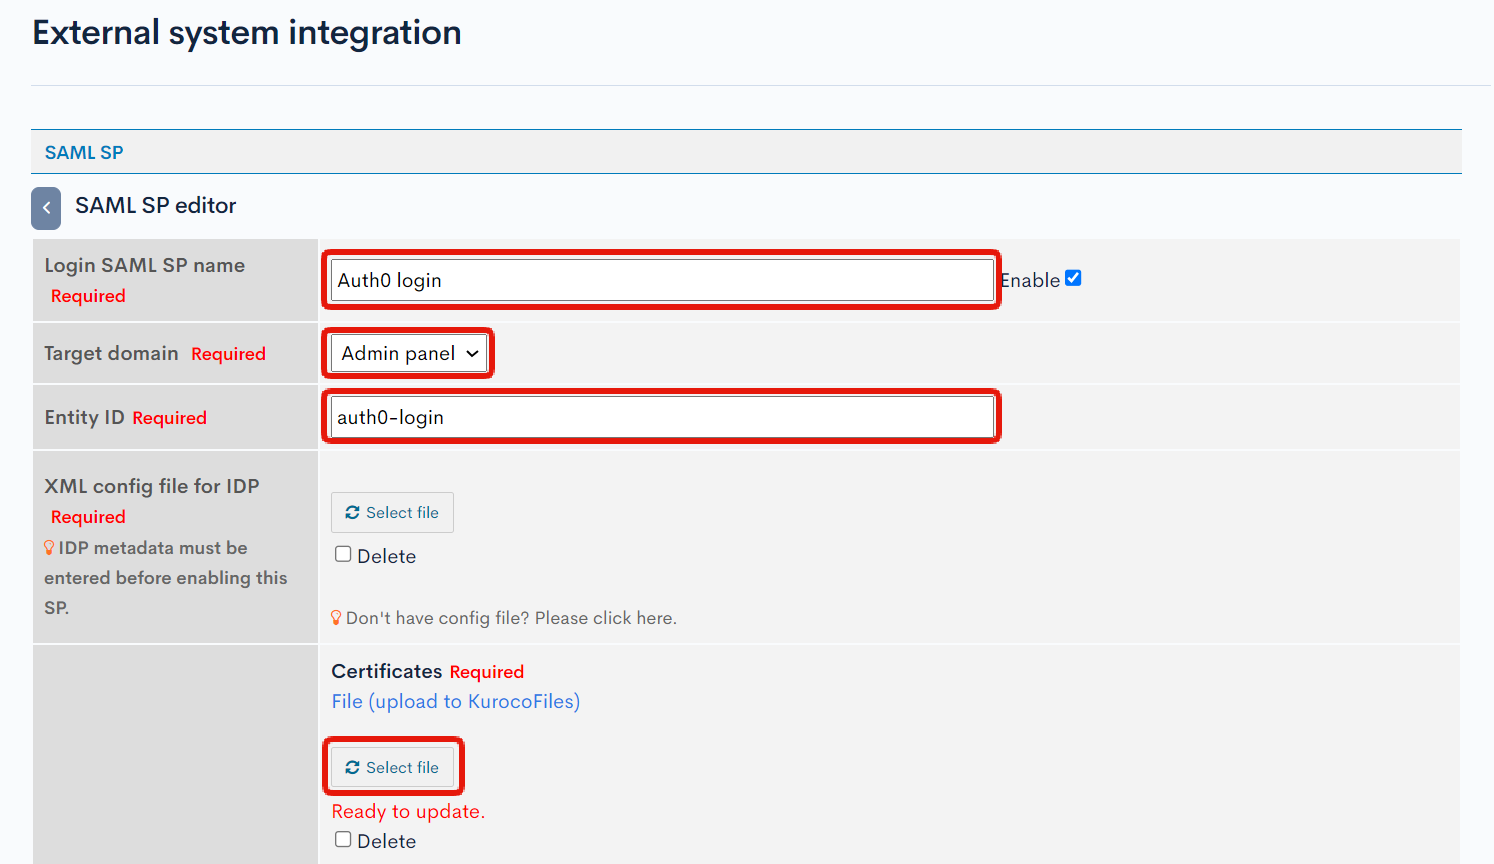
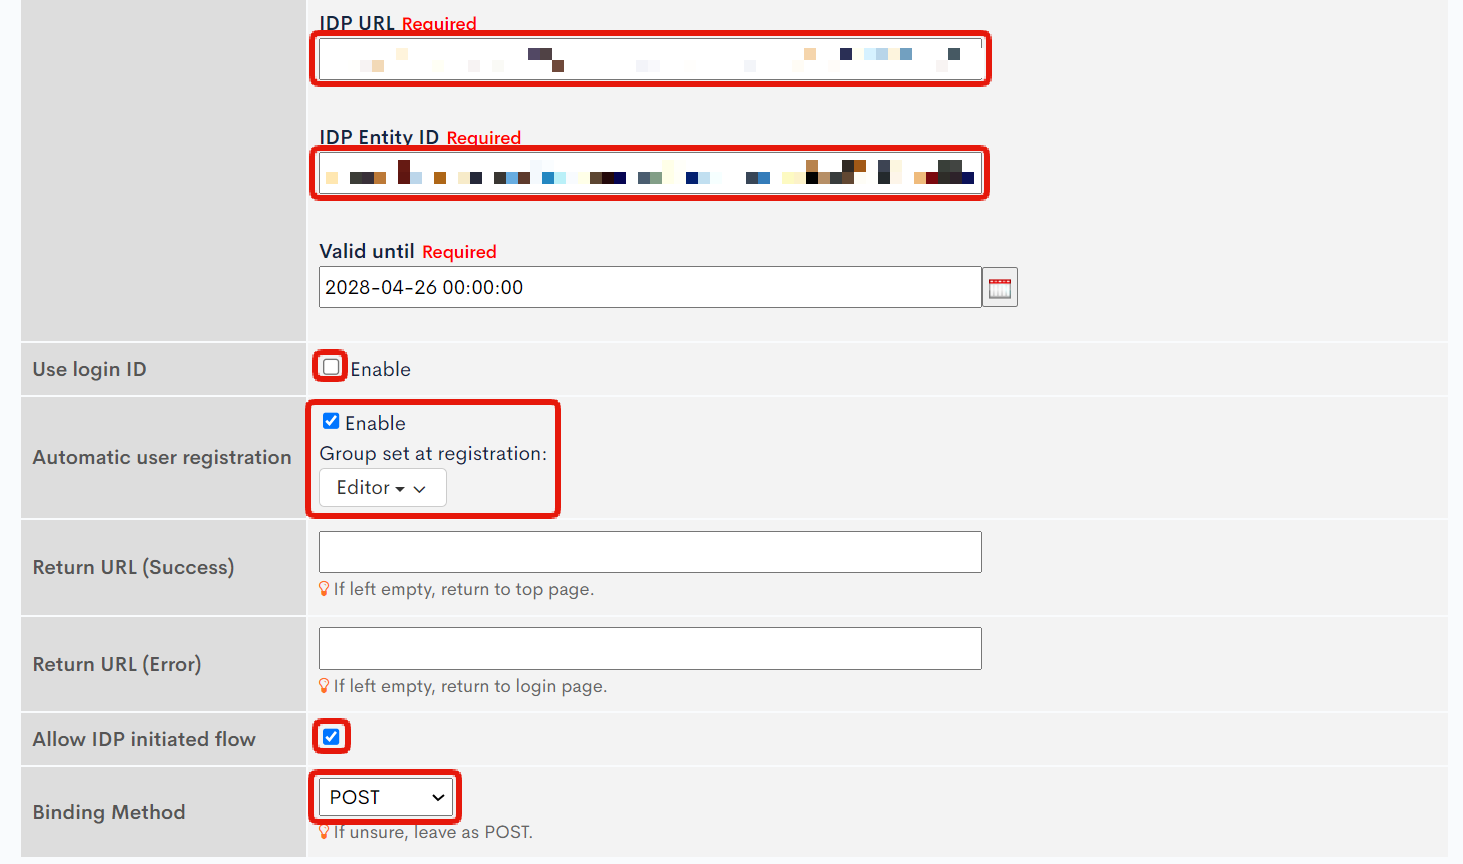
Configure the fields in the SAML SP editing screen as follows.
Click on [Do you have a configuration file? Click here to display] to show the certificate input field.
Field Descriptions
| Field | Description |
|---|---|
| Login SAML SP Name | Enter a name of your choice. |
| Target Domain | Select [Management Screen]. |
| Entity ID | Enter any string. |
| Certificate | Click on [Select File] and upload the certificate (.pem file) obtained from Auth0. |
| IDP URL | Enter the SAML Protocol URL obtained from Auth0. |
| IDP Entity ID | Enter the SAML Protocol URL obtained from Auth0 (same as IDP URL). |
| Expiration Date | Set any date and time. |
| Use Login ID | Turn off the checkbox. |
| Automatic User Registration | Turn on the checkbox and select any group. |
| Allow IDP-initiated Flow | Turn on the checkbox. |
| Binding Method | Select "POST". |
Checking the Login SAML SP ACS URI
Click on the previously added [Login SAML SP Name].
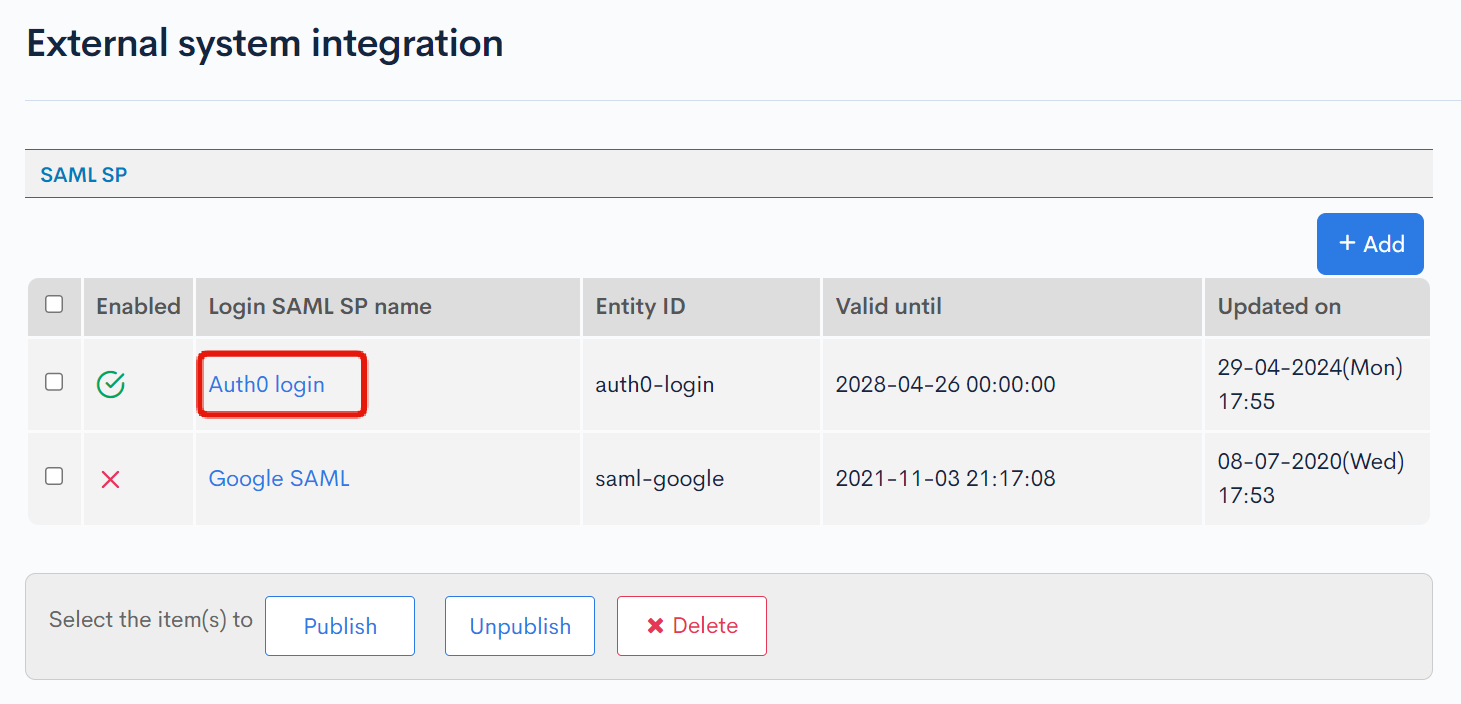
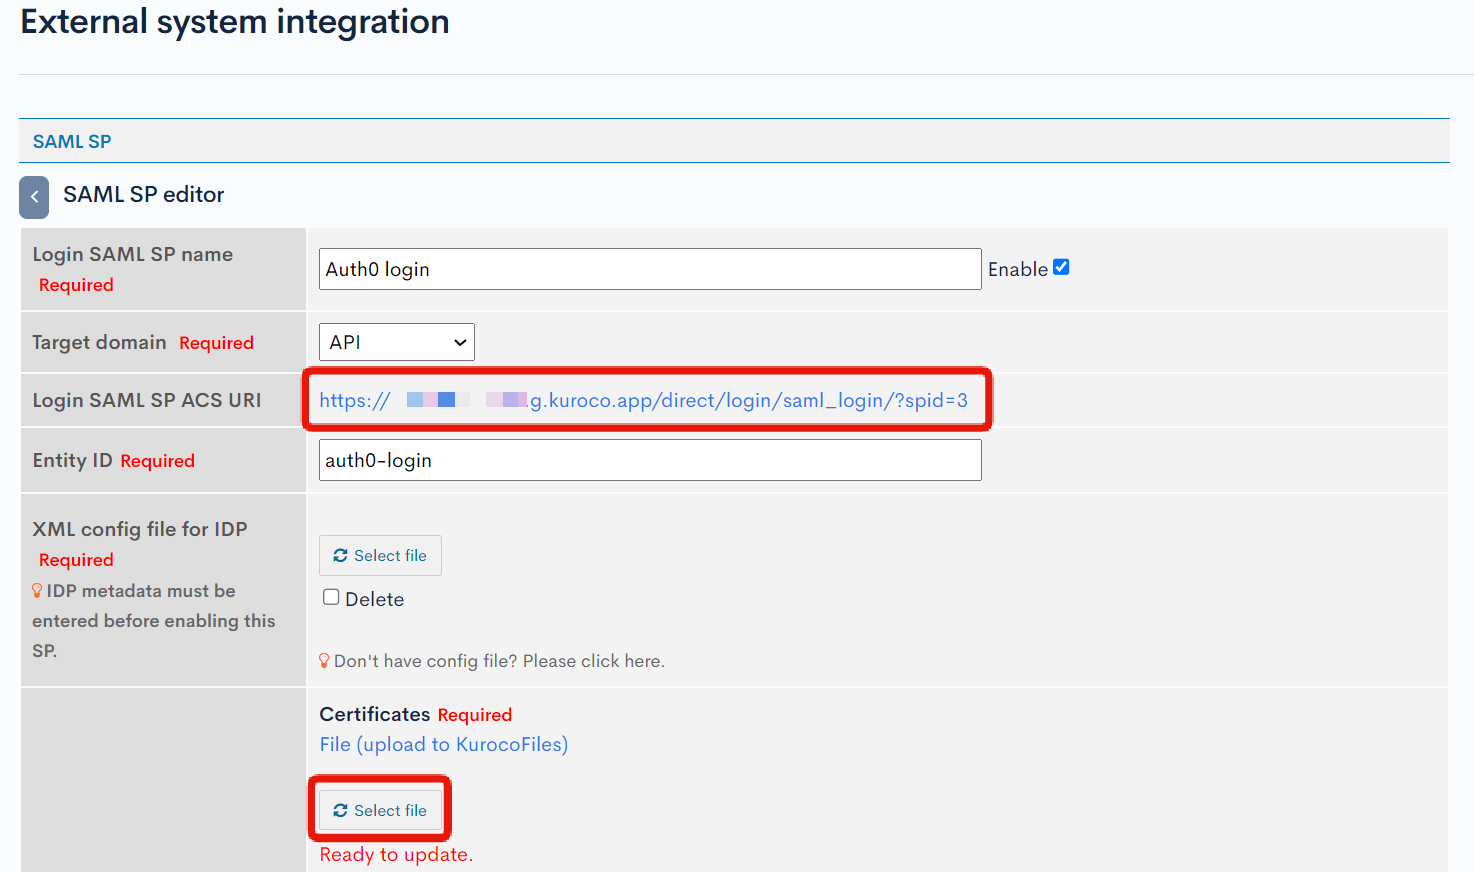
Copy the [Login SAML SP ACS URI] displayed.
Also, since the certificate file is missing, re-upload it for an update.
Enabling SAML2 WEB APP on Auth0
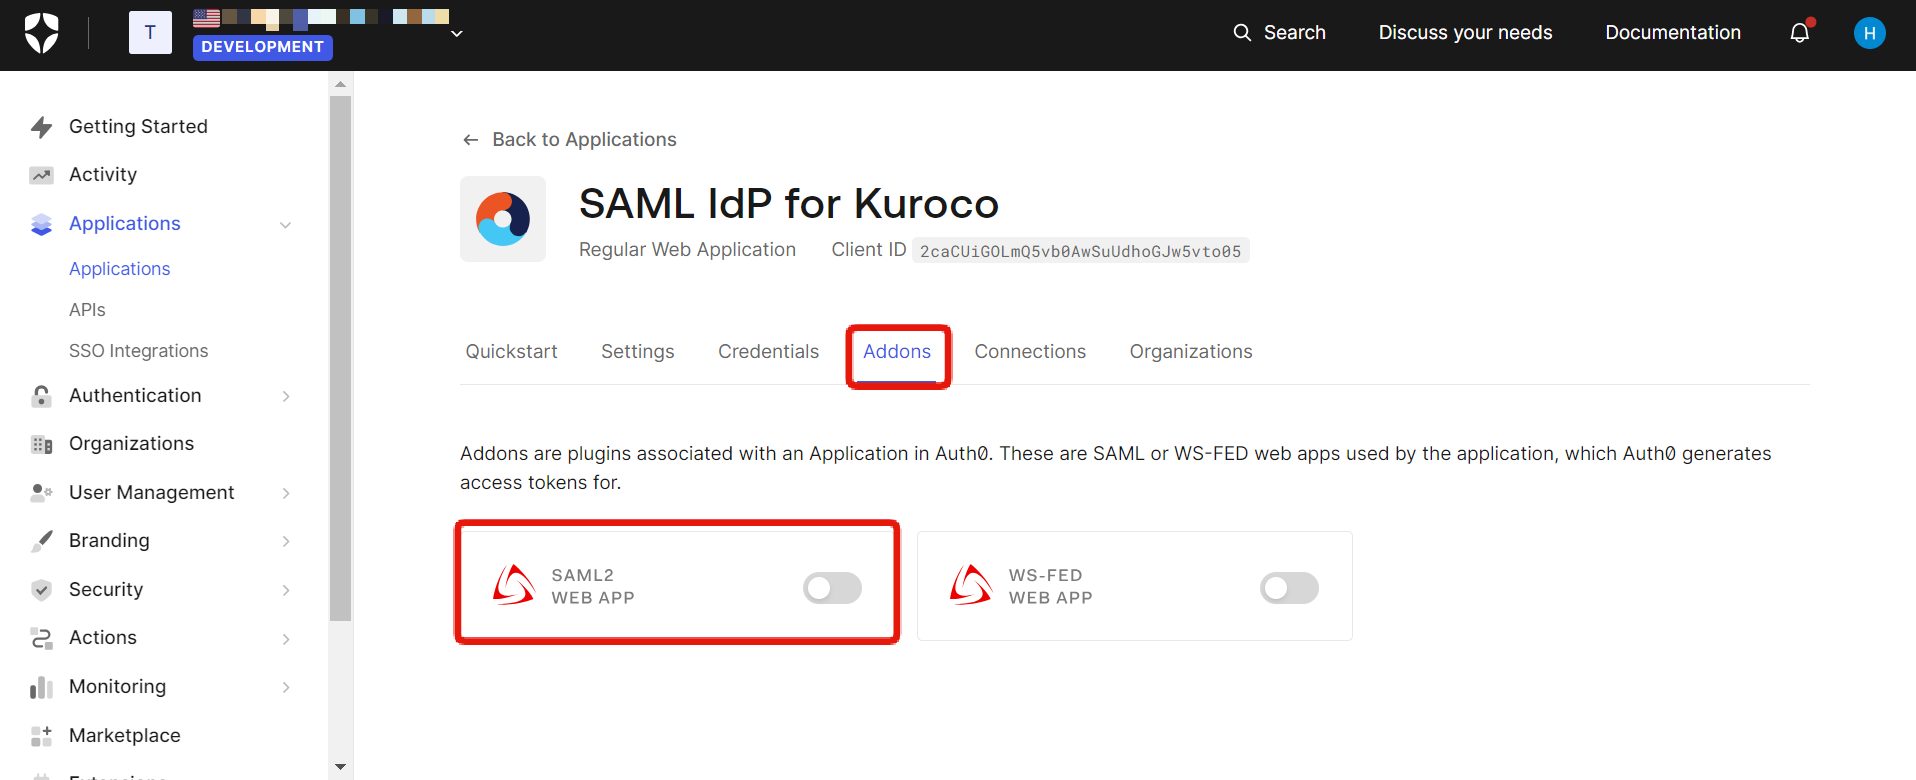
Go back to the App settings on Auth0 and click on the [SAML2 WEB APP] tab.
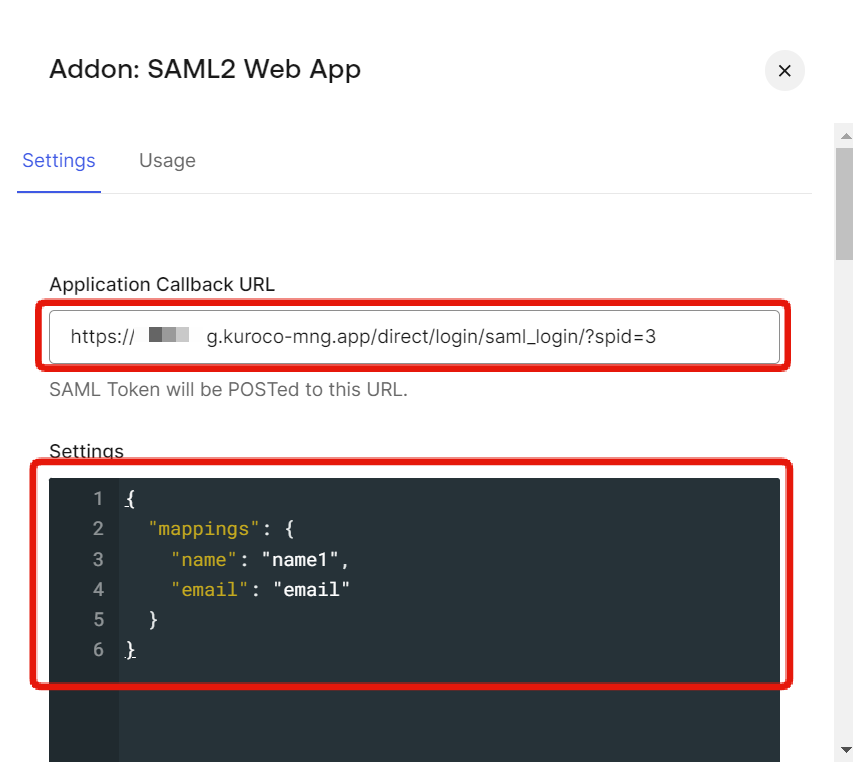
Once the Addon settings open, enter the Login SAML SP ACS URI that you confirmed on the Kuroco admin screen into the Application Callback URL, and enter the following JSON into Settings.
{
	"mappings": {
		"name": "name1",
		"email": "email"
	}
}
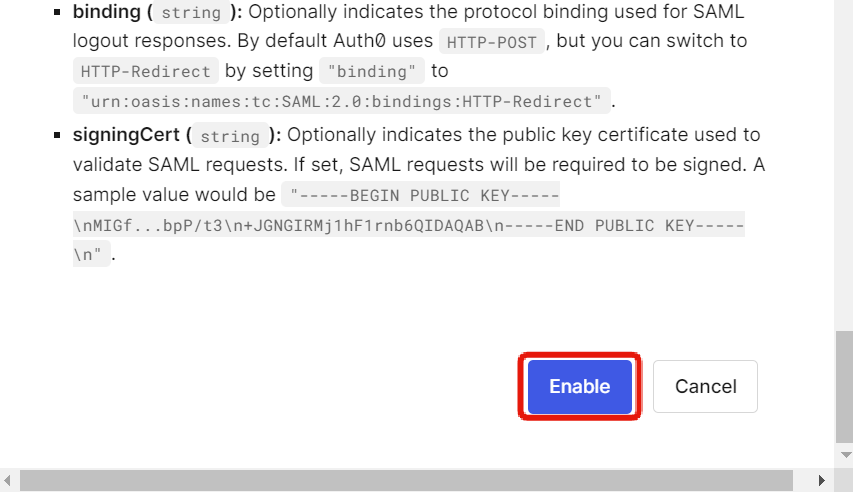
After configuring, scroll down to the bottom of the screen and click on [Enable].
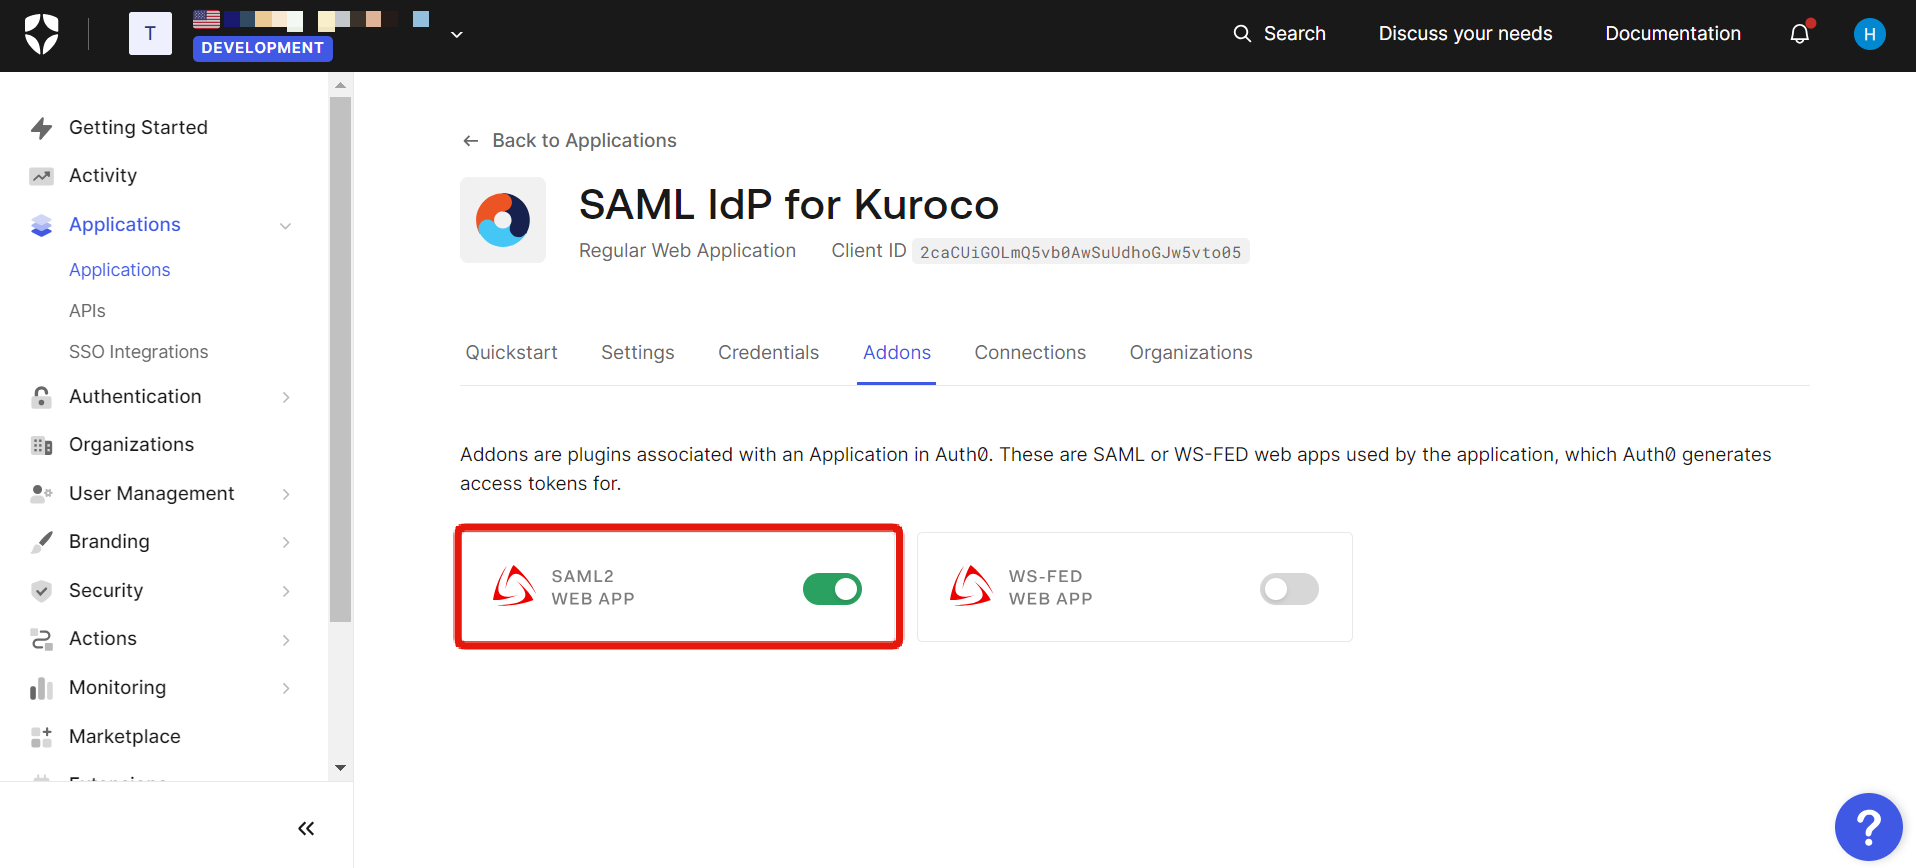
Once [SAML2 WEB APP] is enabled, the Auth0 configuration is complete.
Verifying the functionality
After the setup is complete, an SSO link will be displayed on Kuroco's login page.
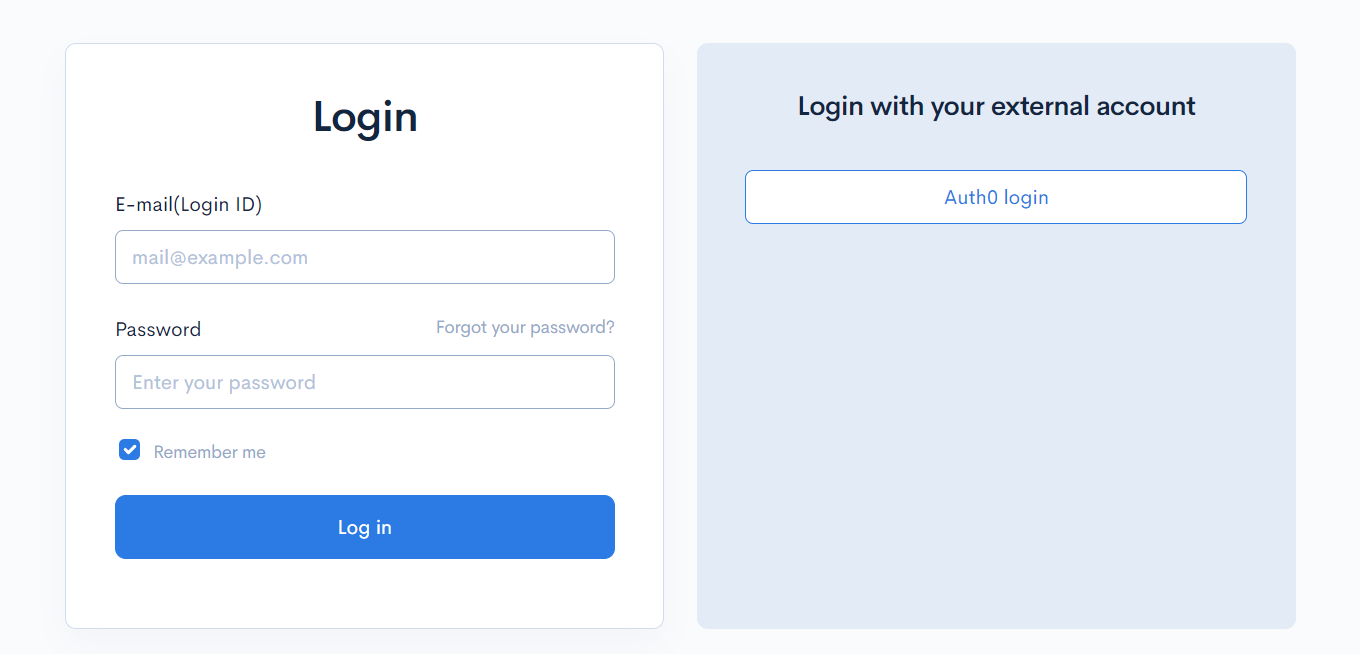
Clicking on the link will redirect you to the Auth0 login page.
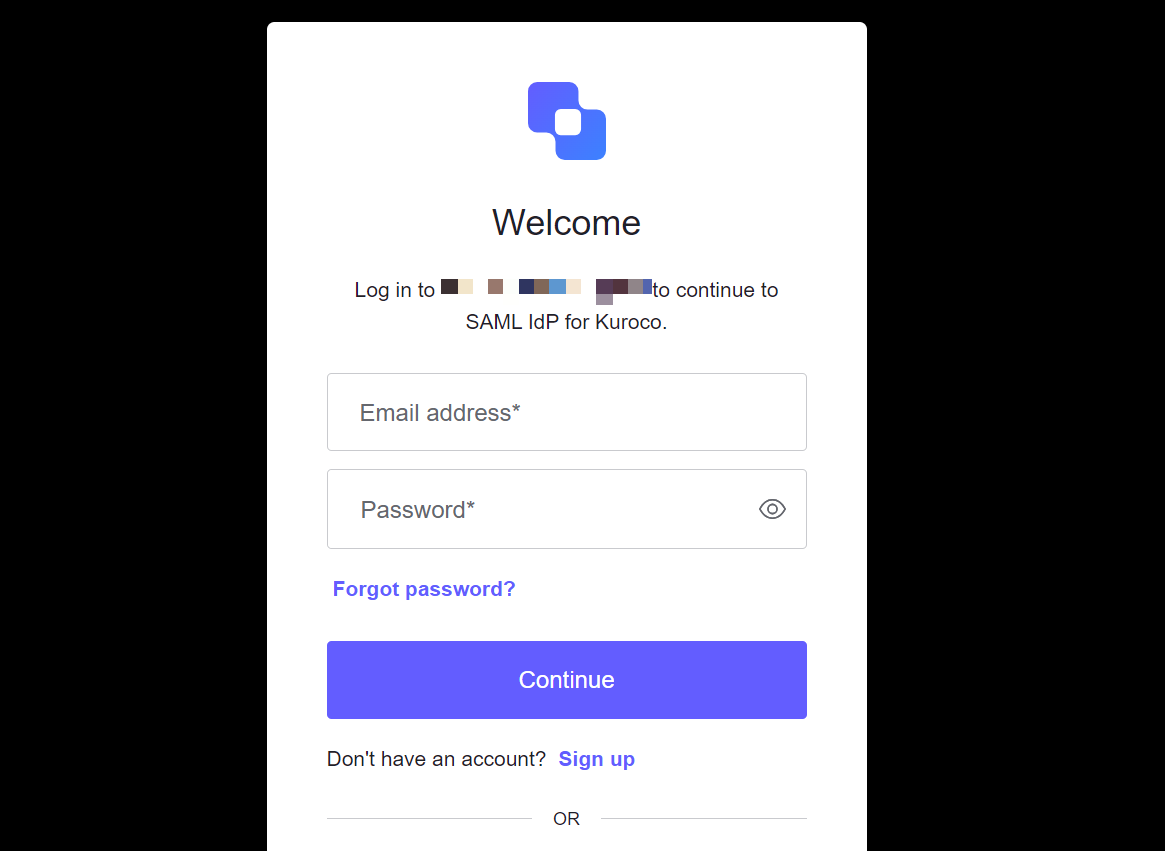
You will now be able to perform SAML login here.
Related documents
Support
If you have any other questions, please contact us or check out Our Slack Community.