How to implement SAML based SSO using Google Workspace
This tutorial explains how to implement SAML-based SSO using Google Workspace.
This is an SSO using SAML authentication, with Google Workspace as the IdP and Kuroco as the SP.
Prerequisites
It is required that you have a Google Workspace account.
Add SP settings on Kuruco management page.
First of all, add SP settings on Kuroco's management page.
1. Access SSO SAML SP setting page
Refer to SSO SAML SP edit to access the SAML SP edit page.
2. Add SP setting
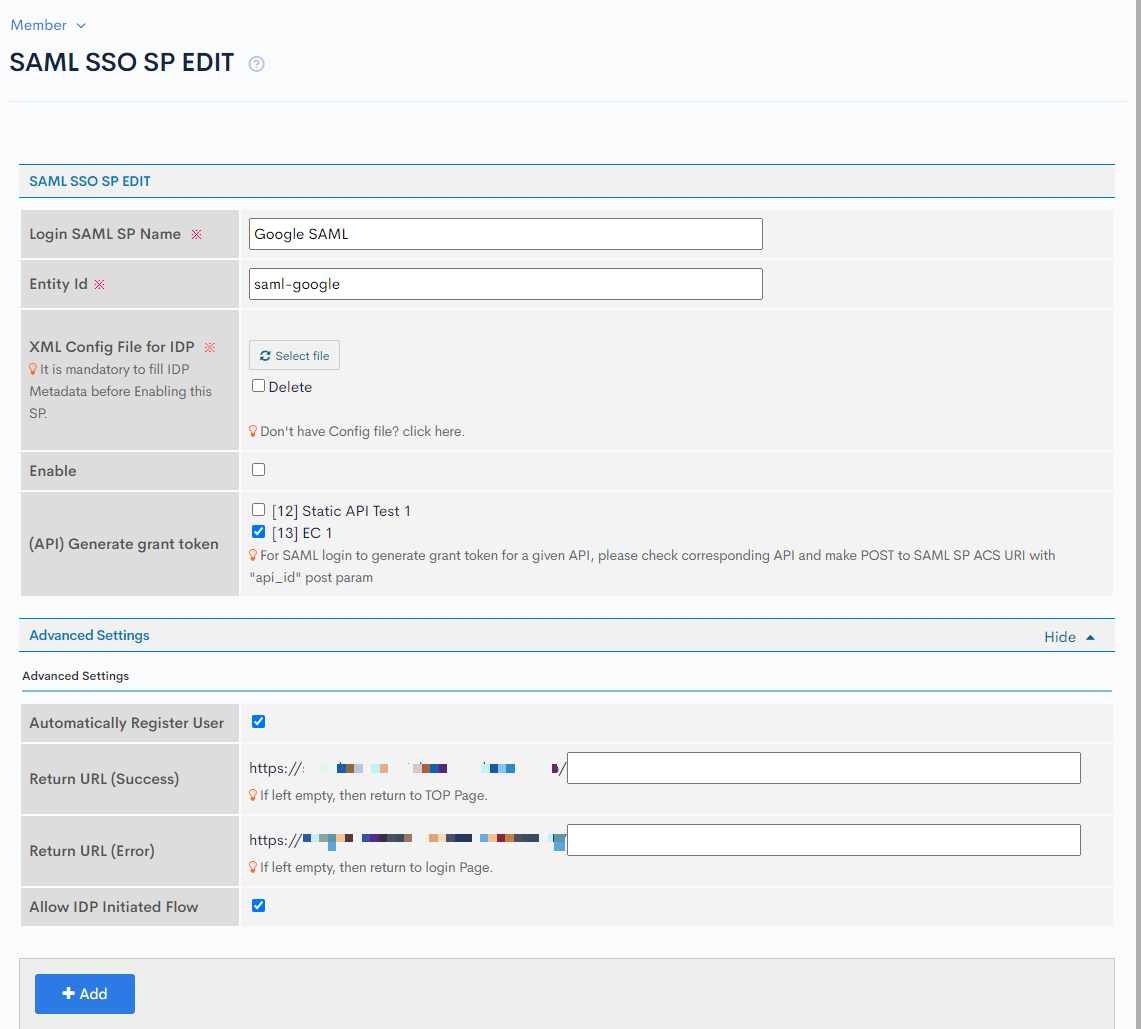
Input the followings in SSO SAML SP edit page and click [Add] button.
- Login SAML SP Name: your preferred name.
- Entity ID: your preferred ID.
- Enable: Uncheck it.
- (For API) Generate grant token: Select and check the desired ones.
- Automatically Register User:Check it.
- Allow IDP Initiated Flow: Check it.
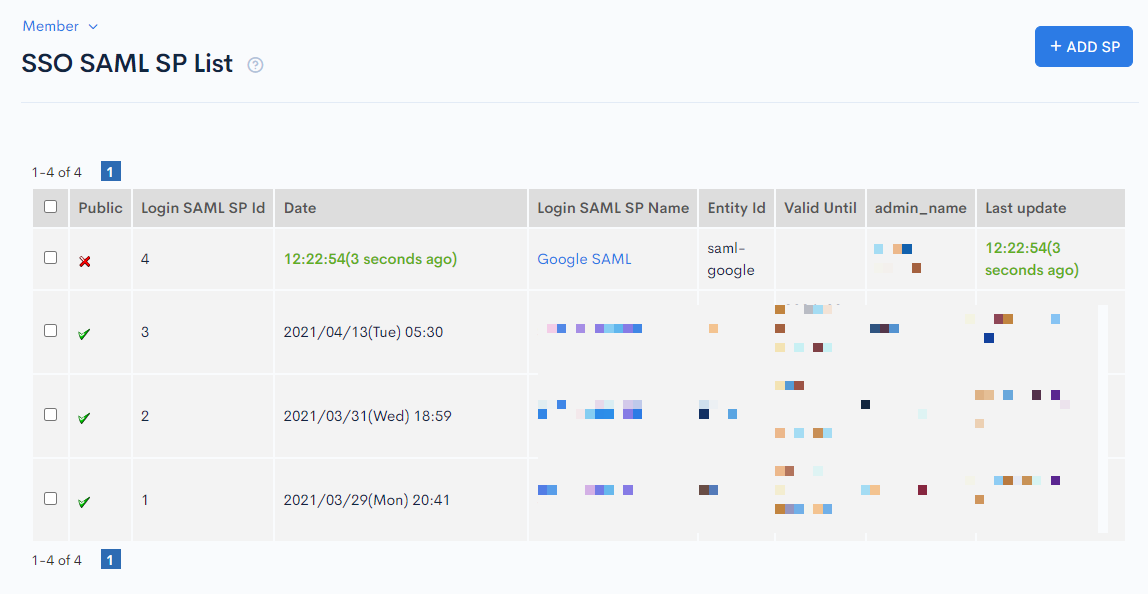
 Created SP is added on the SSO SAML SP list page.
 3. Check the SP settings detail
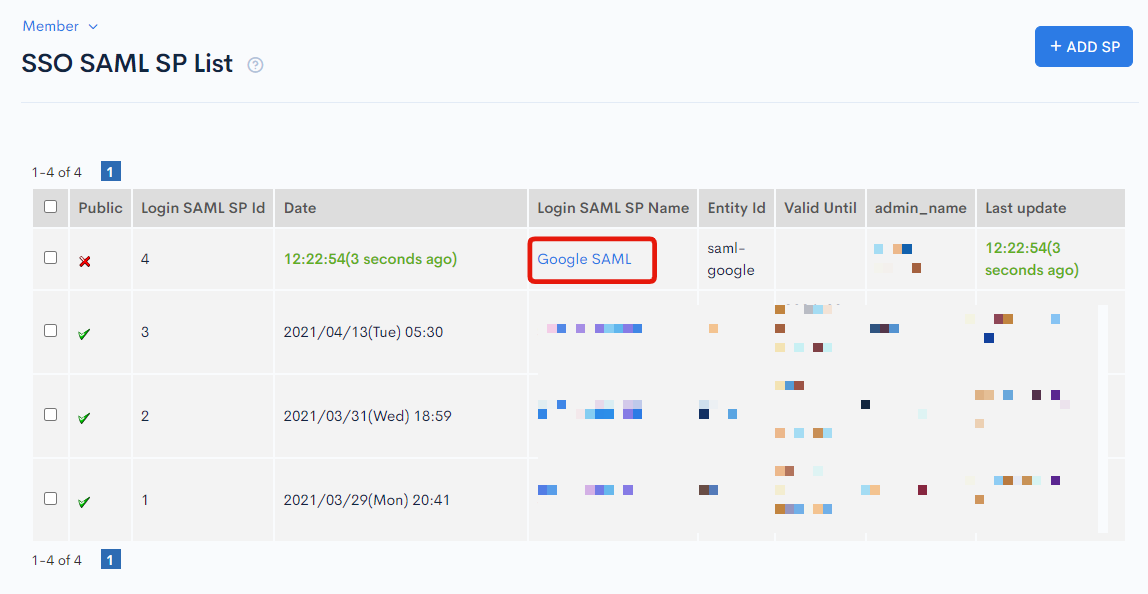
From the SSO SAML SP list page, click [Login SAML SP Name] of the one which you have just added.
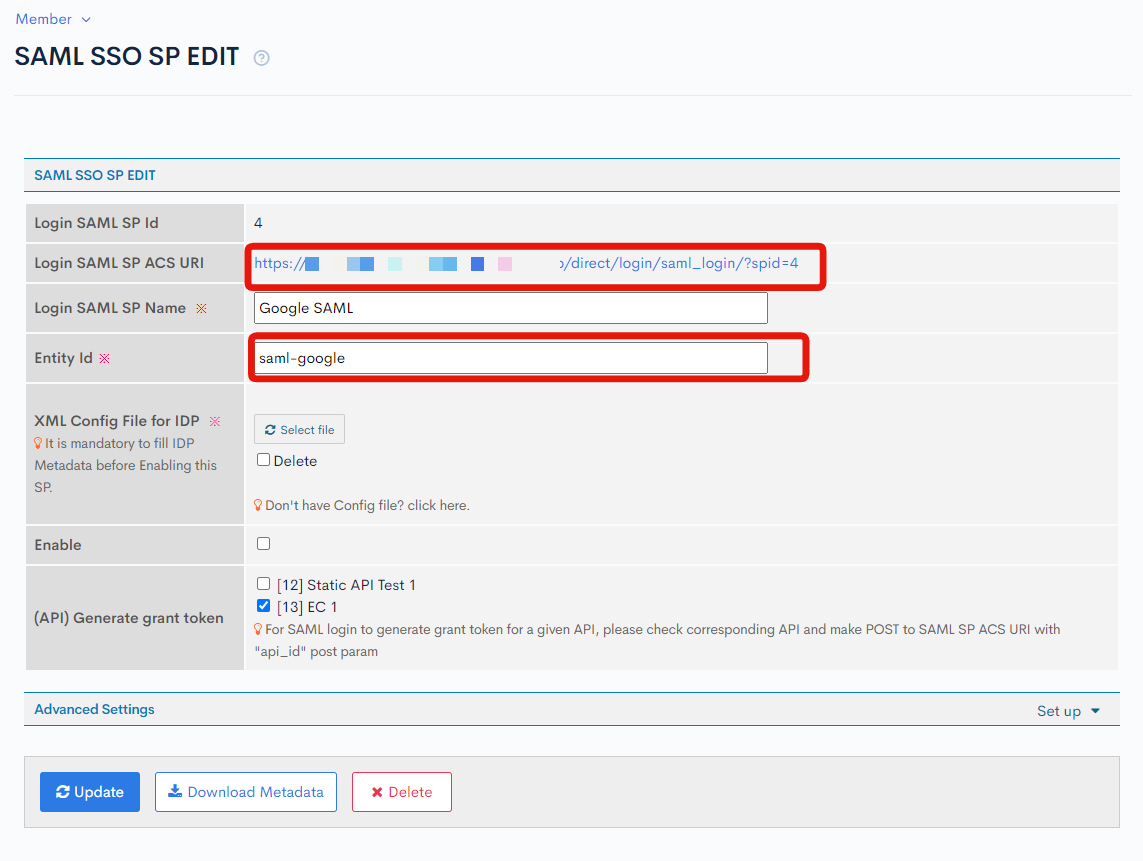
 Check and copy [Login SAML SP ACS URI] and [Entity Id] on the editing page since it will be required in the next step in Google Workspace management page.
Google Workspace management page setting
Next is the SAML integration setting on Google Workspace management page.
- Make sure to login with Google Workspace admin account for the following procedures.
- The screen may change depending on Google specification.
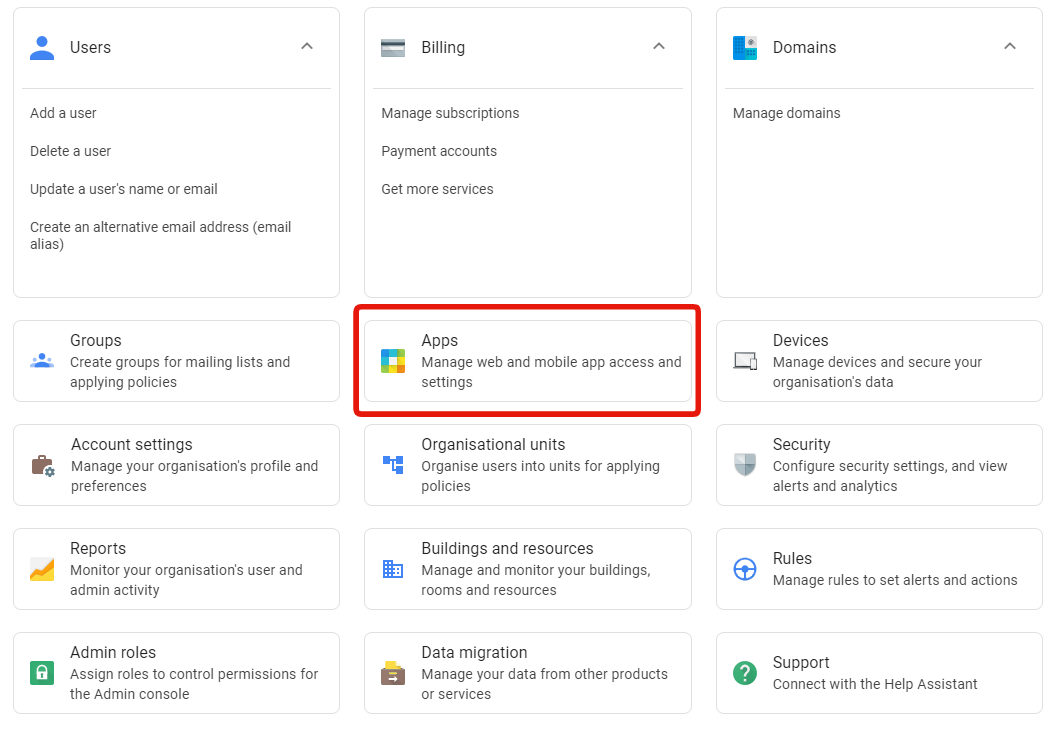
1. Access the Apps settings page from Google Workspace admin page
Click [Apps] on the admin page.
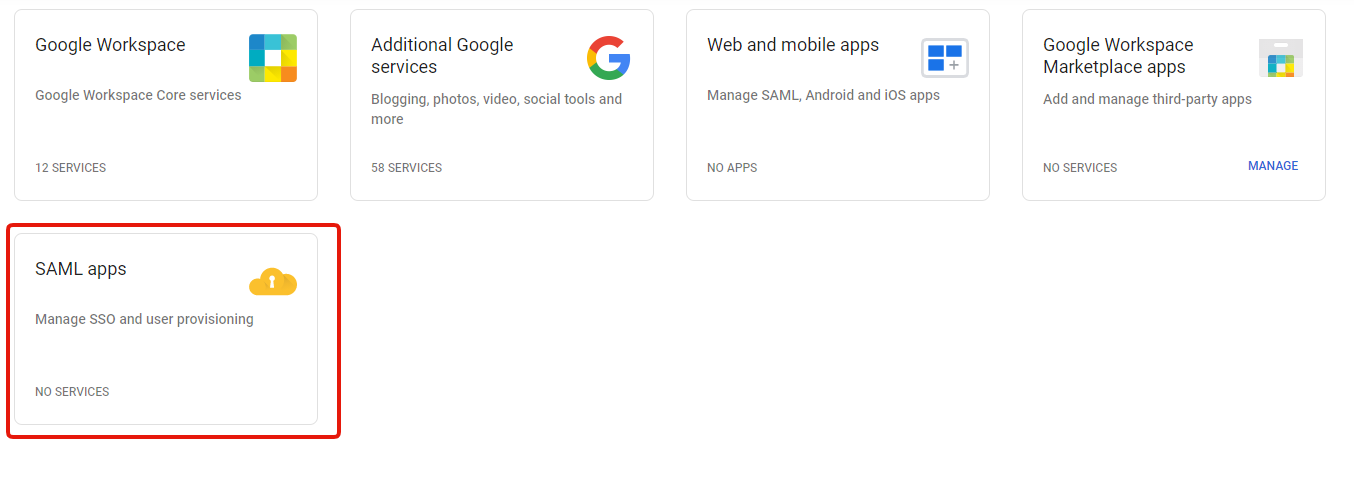
 2. Access SAML apps setting page
Click [SAML apps].
 3. Add SAML apps
Click [Add App]->[Add custom SAML app].
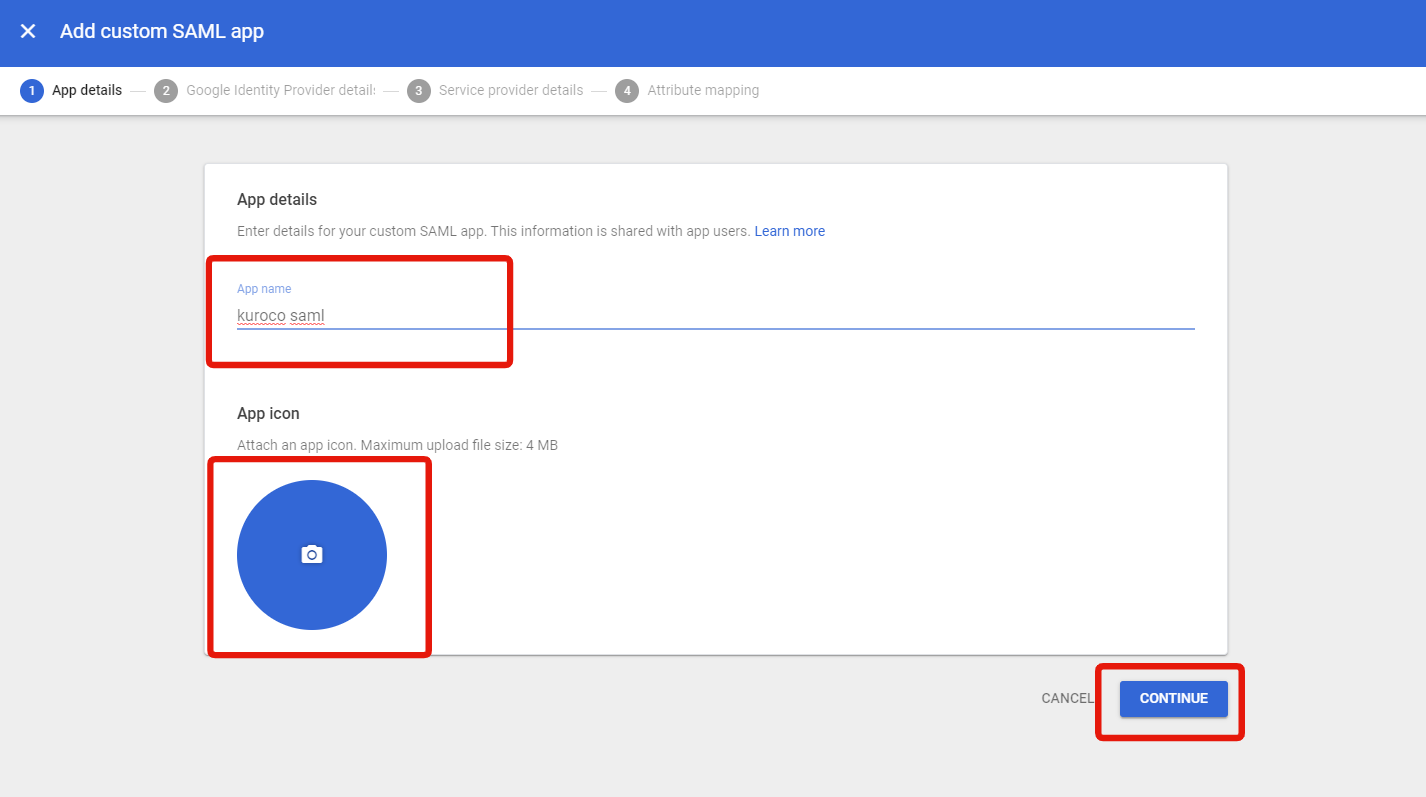
 4. Create custom app
Input the followings and click [continue].
-
App name
-
App icon
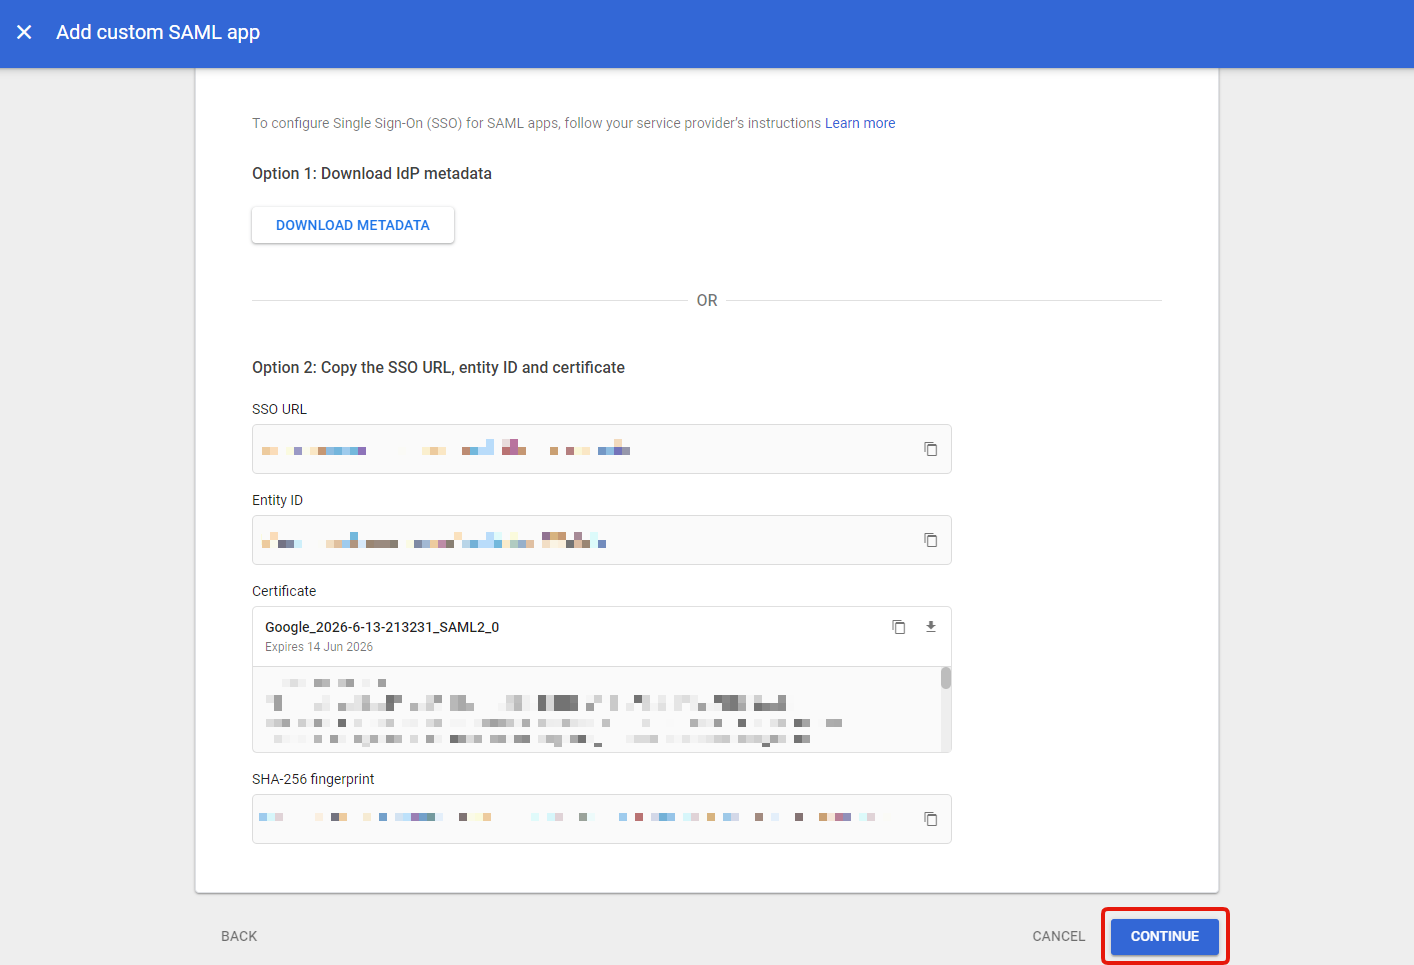
 5. Download IdP information
Click [DOWNLOAD METADATA] to download the IdP metadata.
 Click [CONTINUE] after the download is completed.
 6. Input the SP information
Input the following information: -
ACS URL: Paste "Login SAML SP ACS URI" which you copied on Kuroco management page at step 3.
-
Entity ID: Paste "Entity ID" which you copied on Kuroco management page at step 3.
-
Start URL: the URL after login such as /sample.
-
Signed response: Check it.
-
Name ID format: Select "EMAIL".
-
Name ID: Select "Basic Information > Primary Email".
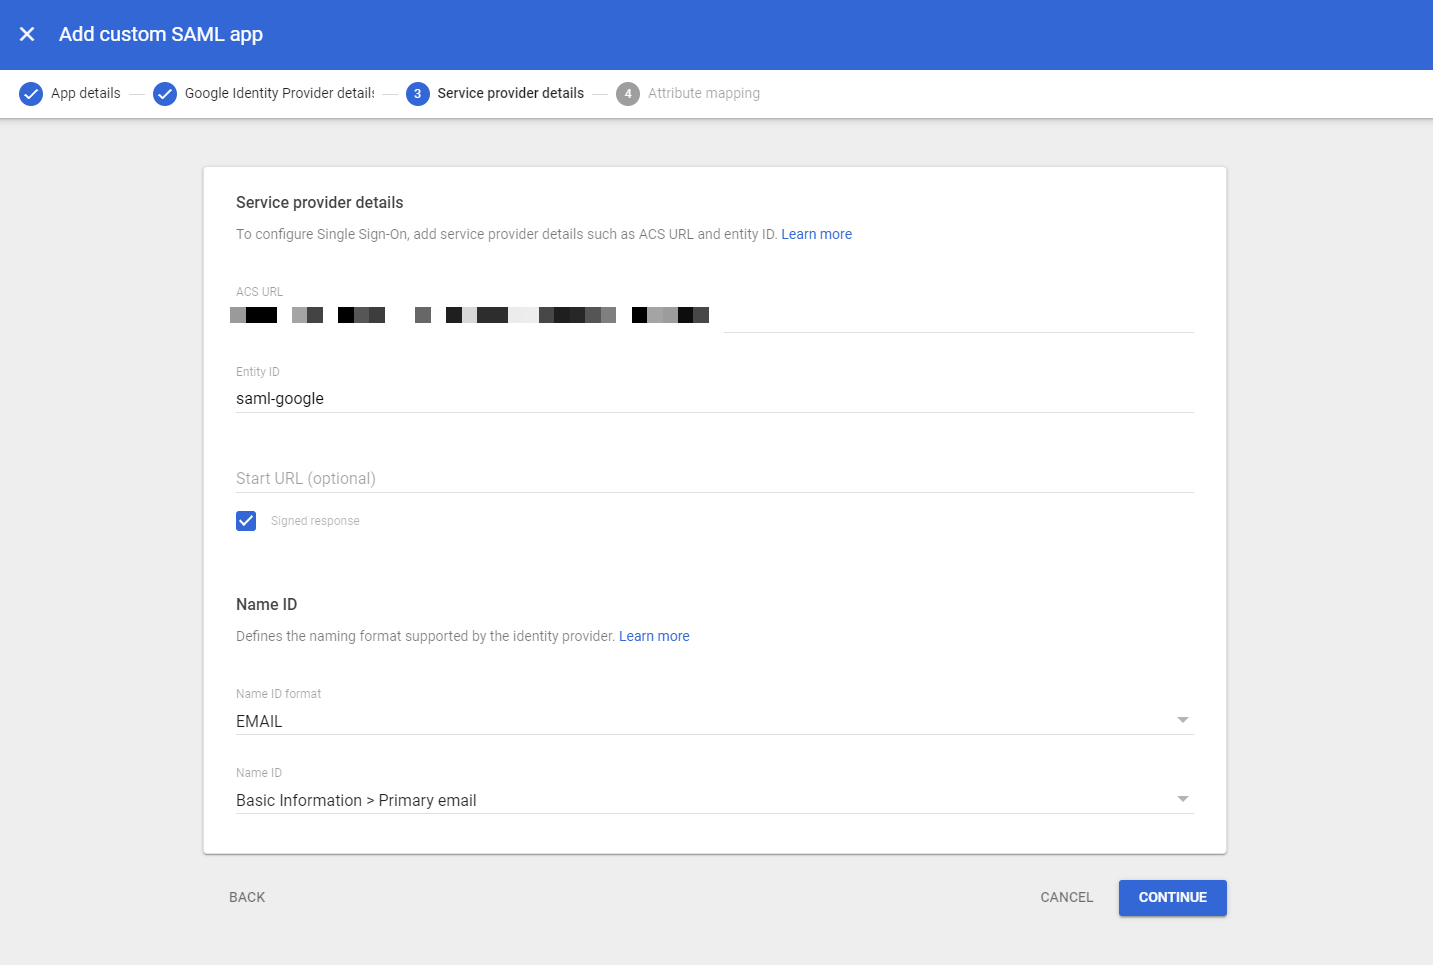 Click [CONTINUE] once completed.
7. Setup the mapping information
Click [ADD MAPPING].
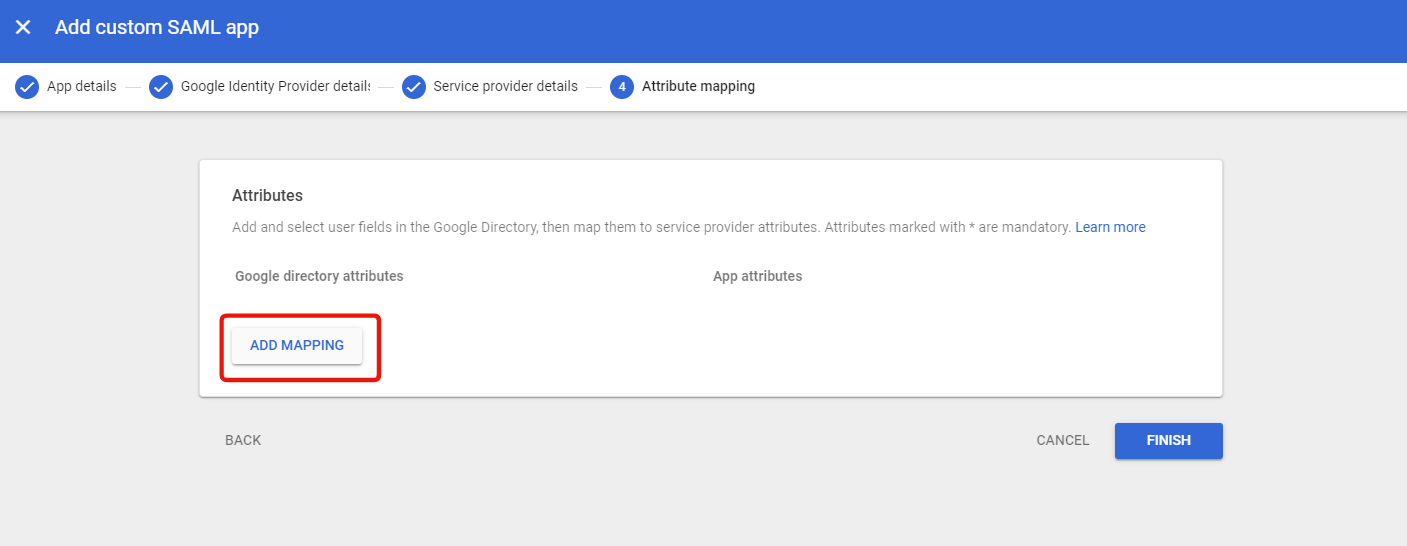 Setup the followings:
- Basic Information / Last name:name1
- Basic Information / First name:name2
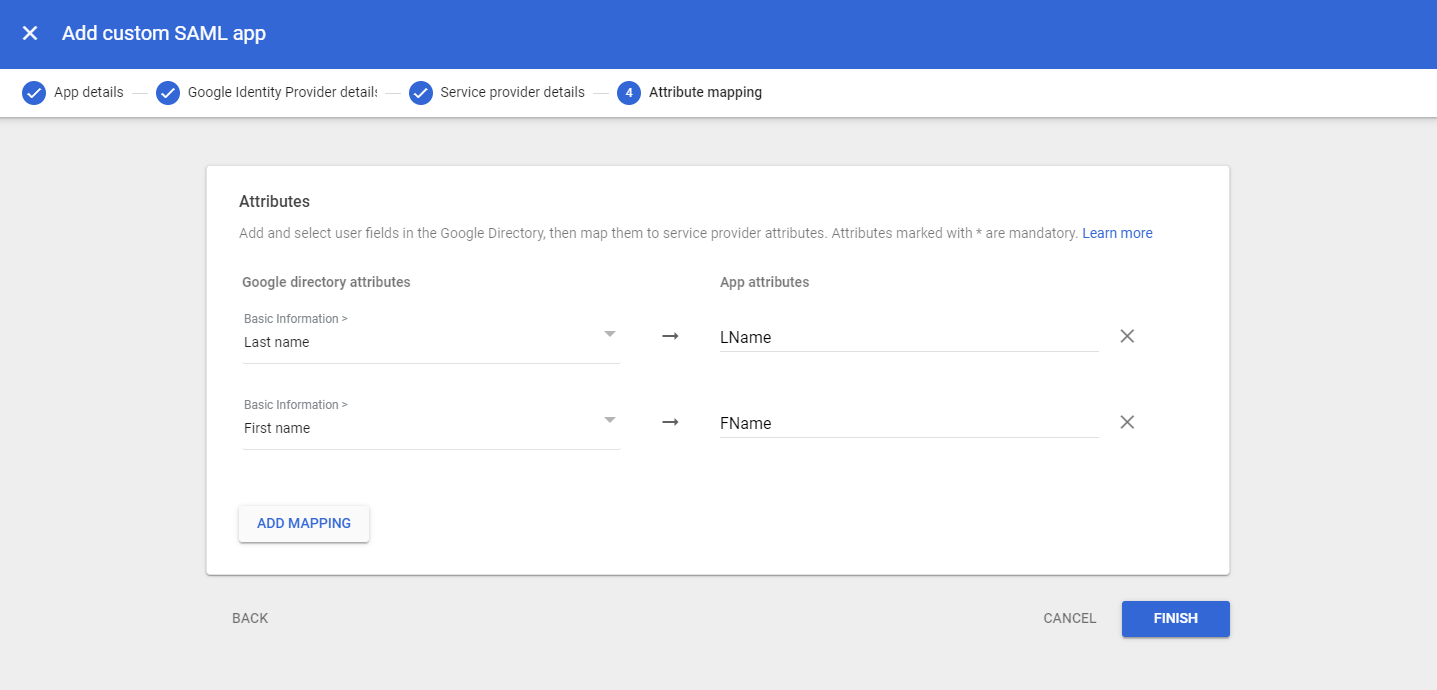 Click [FINISH] once completed.
Custom SAML app has been created.
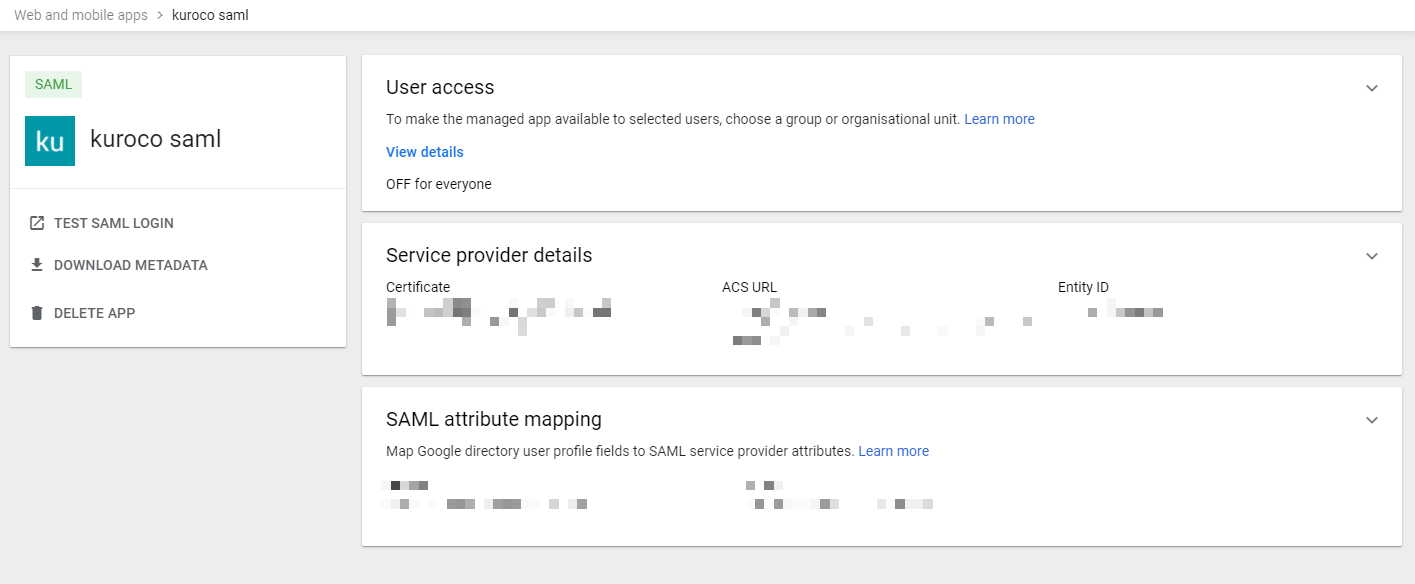 8. Change the user access to "ON"
The user access is OFF by default, so change it to ON.
Click the arrow of [User access].
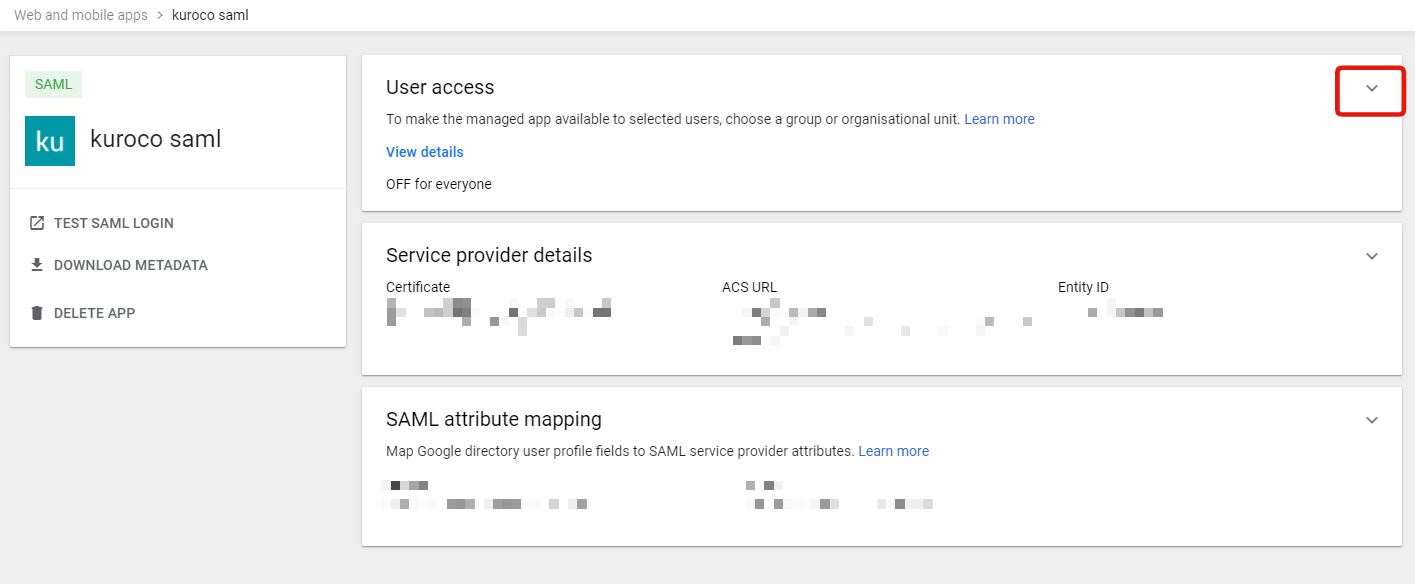 Select "ON for everyone" on the service status page and click [SAVE].
 Google Workspace setup has been completed.
Setup IdP information on the SP edit page on Kuruco management page.
On Kuroco's management page, access the SSO SAML SP editpage.
 Upload the XML file of IdP information which you downloaded on step [Google Workspace management page setting -> 5. Download IdP information] and check [Enable].
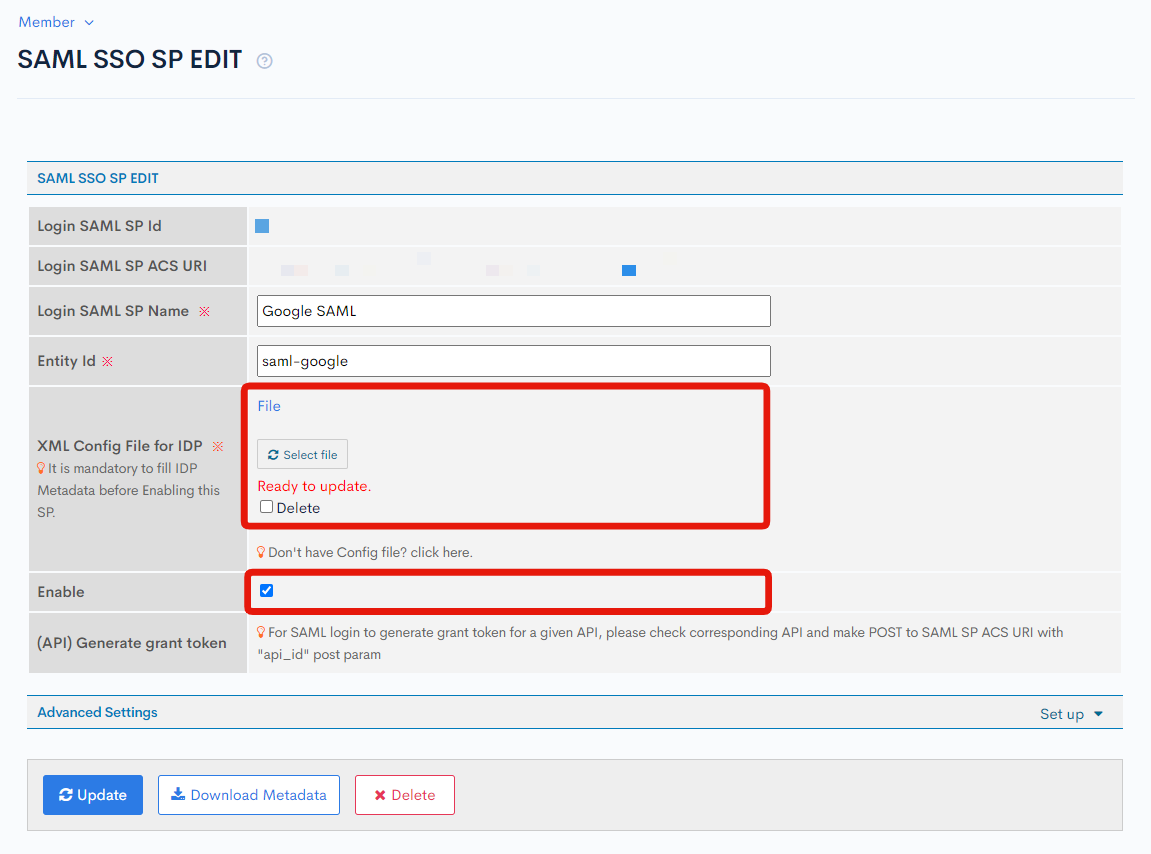 Click [Update] after the setup is completed. The configuration is now complete.

How to use
Check the created SAML SP page.
Click [Login SAML SP Name] of the SP configuration which you have created on the SSO SAML SP list page.
 You can find [Login SAML SP ACS URI].
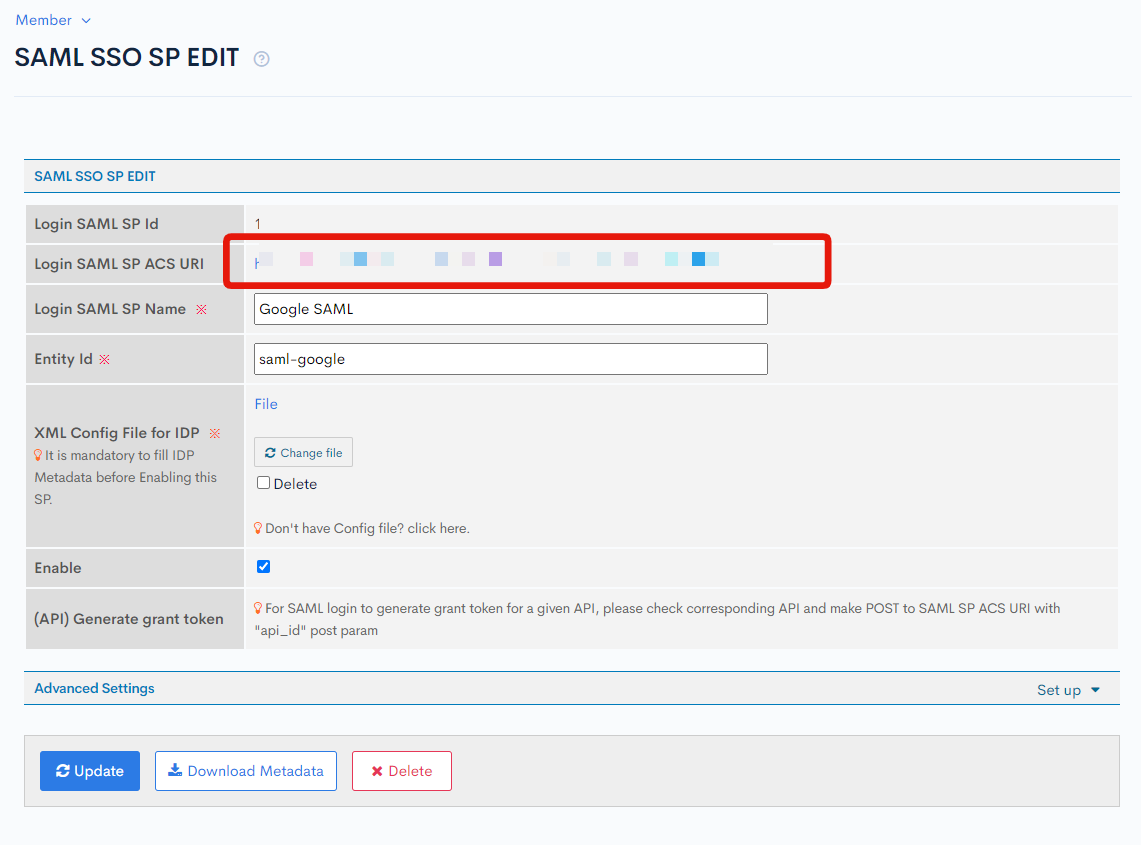 Click the URL and it links to the Google login page.
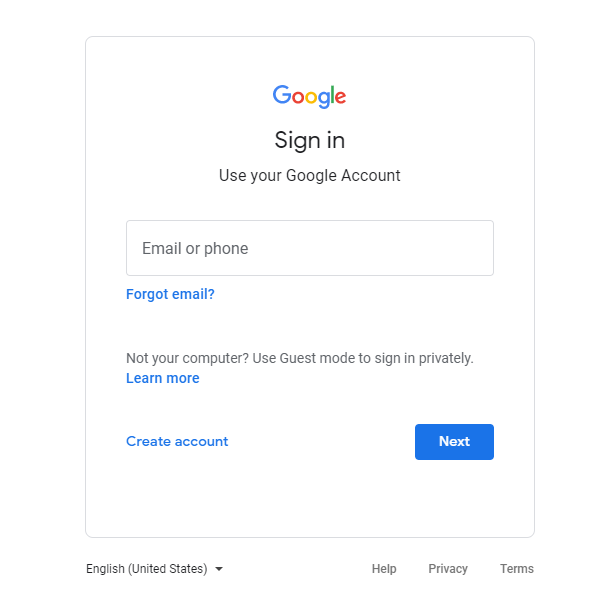 You can use SAML login here.
Support
If you have any other questions, please contact us or check out Our Slack Community.