Adding Vue components to the content editing screen using plugins
Overview
This tutorial explains how to add a Vue plugin to Kuroco's admin panel.
For demonstration purposes, we will be adding a color picker in a text input field on the content editor screen.
About the plugin
We will be using the sample directory diverta/management-vue-plugin-sample to create the plugin.
The ContentsColorPickerInput plugin will be installed as an additional field in your content structure of choice. It enables you to select a color by one of the following ways:
- Entering the color code
- Clicking on the gradient palette and/or color sliders
Before you start
For the development part of this tutorial, you need to have Vue devtools installed in your browser.
Note: This tutorial was written for use with Google Chrome. Actual controls may be different depending on the browser you are using.
What you'll learn
The steps for installing this plugin can be divided into two phases:
-
- Enabling and configuring Kuroco's developer tools
- Launch development server
- Editing the component
- Verifying and finalizing the plugin
Plugin setup
Preparing the content field
In a new or existing Content structure editor, set up a new additional field as follows:
| Setting | Value |
|---|---|
| ID | Note down the field ID ("01" in this example). |
| Field name | Color picker |
| Field settings | Select "Single-line text" from the dropdown menu. |

Click [Update] or [Add] at the bottom of the screen to save this content structure.
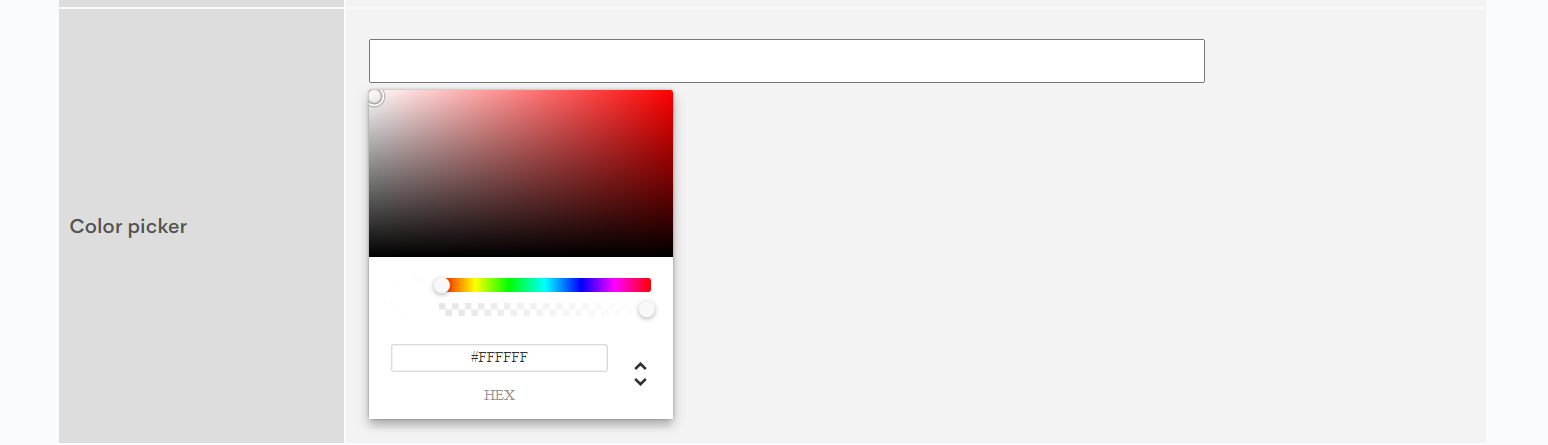
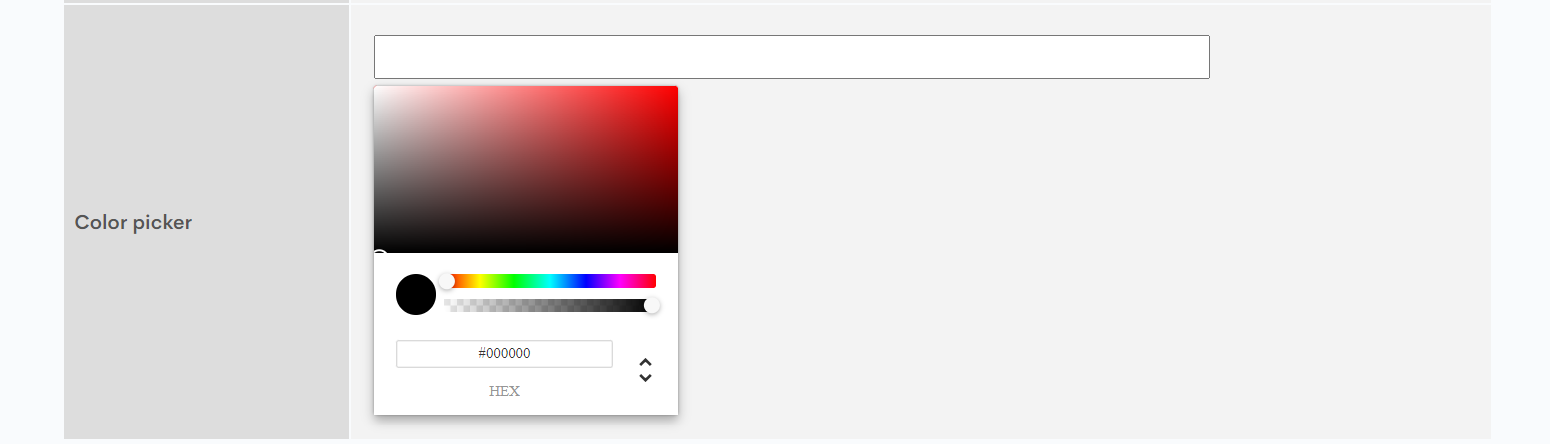
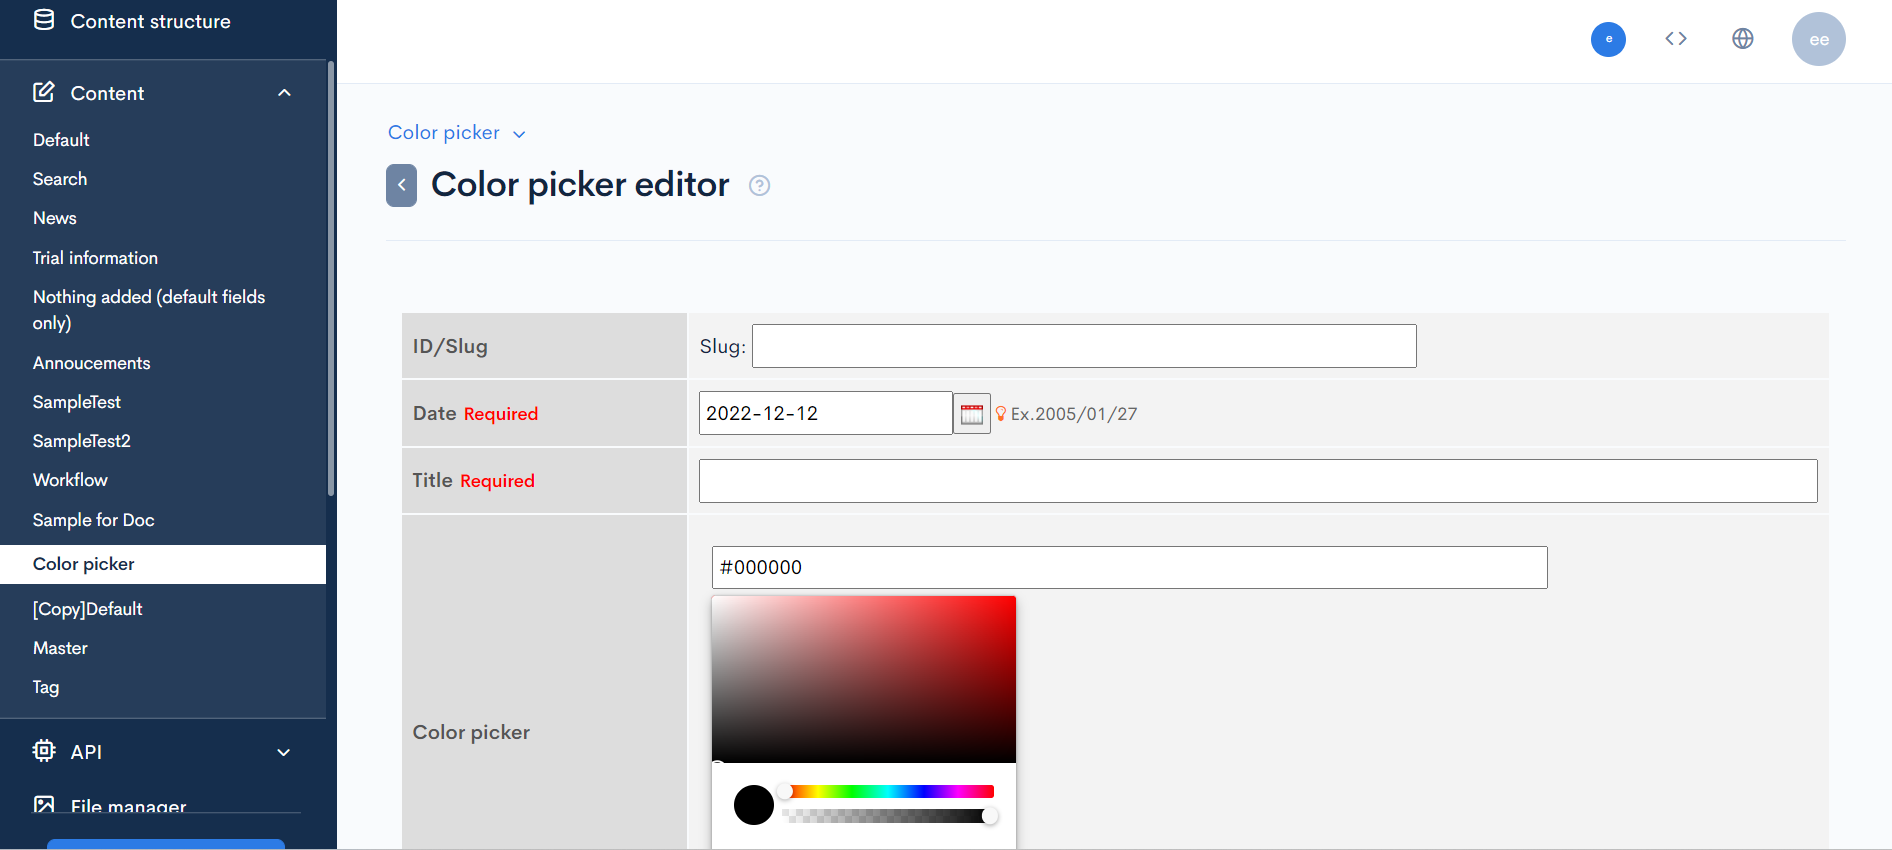
Now, navigate to the Content editor you just modified. The newly added field should look like this:

Sample component installation
Next, clone the sample repository using the following code:
git clone https://github.com/diverta/management-vue-plugin-sample.git
Navigate to the cloned directory.
cd management-vue-plugin-sample/packages/ContentsColorPickerInput
Then, run the following command to install the relevant dependencies:
npm install
Component build
Run the following commands in the cloned directory:
npm run lint:fix
npm run build
When the build process is done, you will see the following bundle files in the dist/ folder. (Note: The hashes in the file names will be different for each build.)
manifest.json
vendors.43ede78aa5d8feb80b64.js
ContentsColorPickerInput.b584f61c71a18c07edb8.js
Component deployment
The next step is to deploy the created files and make them externally available. You can use any hosting or storage service to do this. For this tutorial, we are uploading them to the Kuroco File manager.
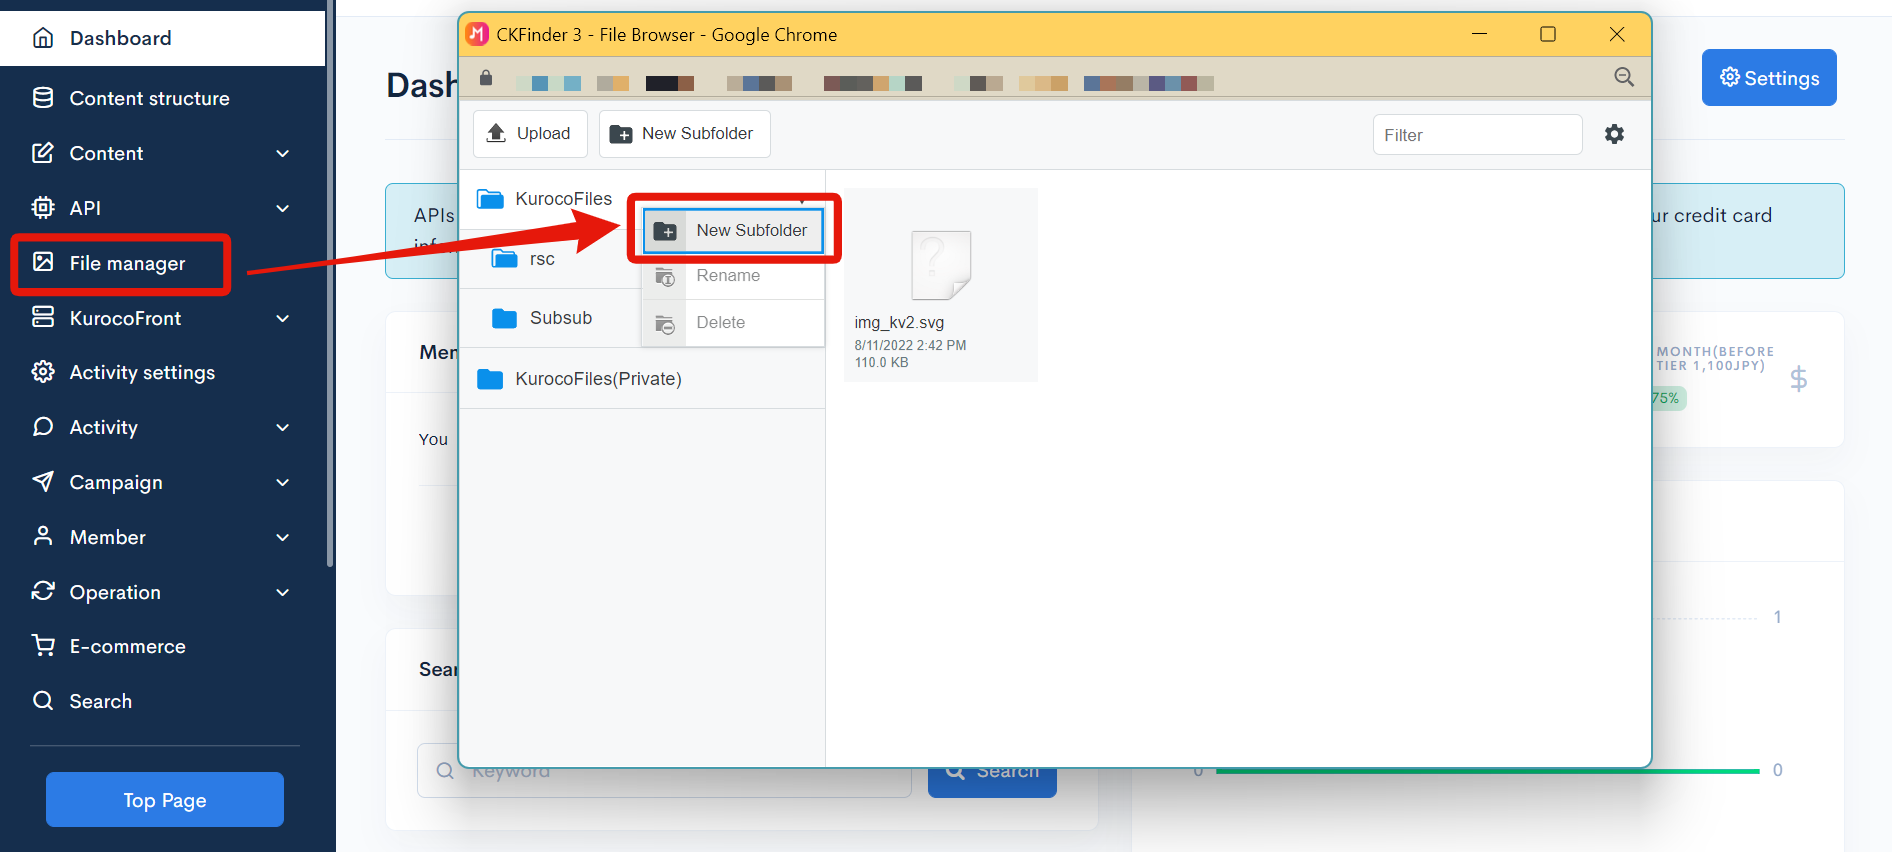
Select [File manager] from the sidebar menu. In the dialog, right click [KurocoFiles] and select [New subfolder].
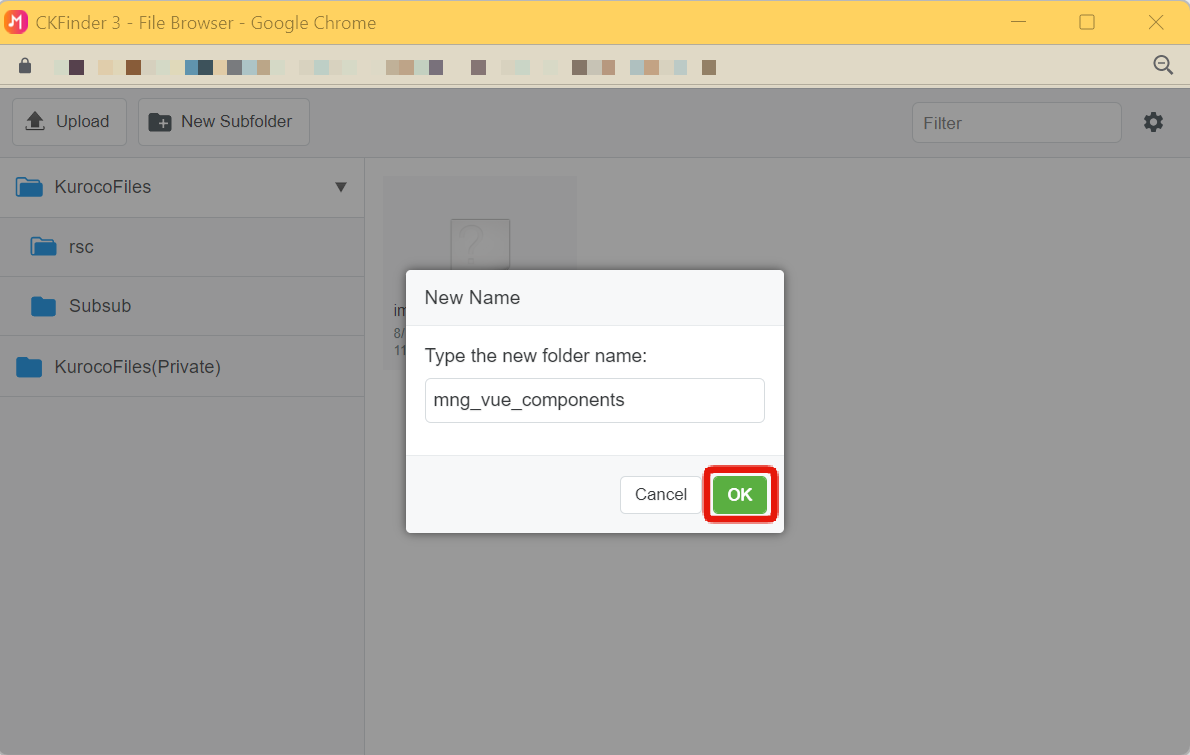
Enter mng_vue_components in the name field and click [OK] to save the new subfolder.
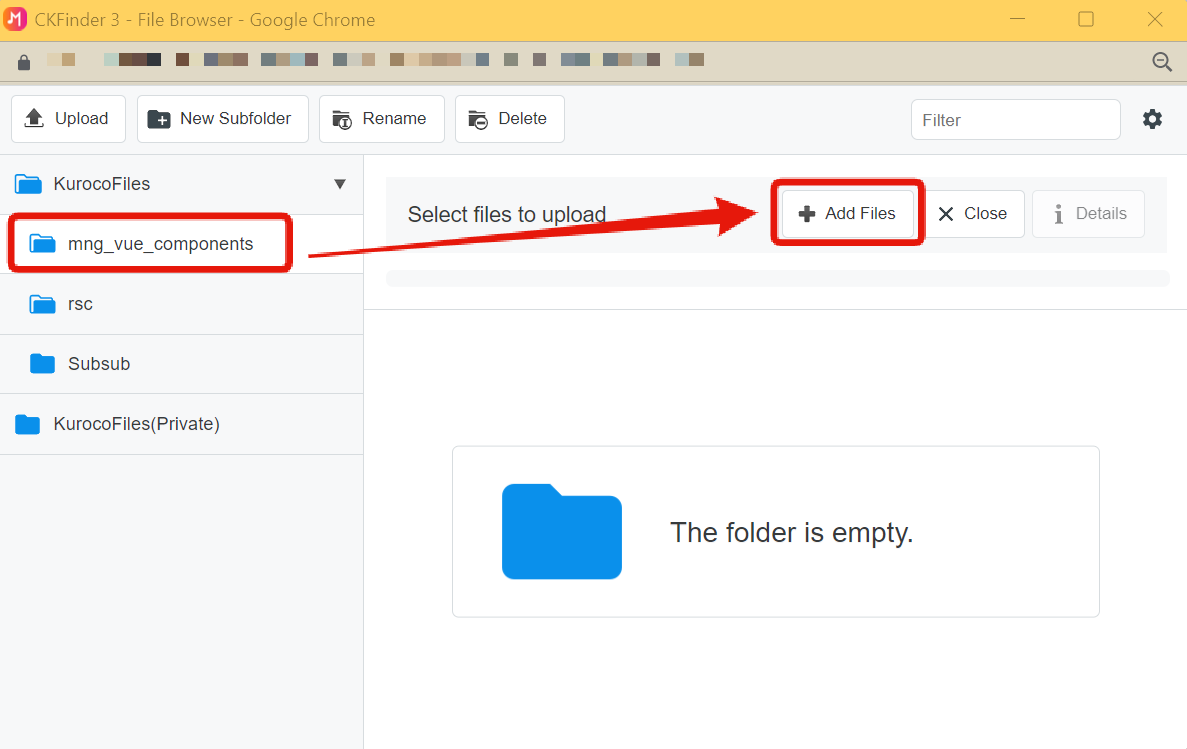
Select the /mng_vue_components subfolder and click [Add files] to upload the three bundle files from your local /dist directory.
Admin panel plugin creation
Now, you are ready to set up the admin panel plugin to read the uploaded bundle files.
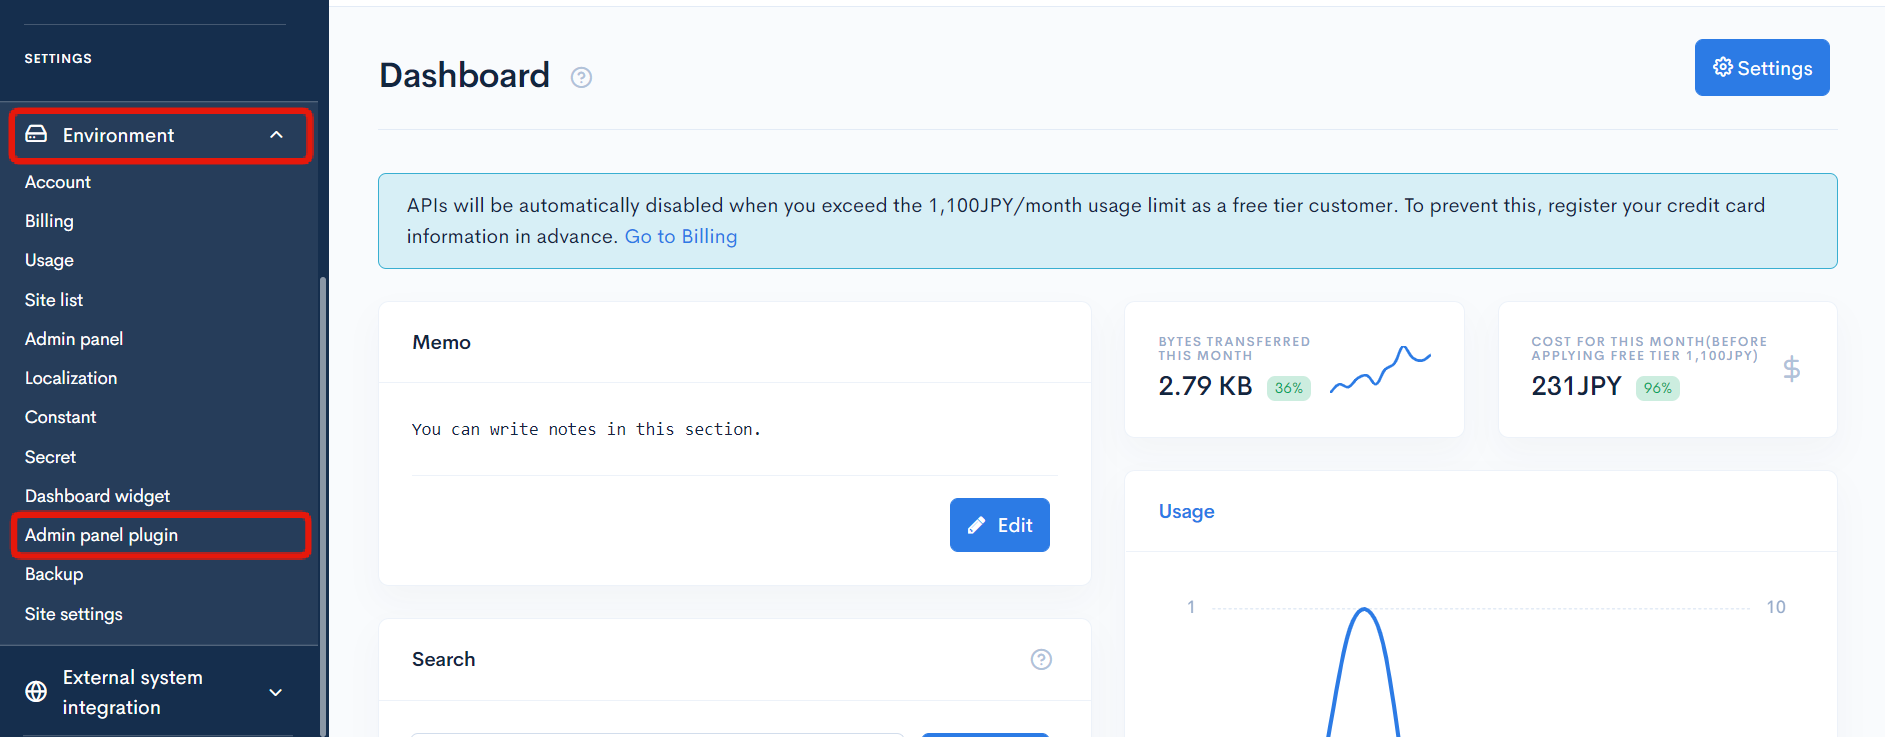
In the sidebar menu, select [Environment] -> [Admin panel plugin].
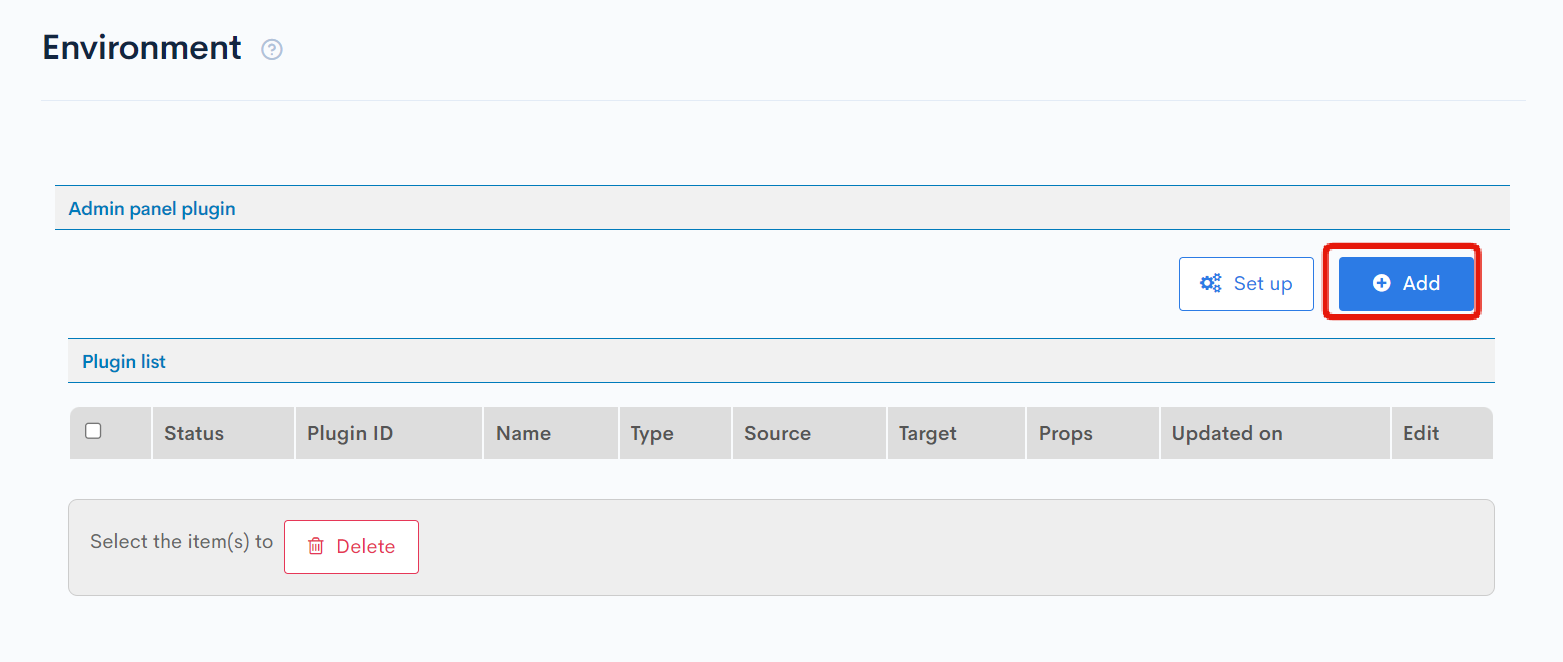
In the upper right corner of the screen, click [Add].
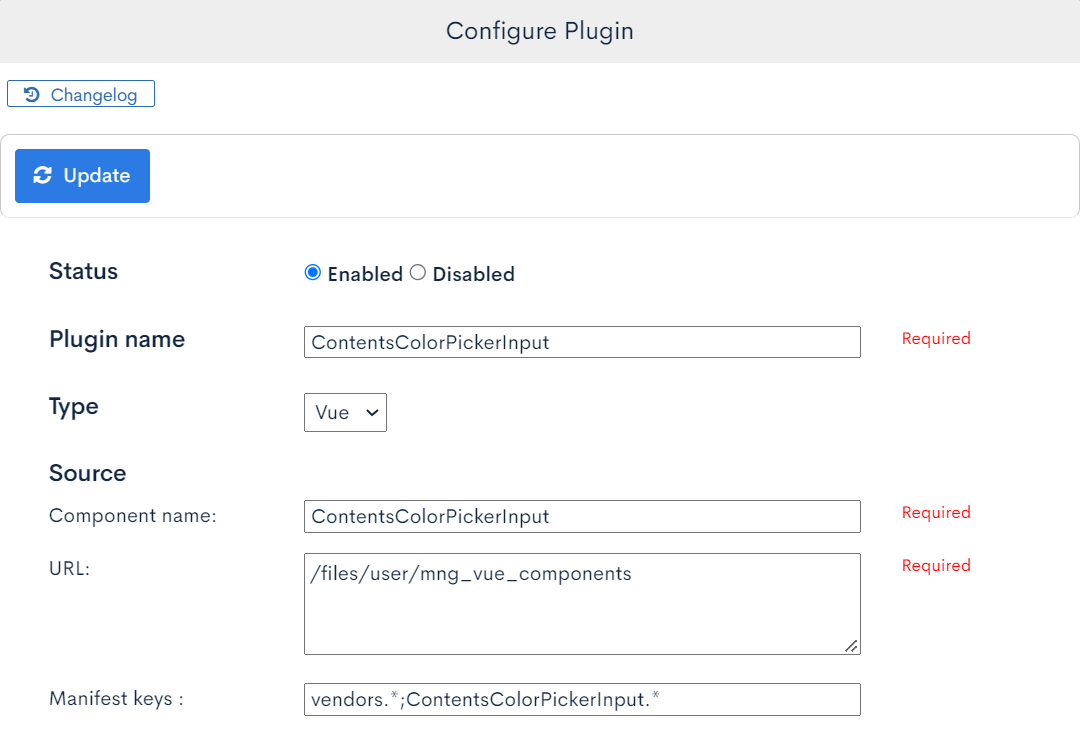
Enter the following values in the dialog:
| Field | Sub-field | Value | Description |
|---|---|---|---|
| Status | - | Enabled | - |
| Plugin name | - | ContentsColorPickerInput | Enter a name for your plugin. |
| Type | - | Vue | - |
| Source | Component name | ContentsColorPickerInput | Make sure the name you enter here matches the component name in the sample repository. |
| URL | /files/user/mng_vue_components | URL where the component is stored. For Kuroco-external URLs, use the absolute path (https://**).
| |
| Manifest keys | vendors.\*;ContentsColorPickerInput.\* | Enter the manifest.json keys in this format: vendors.*;(component name).* | |
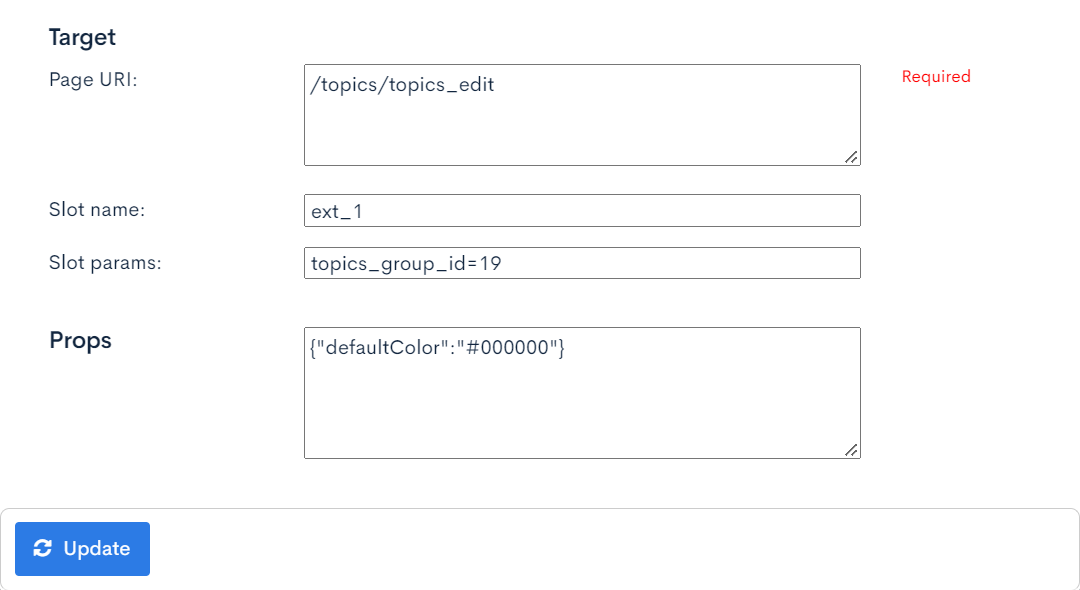
| Target | Page URI | /topics/topics_edit/ | Path of the content editor screen (following /management/). |
| Slot name | ext_1 | Name of the additional field that you set up in "Preparing the content field". The naming format is ext_X, where "X" is the field ID. | |
| Slot params | topics_group_id=19 | Content structure ID or topic group ID where the plugin will be added. This can be found on the Content structure list screen. | |
| Props | - | {"defaultColor":"#000000"} | Props to be passed to the component, if any. Here, we are specifying a default value of "#000000" upon initiation. |
Plugin verification
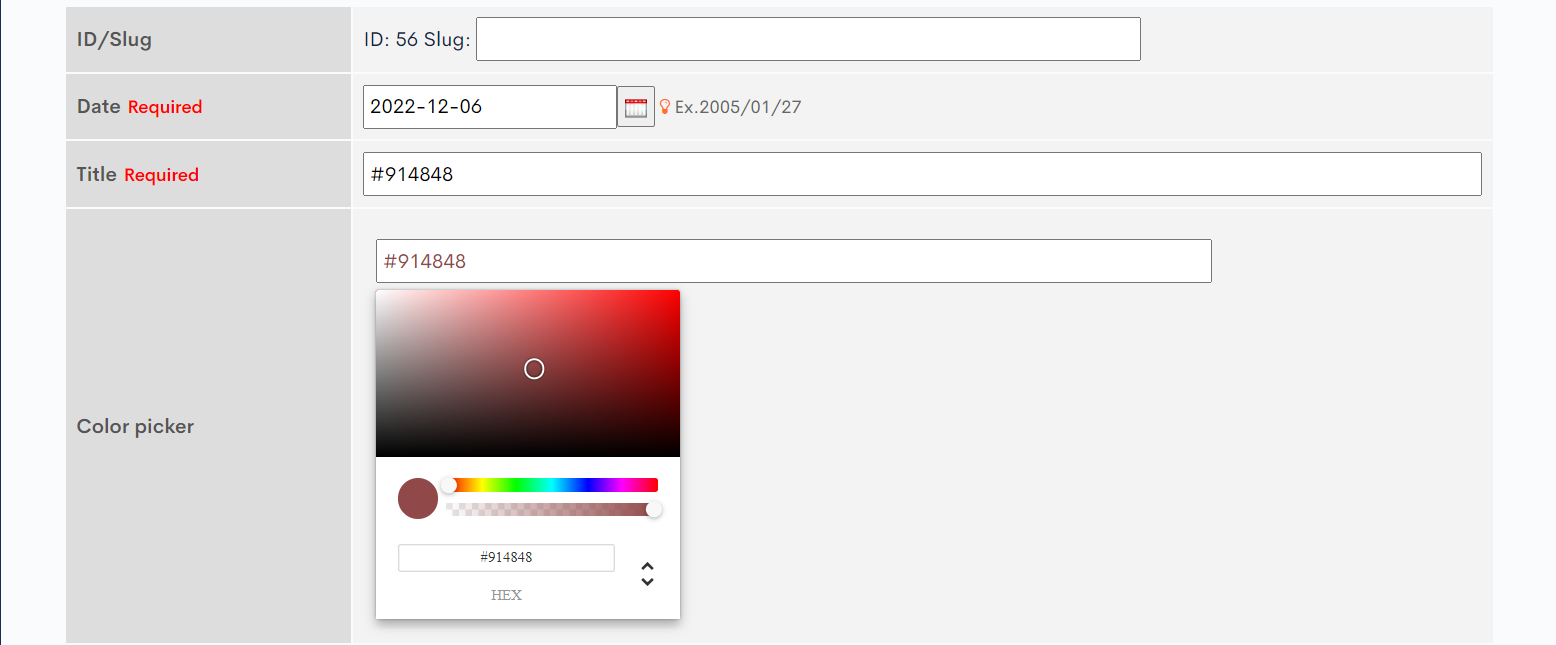
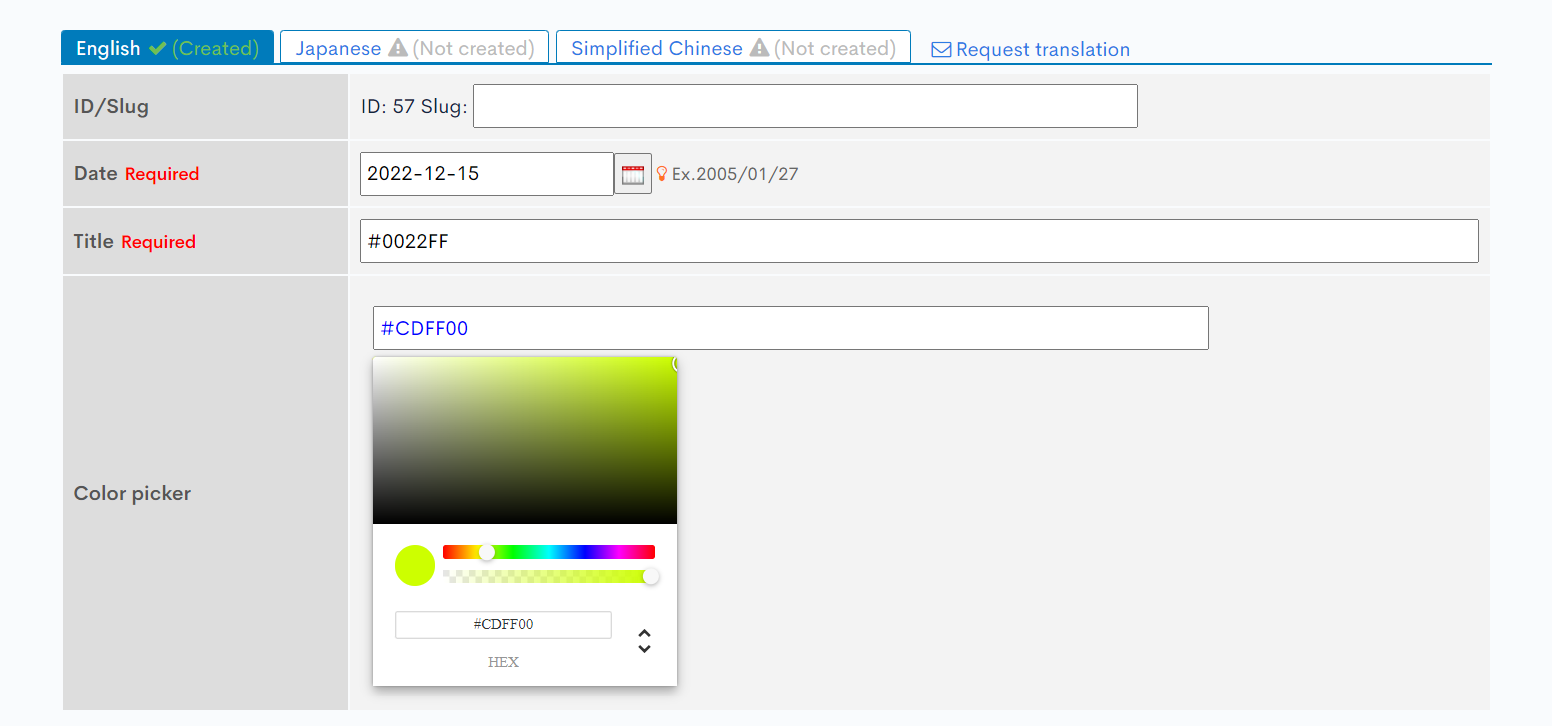
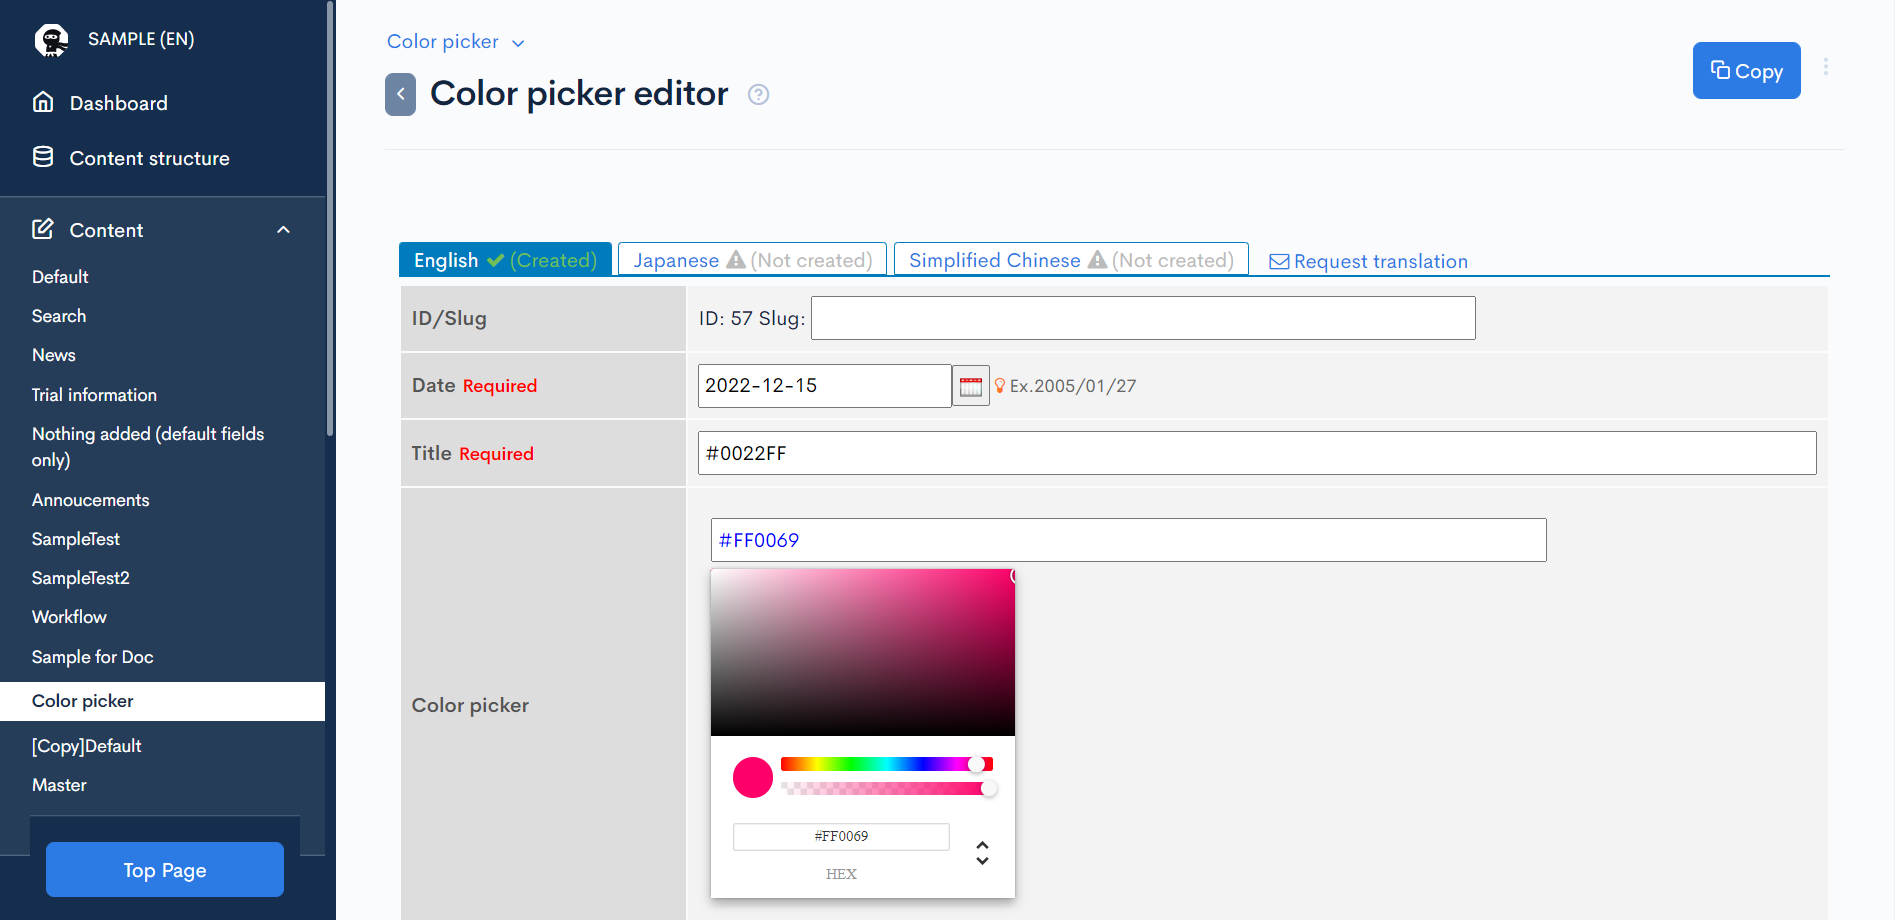
To verify that your plugin is working correctly, go to [Content] -> [(Name of your content group)] in the sidebar menu. You should see the following color picker when you open an existing or new content editor.
Create a new content post. Select a color in the color picker and click [Add] to save the post.

After saving, access the post from the content list. The color picker should display the color code you saved earlier instead of the default.
Plugin development
Next, you will learn how to develop the admin panel plugin. We will walk you through the process of editing the ContentsColorPickerInput source code that you set up above in your local environment and verify its operations.
To do this, you need to first activate Kuroco's developer tools. This will allow you to synchronize your admin panel with your local development server for component editing and operation checks.
Enabling developer tools
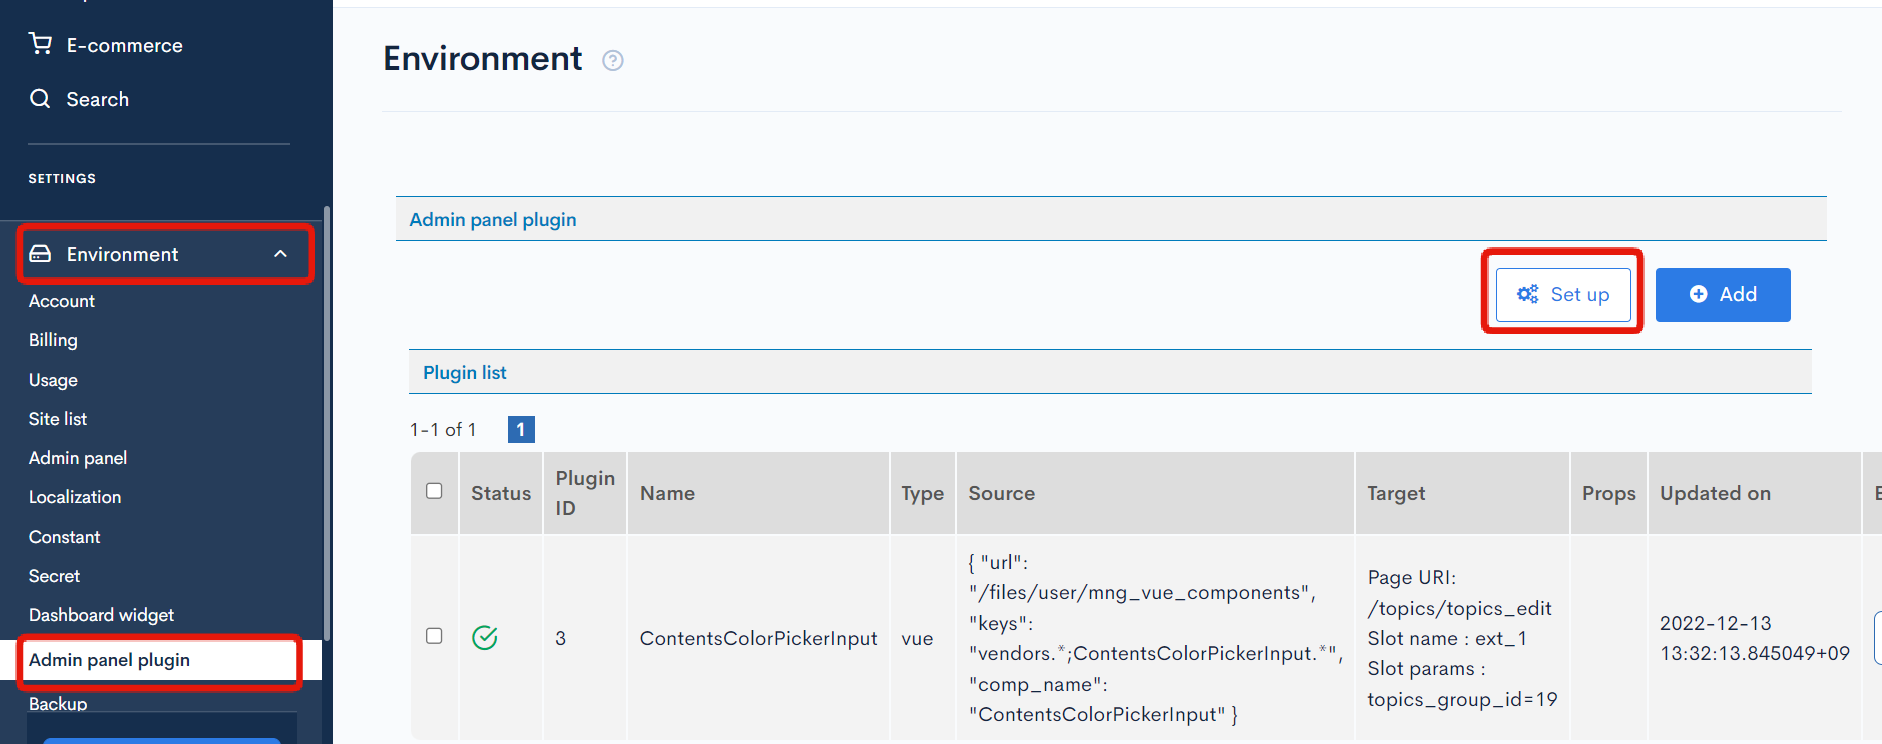
In the left sidebar menu, select [Environment] -> [Admin panel plugin]. Then, click [Set up] in the upper right corner of the screen.
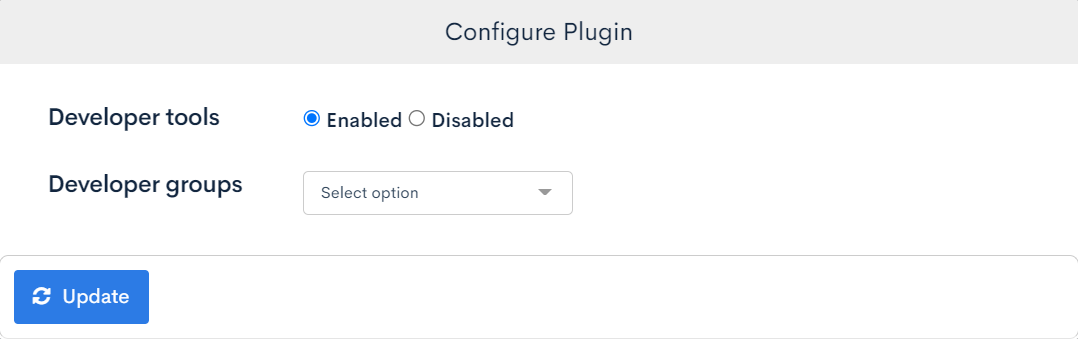
In the Configure plugin dialog, input the following and click [Update].
| Field | Value | Description |
|---|---|---|
| Developer tools | Enabled | - |
| Developer groups | (No selection) | Select the group(s) authorized to use developer tools.
|
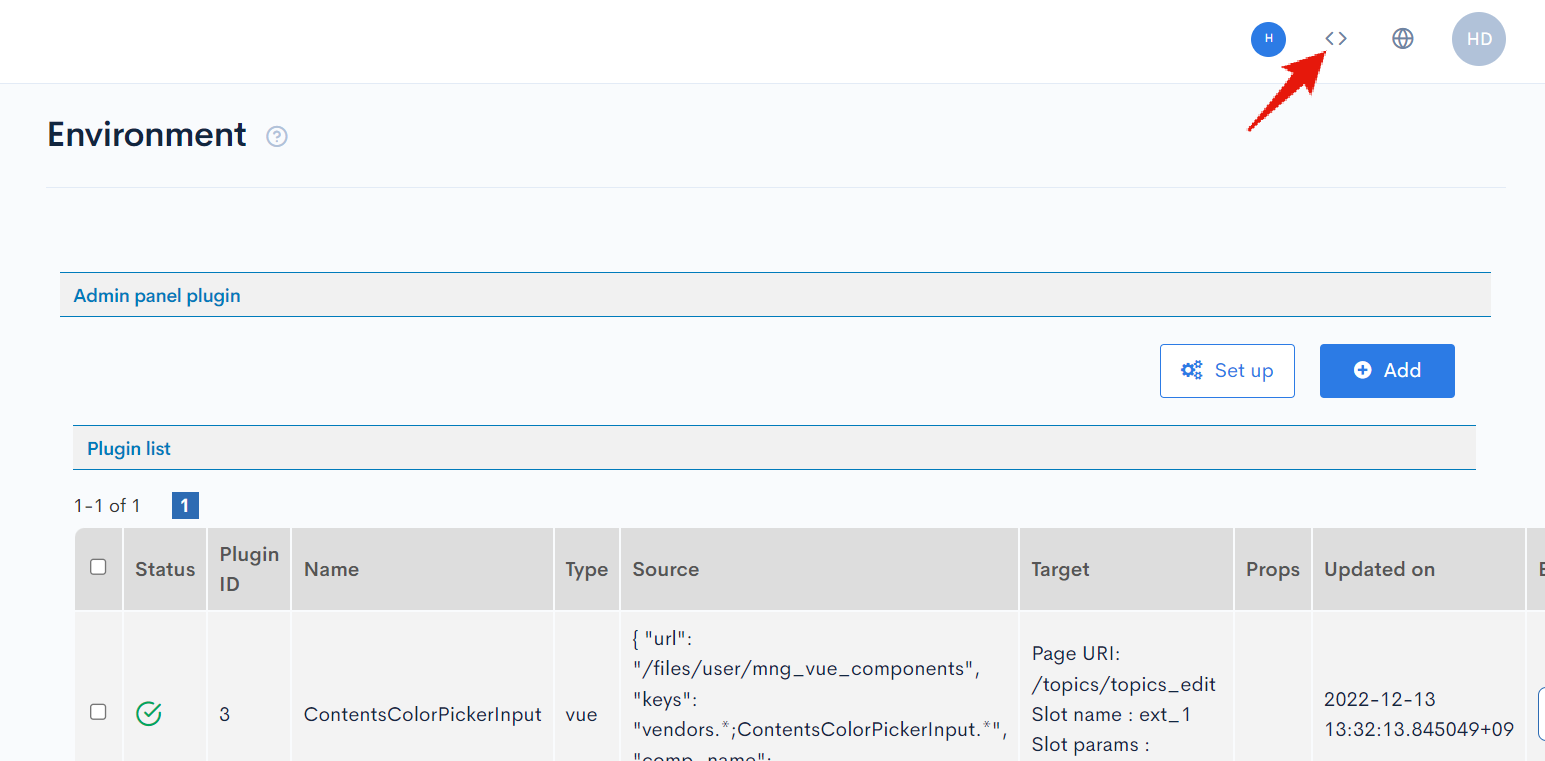
After saving these settings, refresh the screen once. If the developer tools have been activated successfully, you will see a <> button in the top right corner.
Developer tool settings
Go to the content editor that you set up above in "Preparing the content field".
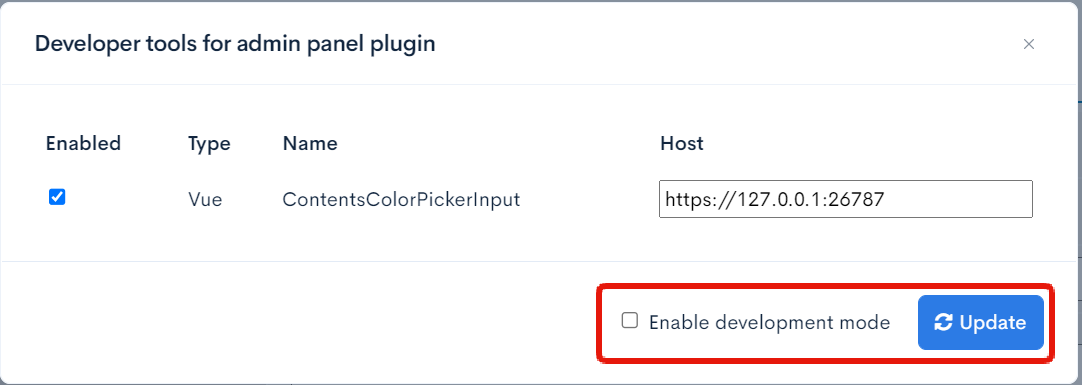
Click [ <> ] in the top right corner to display the developer tools dialog. It should display a list of all detected plugins on the current screen.
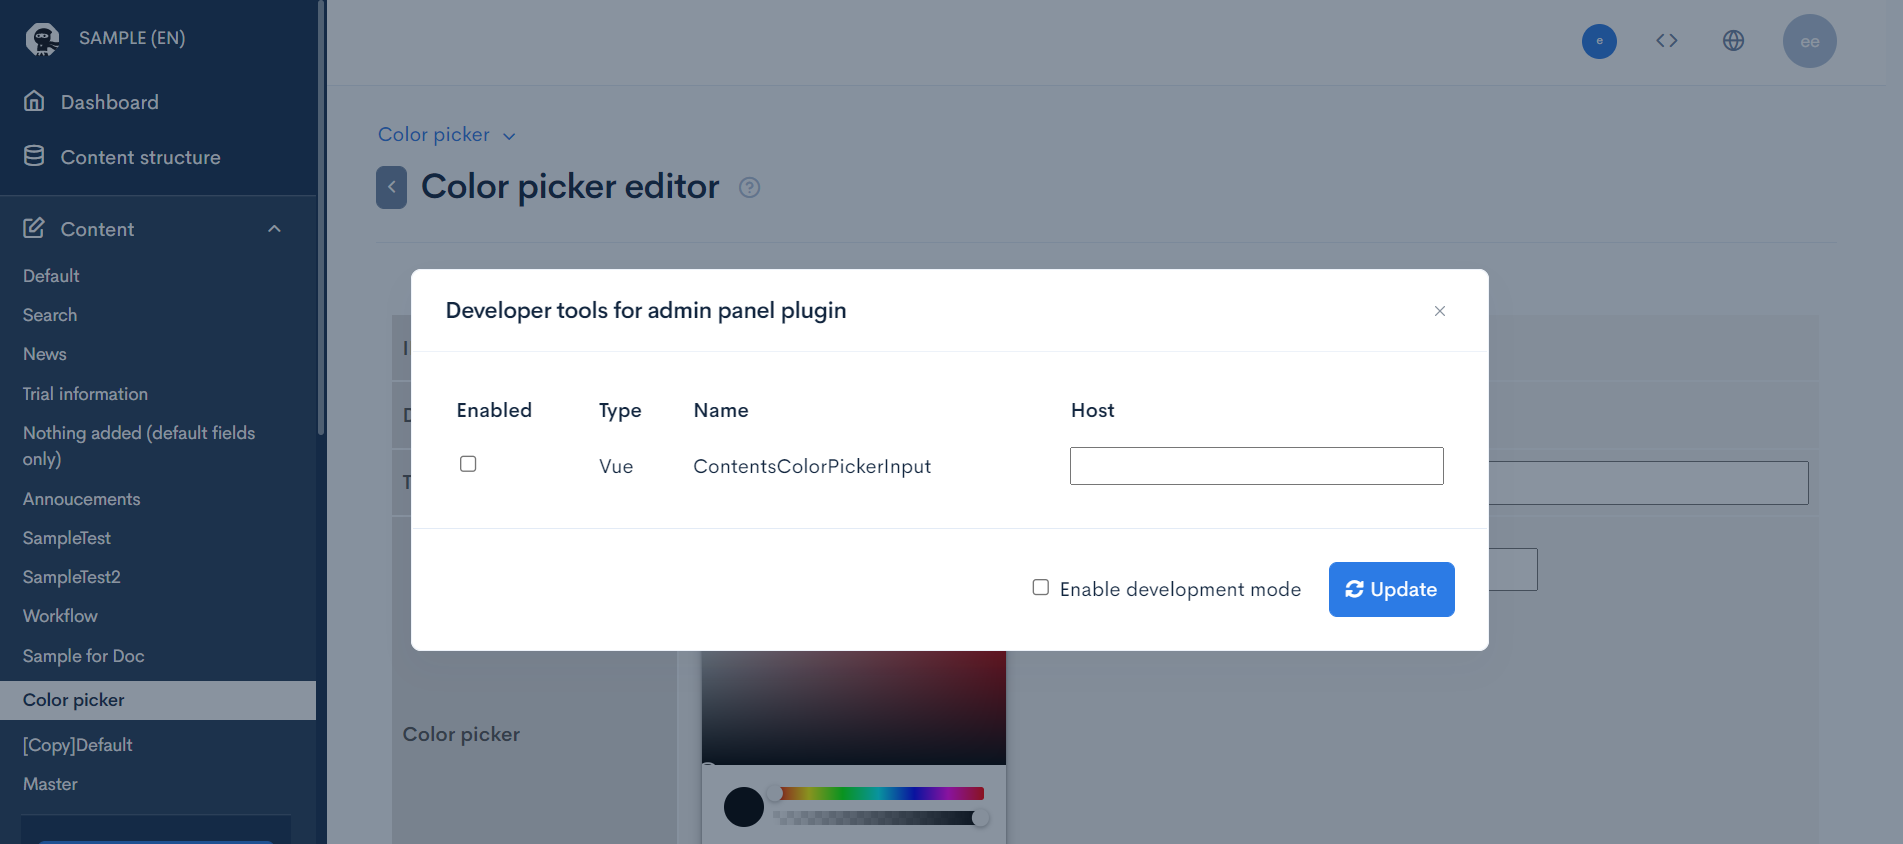
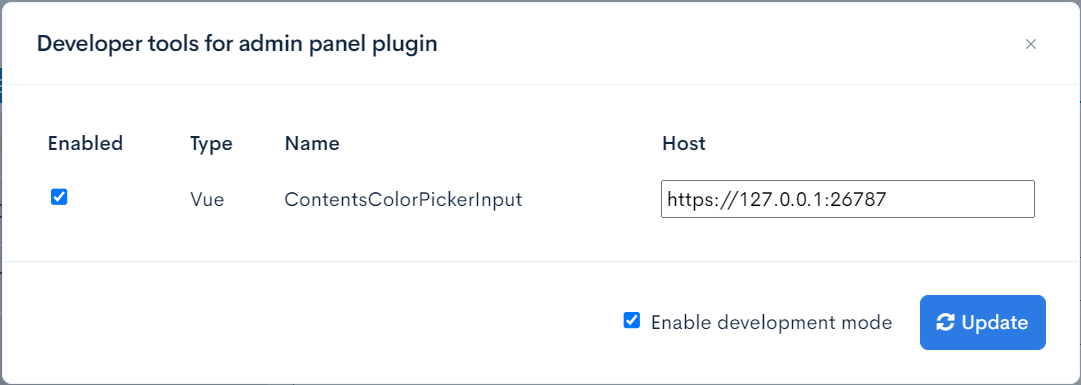
Input the following and click [Update] to save these settings.
| Field | Value | Description |
|---|---|---|
| Enabled | Check this box | Enable development tools on the selected component. |
| Host | https://127.0.0.1:26787 | Enter the host name of the development server. |
| Enable development mode | Check this box | - |
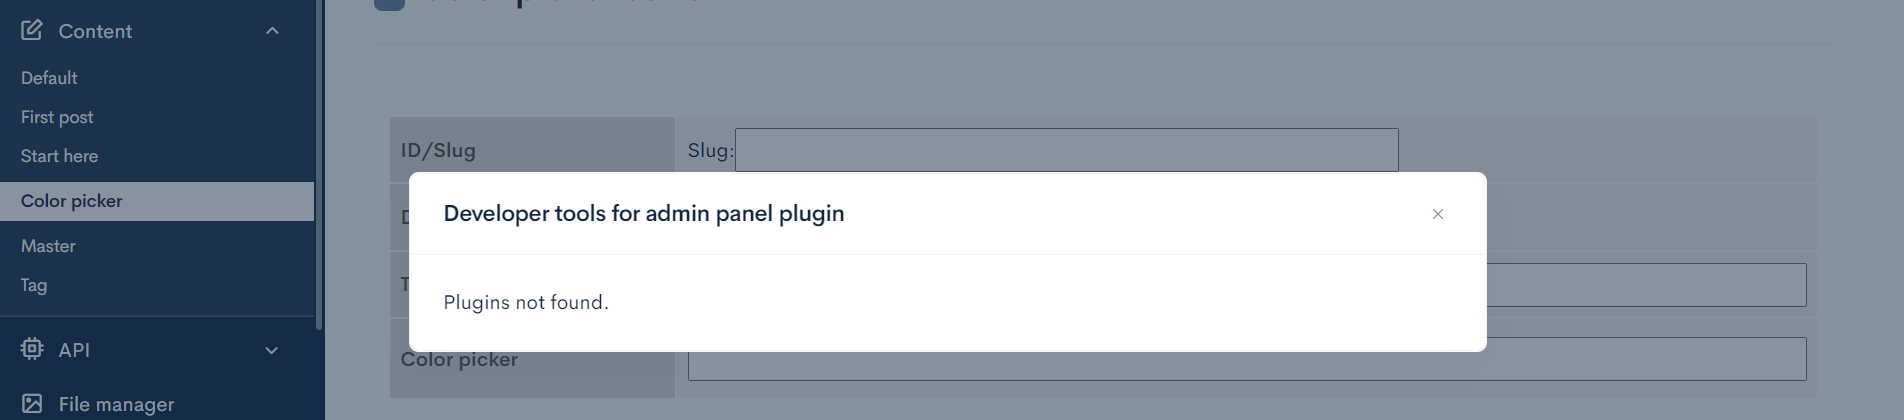
If you see the following error message ("Plugins not found."), there may be errors in your plugin display settings. Go back to the "Admin panel plugin creation" step and make sure you have entered all the information correctly.
Starting the development server
In your local terminal, navigate to the ContentsColorPickerInput directory.
cd management-vue-plugin-sample/packages/ContentsColorPickerInput
Run the following command to start the development server:
npm run serve:https
You should see the execution results below, indicating that the Webpack development server has been launched in the local environment at https://127.0.0.1:26787/.
> contents-color-picker-input@1.0.0 serve:https .../management-vue-plugin-sample/packages/ContentsColorPickerInput
> cross-env WEBPACK_DEV_SERVER=true RCMS_JS_HTTPS=true webpack-dev-server

ℹ 「wds」: Project is running at https://127.0.0.1:26787/
ℹ 「wds」: webpack output is served from /files/user/mng_vue_components

...

ℹ 「wdm」: Compiled successfully.
In your browser, go to the URL https://127.0.0.1:26787/files/user/mng_vue_components/manifest.json.
You will see a privacy certificate error. This can be safely ignored. Click [Advanced] and then [Proceed to 127.0.0.1 (unsafe)].
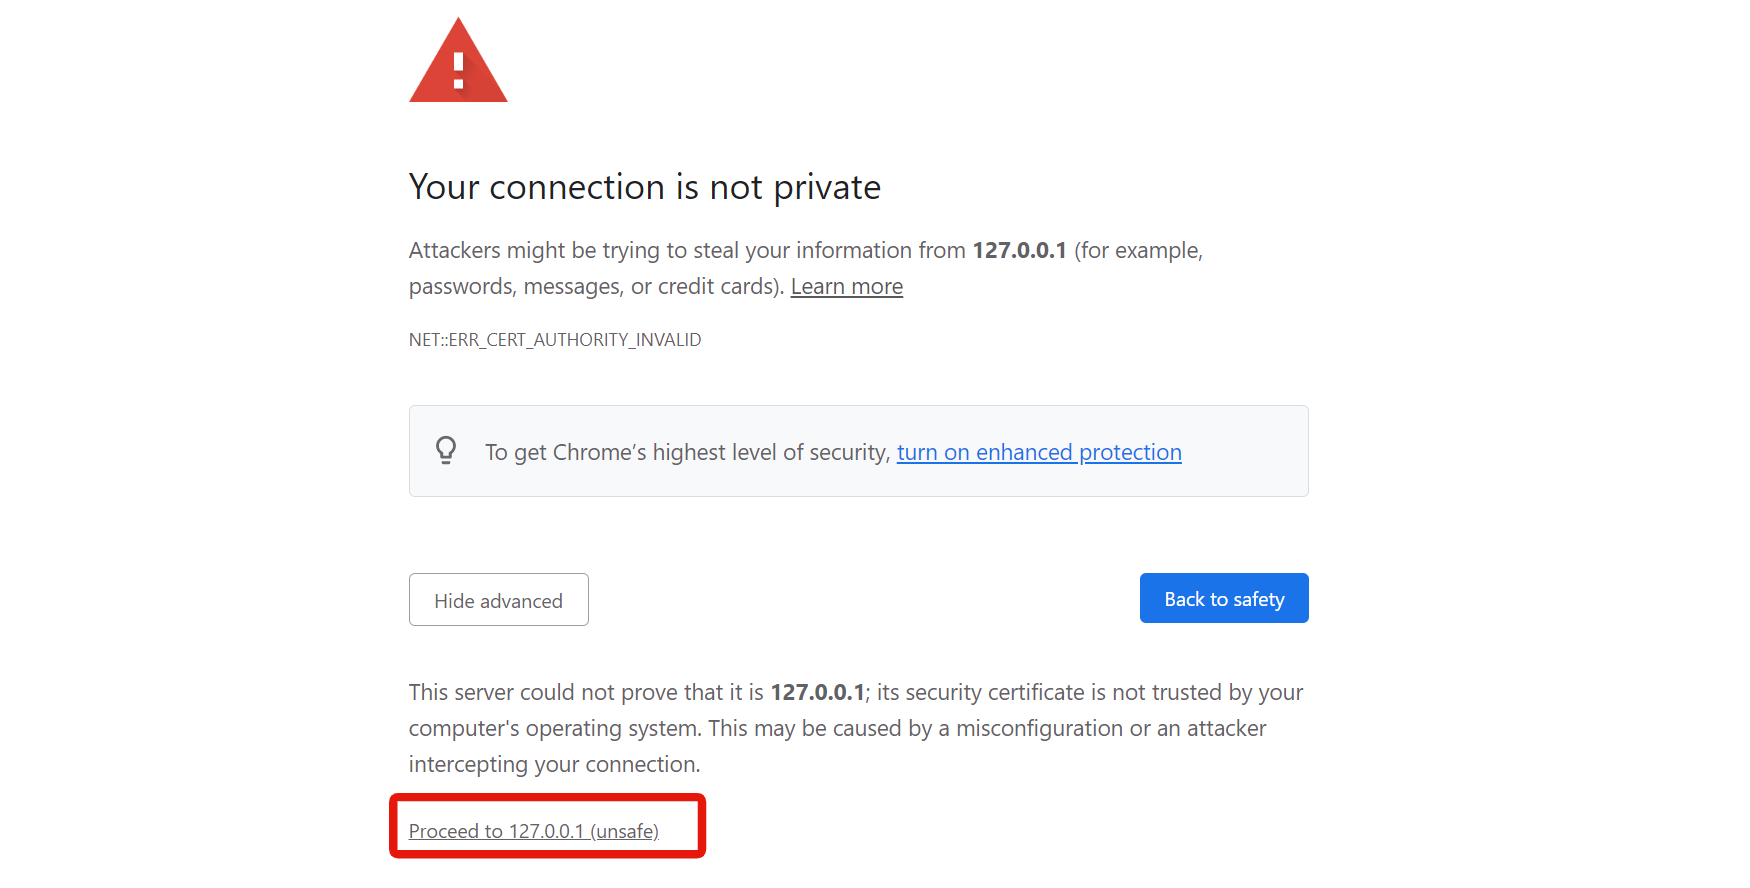
Verify that the contents of manifest.json are correct.

You can safely continue development by ignoring any SSL errors. However, if you wish to resolve them, you can set up a self-signed certificate in your local environment by following the steps below.
Optional: SSL certificate setup
To resolve SSL errors, you can use mkcert to set up a self-signed certificate.
In your terminal, go to any directory and run the following:
mkcert -key-file rcms_js_key.pem -cert-file rcms_js_cert.pem 127.0.0.1
Set the paths to the generated certificate as environment variables in the format RCMS_JS_HTTPS_(TYPE)_FILE. You can use either absolute or relative paths:
export RCMS_JS_HTTPS_KEY_FILE=(path)/rcms_js_key.pem
export RCMS_JS_HTTPS_CERT_FILE=(path)/rcms_js_cert.pem
export RCMS_JS_HTTPS_CA_FILE=(path)/rcms_js_cert.pem
For Windows operating systems, use set instead of export:
set RCMS_JS_HTTPS_KEY_FILE=(path)/rcms_js_key.pem
set RCMS_JS_HTTPS_CERT_FILE=(path)/rcms_js_cert.pem
set RCMS_JS_HTTPS_CA_FILE=(path)/rcms_js_cert.pem
Then, run npm run serve:https again.
Alternatively, you can also set the environment variables and start the development server all in one line:
RCMS_JS_HTTPS_KEY_FILE=(path)/rcms_js_key.pem RCMS_JS_HTTPS_CERT_FILE=(path)/rcms_js_cert.pem RCMS_JS_HTTPS_CA_FILE=(path)/rcms_js_cert.pem npm run serve:https
Component development
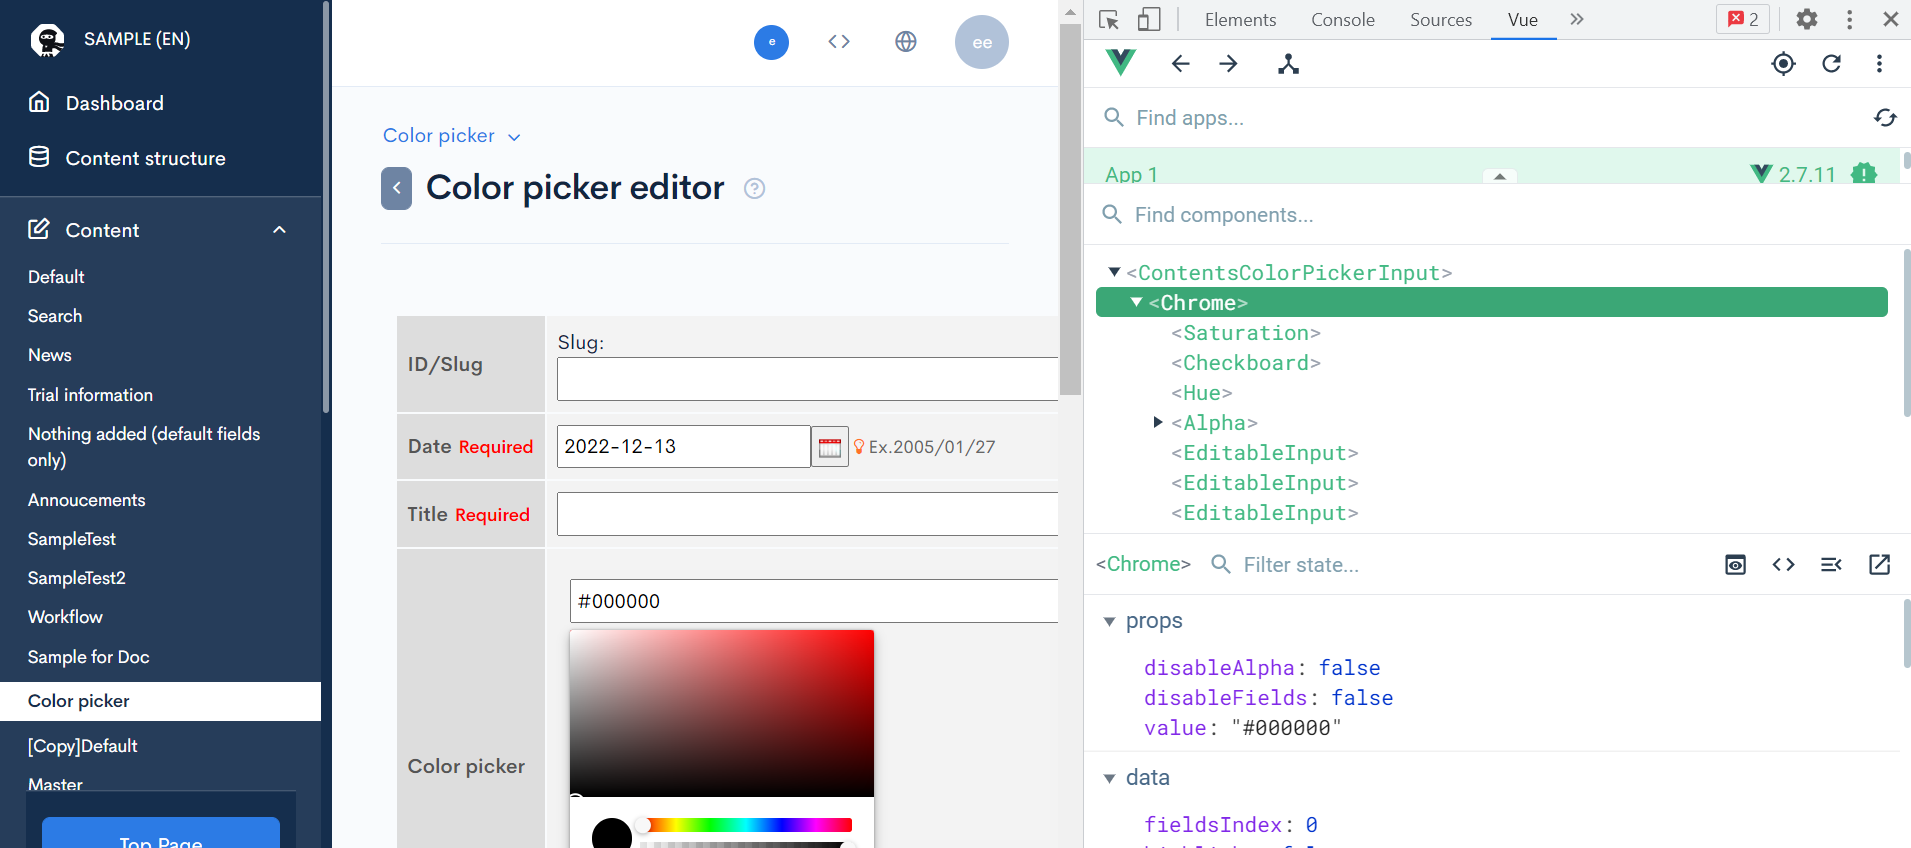
Return to your content editor screen in Kuroco and refresh once. Run the Vue devtools extension in your browser.
If you get the following error, you may need to access Vue devtools from the Inspect Element panel (right click on the page and select [Inspect]):

If synchronization with the local environment has been successful, you should see the detected plugin in Vue:
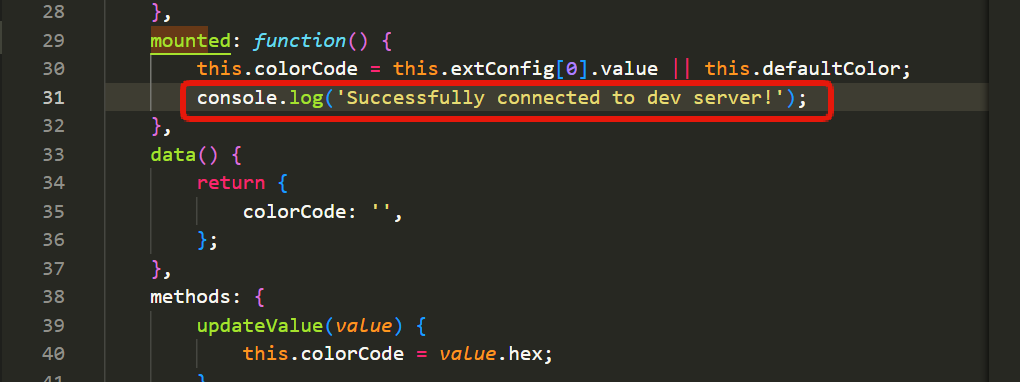
Now, open the file management-vue-plugin-sample/packages/ContentsColorPickerInput/src/pages/ContentsColorPickerInput.vue in your local terminal. Add the following code after mounted() and save the changes:
console.log('Successfully connected to dev server!');
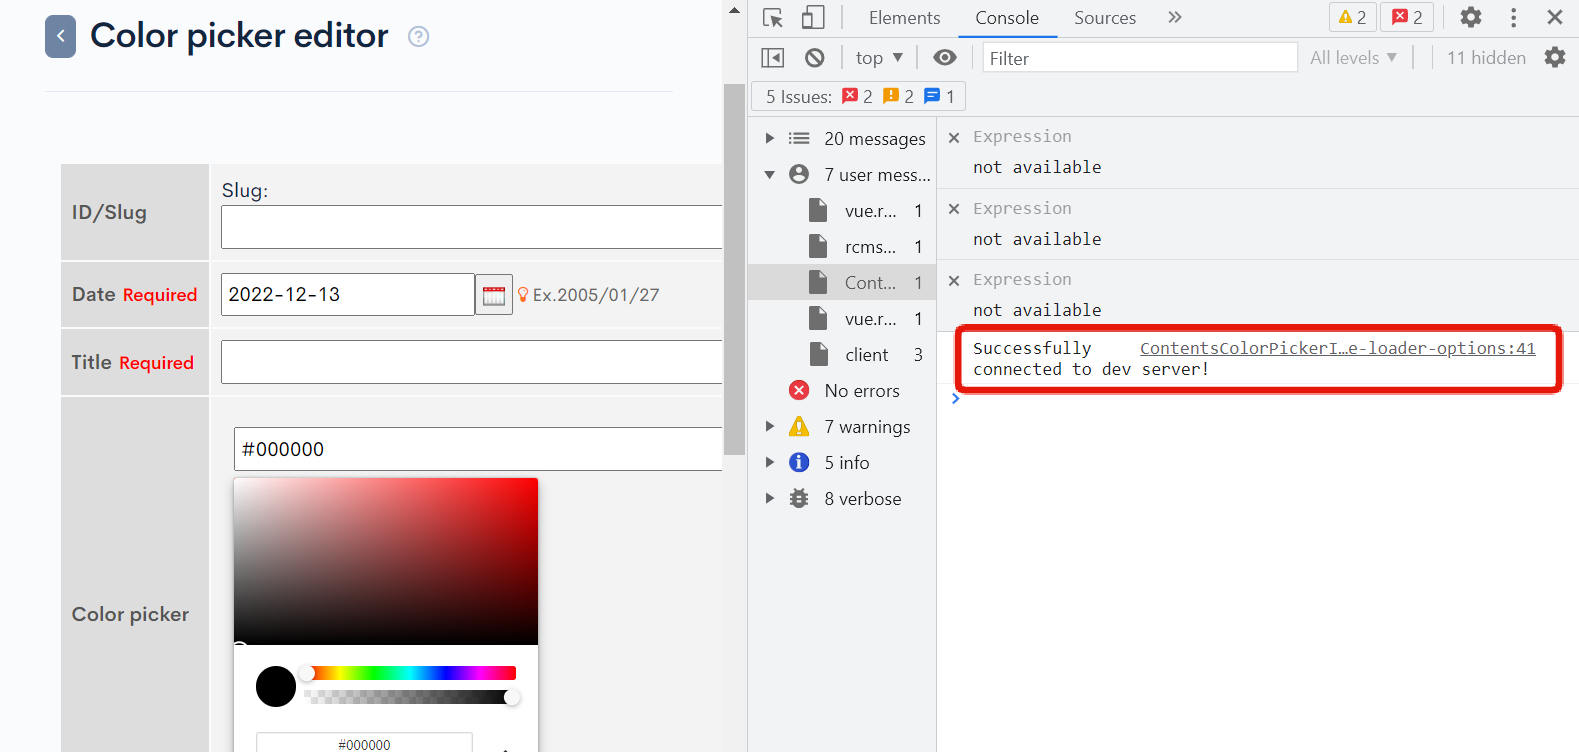
Refresh your content editor screen in Kuroco. You should see the user message you added in the developer tools console.
Delete the console.log() line. Then, find the input element and make the following modification:
<!-- Make the color picker text blue -->
<input
    type="text"
    :name="extConfig[0].ext_col_nm"
    :value="colorCode"
    size="60"
    :style="{ color: 'Blue' }"
/>
The ContentsColorPickerInput package has built-in static code analysis using ESLint and Prettier. If you get a syntax error after saving the file, run the following command to fix it:
npm run lint:fix
Verification and unsync
Then, reload the Kuroco content editor screen and select a color in the color picker. Verify that the text in the color picker field remains blue and does not change with your selection.
When you have finished editing the component, perform the following steps again to reflect the changes in the admin panel:
- Component build
- Component deployment (replace the bundle files in your storage folder)
The final step is to desynchronize with the development server.
Open the Kuroco developer tools dialog, uncheck "Enable developer mode" and click [Update].
Refresh your screen and verify that the changes are preserved.
More information
This tutorial explained how to install a plugin as an additional field in the content editor screen. You can also install plugins on other screens, but the actual setup varies depends on the screen element (i.e., slot) to which they are added.
For a list of all available slots and their settings, see Reference: Slots available for admin panel plugins.
Related documents
Support
If you have any other questions, please contact us or check out Our Slack Community.