Cloud storage integration with Firebase
This tutorial explains how to integrate Firebase with Kuroco.
Through the integration with Firebase, Kuroco can upload, store, and use image or video files stored in Firebase.
Create a Firebase project
Create a Firebase project from the Firebase official website.
To use Cloud Storage for Firebase, you need to set up a billing account and upgrade to the Blaze plan (pay-as-you-go). This tutorial uses the Blaze plan.
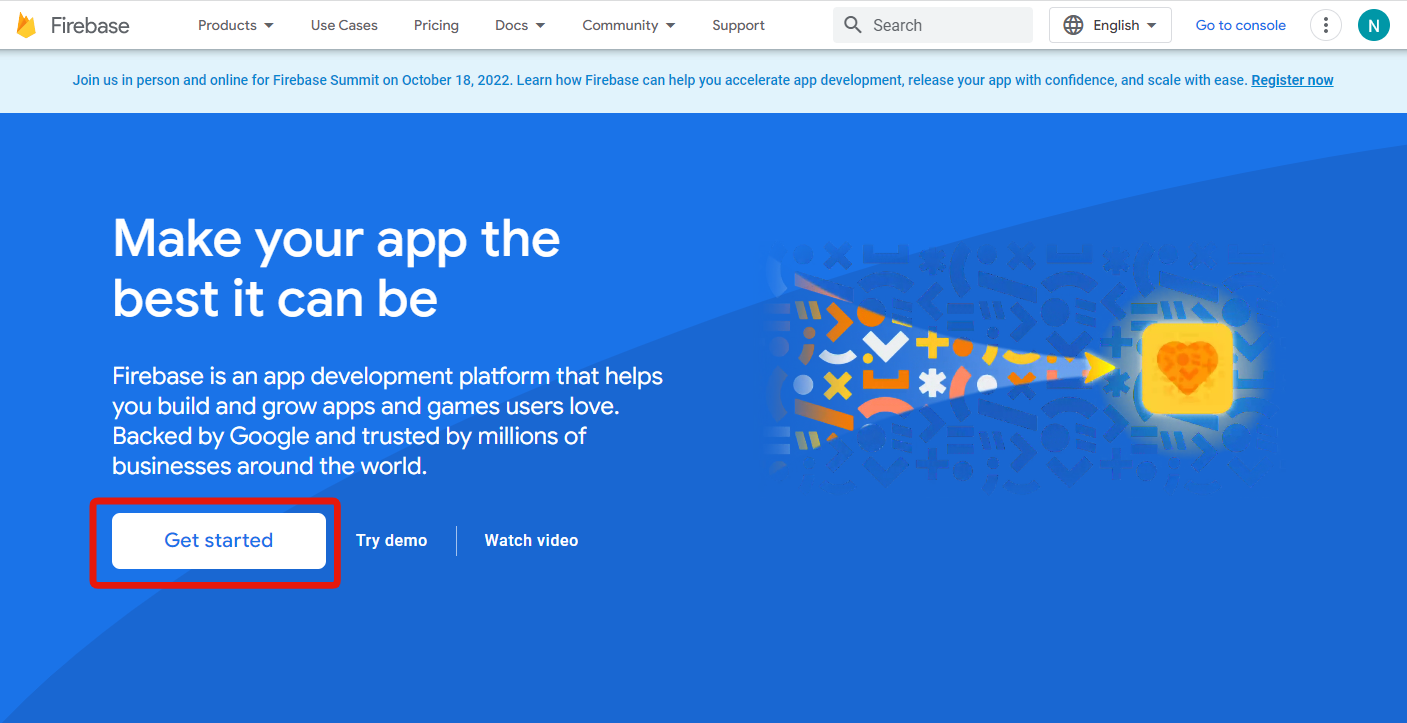
1. Apply for Firebase(Google Cloud Platform)
Go to the Firebase official website and click [Get Started].
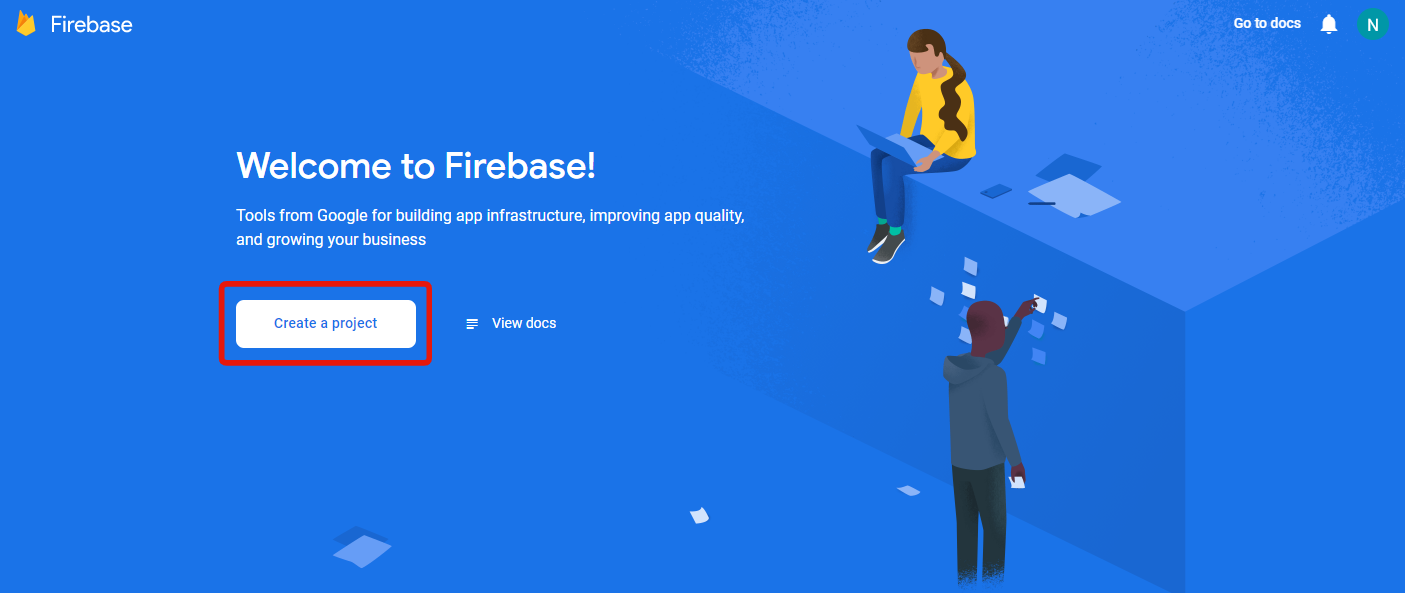
2. Create a project
Click [Create a project] on the "Welcome to Firebase" screen.
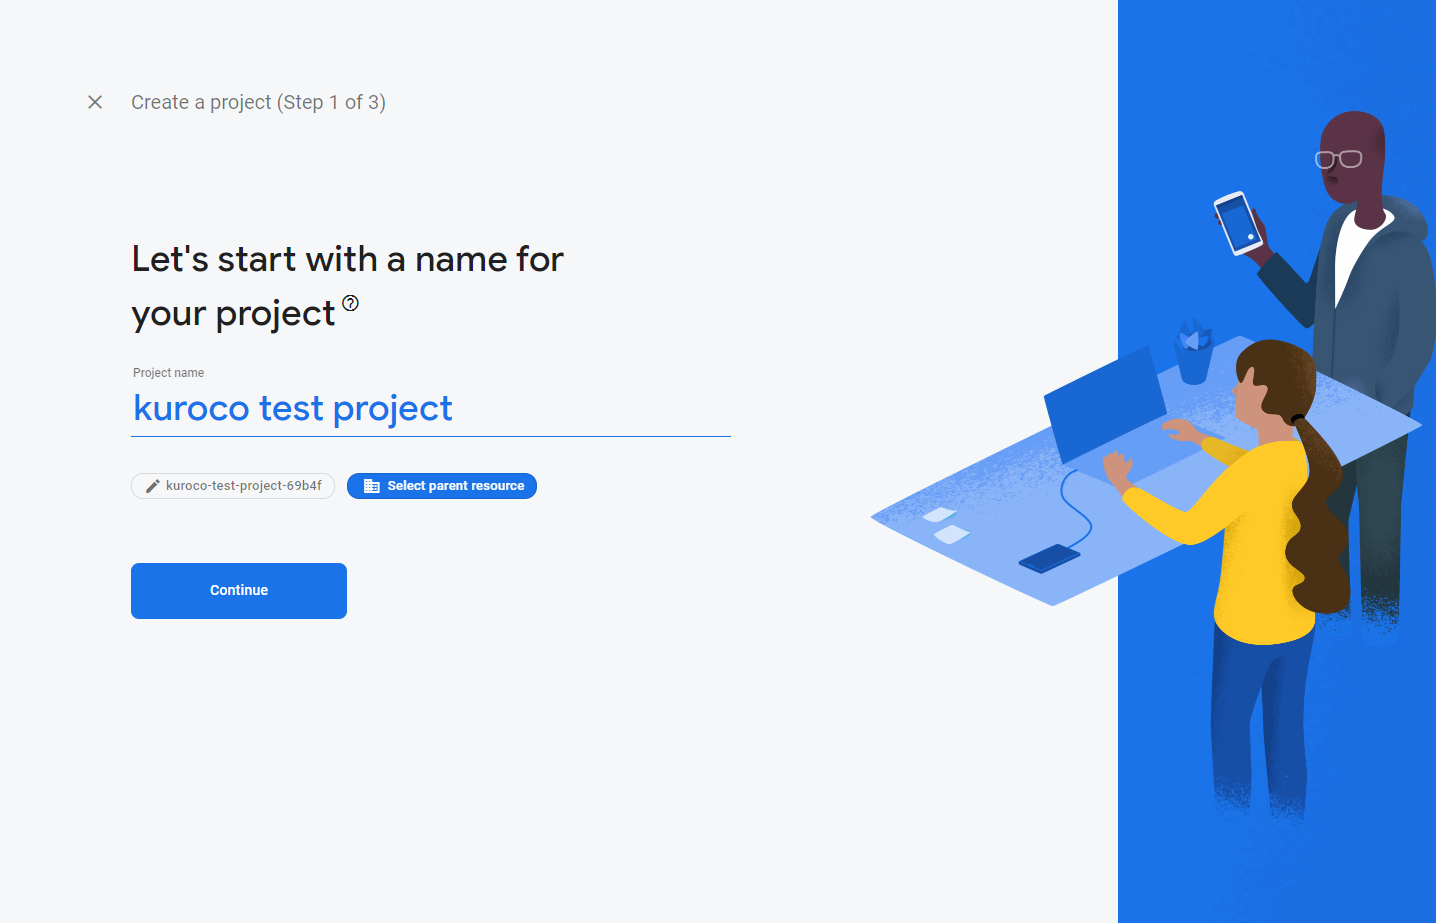
3. Enter the project name and click Continue
Enter the project name, and click [Continue].
Please note that the project name cannot be changed later.
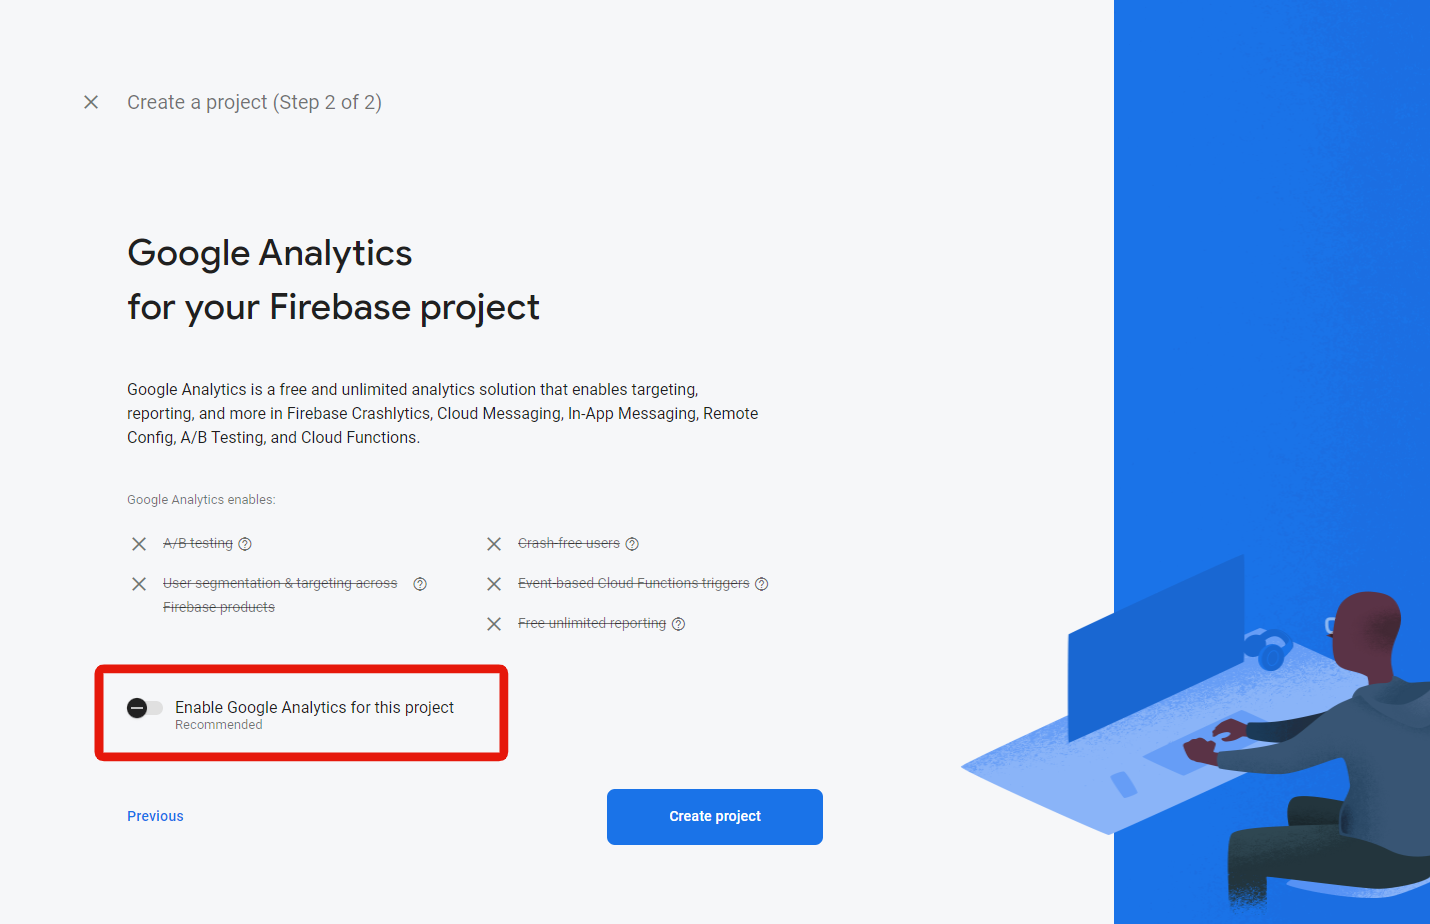
4. Set up Google Analytics
Enable or disable Google Analytics.
If Google Analytics is enabled, the next screen will take you to the account settings page for Google Analytics. For this tutorial, select [Disable].
5. Click Continue after the project has been created
Click [Continue] on the project creation completion screen.
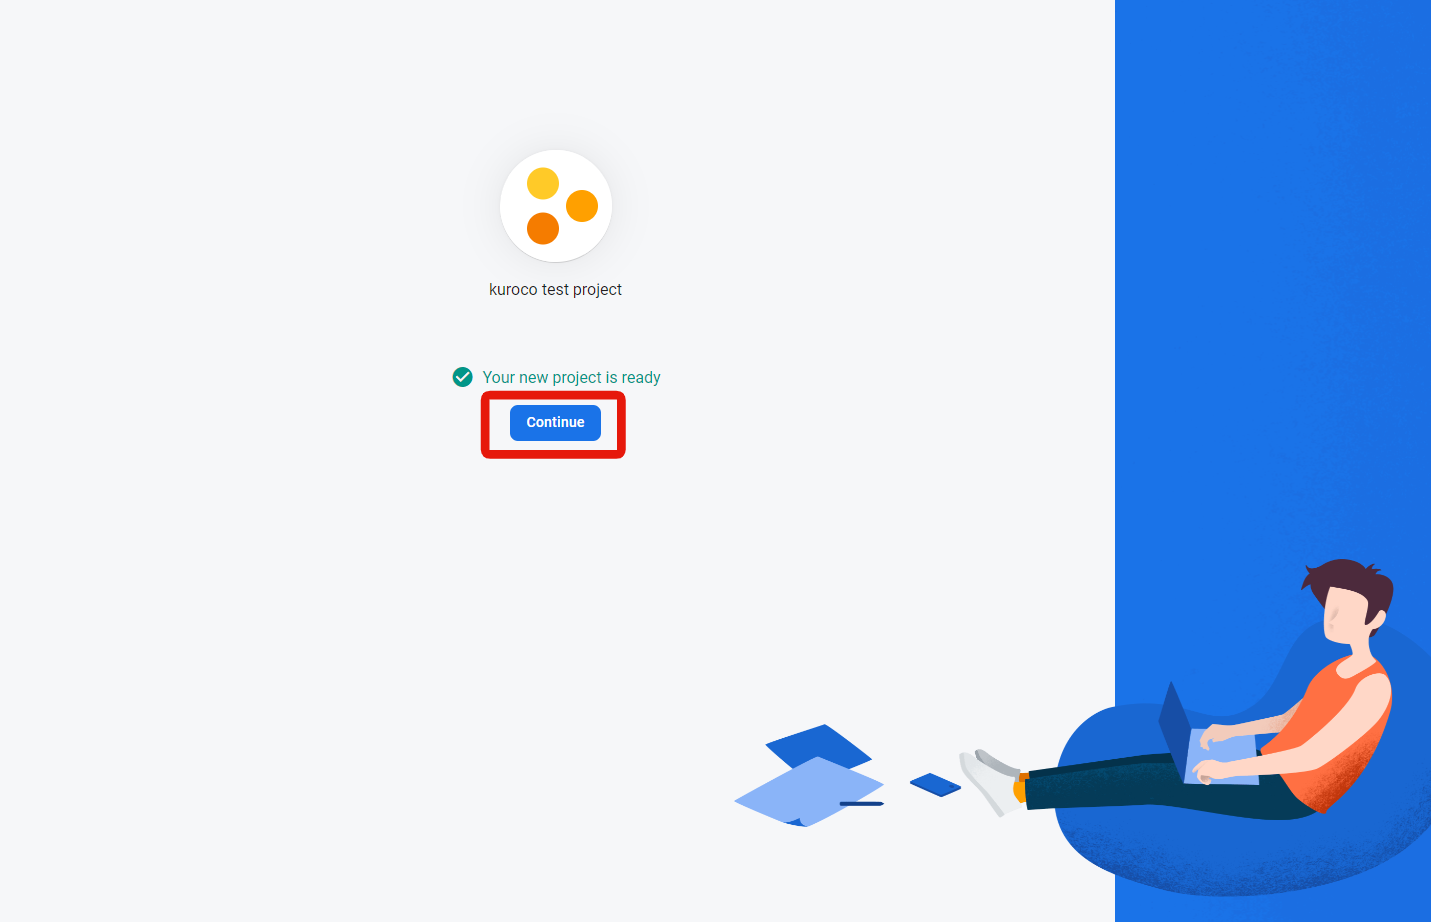
This completes the Firebase project setup.
6. Upgrade to the Blaze plan
To use Cloud Storage for Firebase, you need to upgrade to the Blaze plan (pay-as-you-go).
Click [Upgrade] at the bottom left of the Firebase console, and follow the on-screen instructions to set up a billing account and switch to the Blaze plan.
As of February 3, 2026, Cloud Storage is no longer available on the Spark plan. No-cost usage is still available on the Blaze plan within the free tier limits.
For details: FAQs about Cloud Storage for Firebase changes
We recommend setting up budget alerts when upgrading to the Blaze plan.
Firebase settings / acquiring credentials
We will be focusing on the Firebase management screen for the following steps.
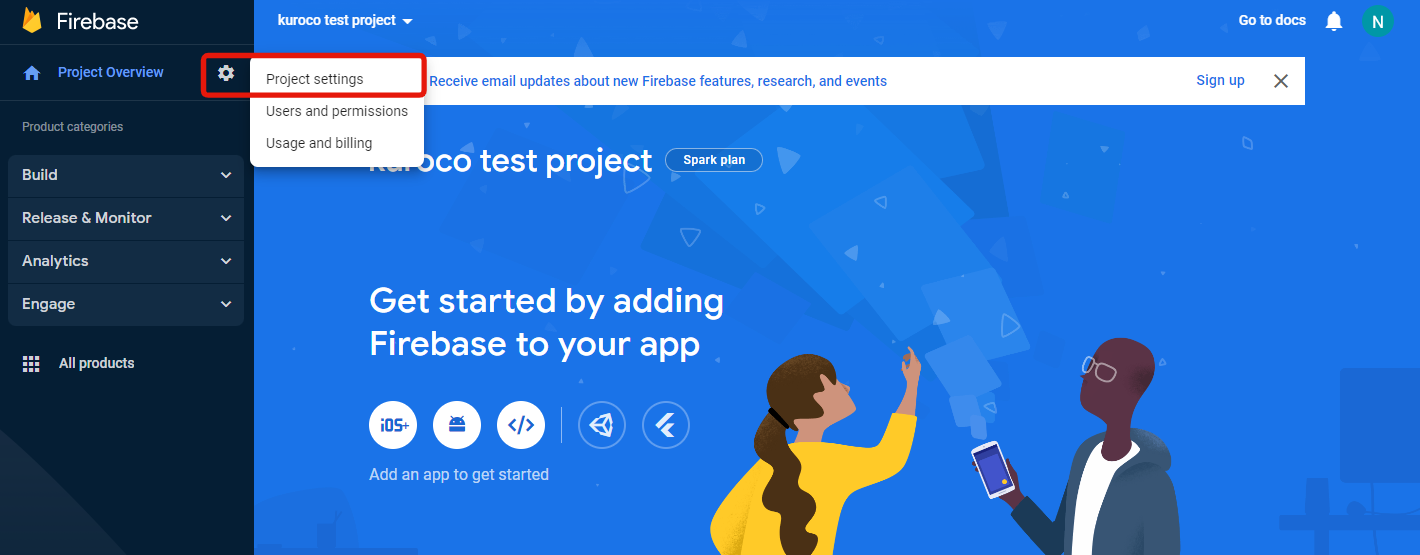
7. Access the [Project Settings]
Click [Project Settings] from the gear icon on the Firebase dashboard.
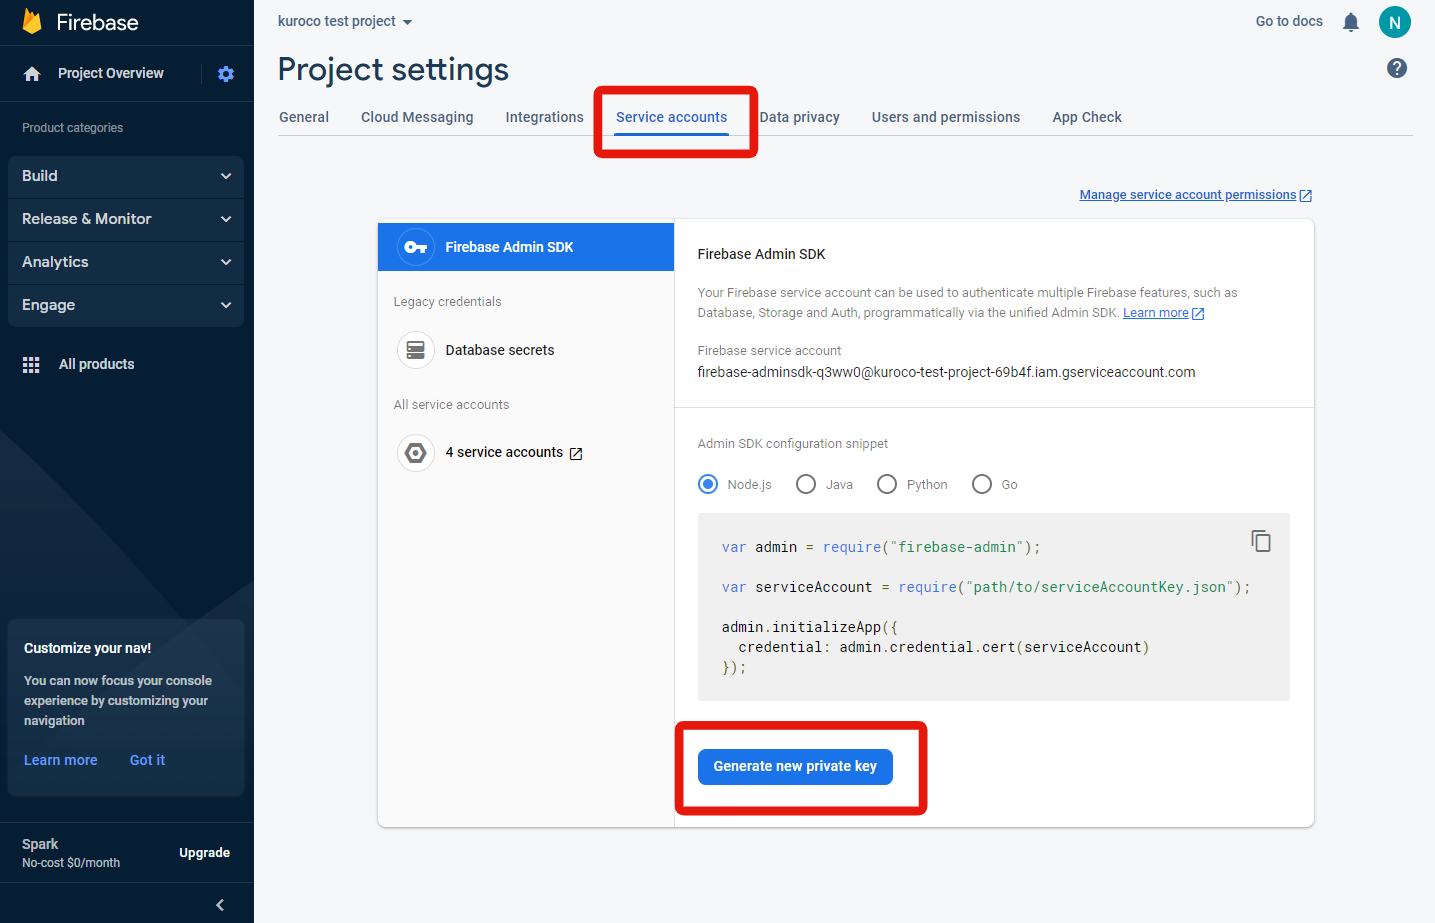
8. Download the private key
Under the [Service accounts] tab, click [Generate new private key].
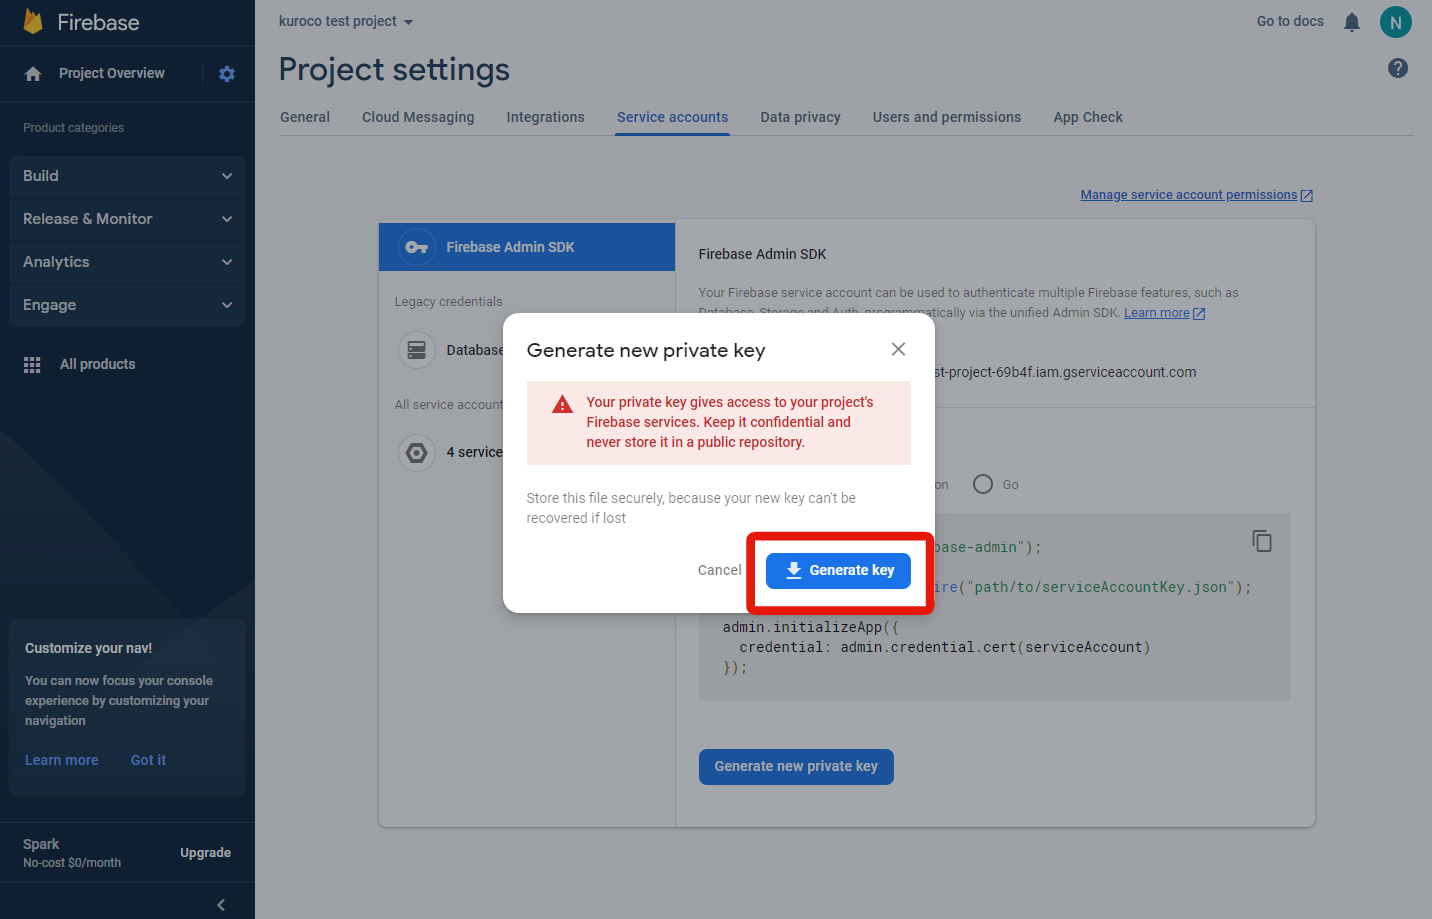
Click [Generate key] in the pop-up and the file will be downloaded.
Save the downloaded file as it will be used later.
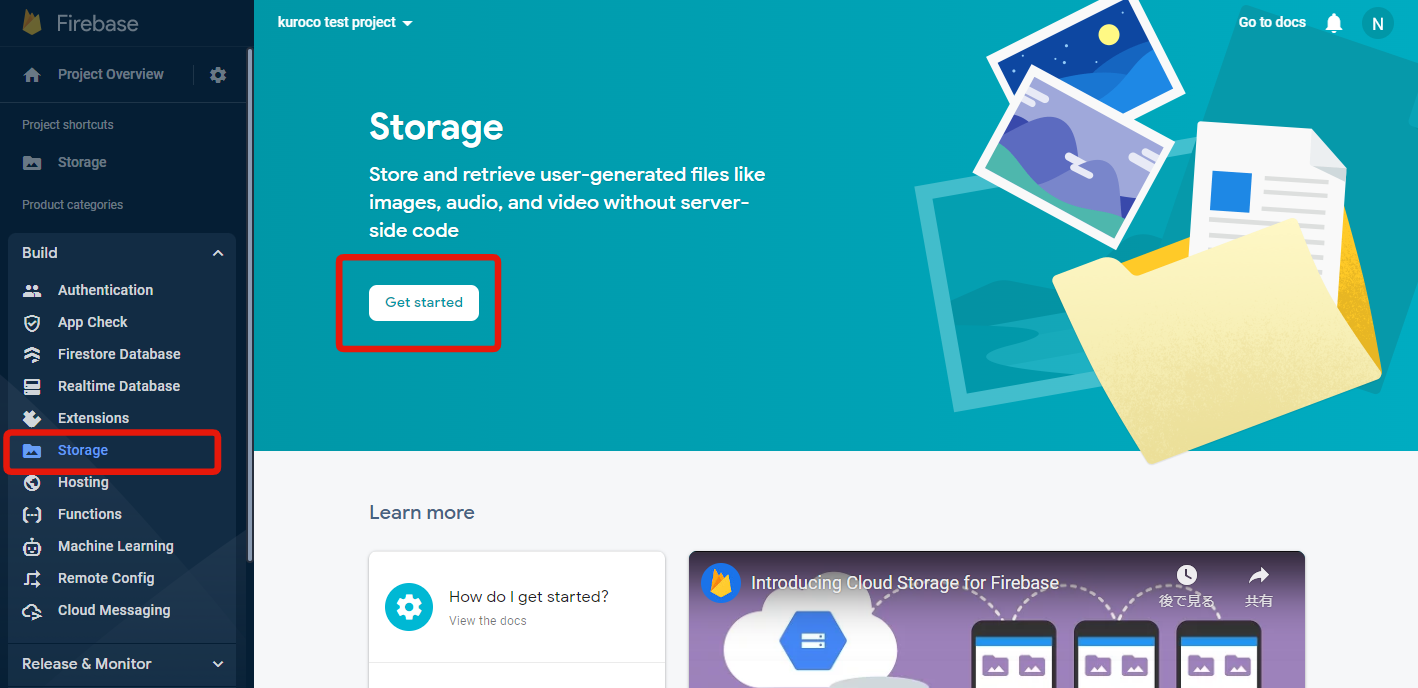
9. Set up to start using Firebase storage
Click [Build] -> [Storage] on the side menu, then click [Get started] on the Storage screen.
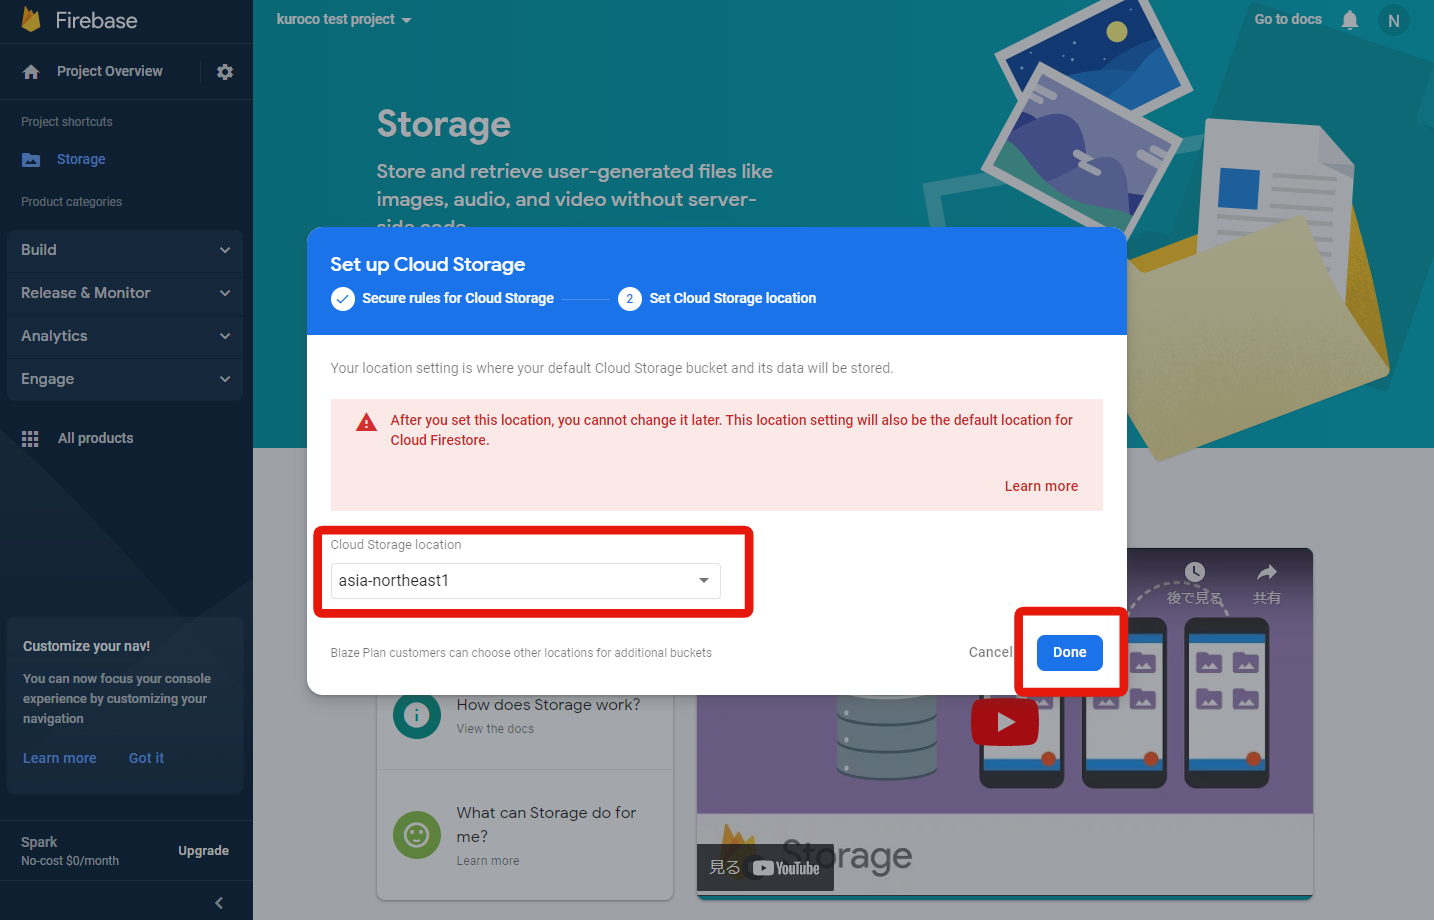
Click [Next].

Select a location that is most suitable for your organization.
In this example, "asia-northeast1" was selected for the Cloud Storage location.
After selecting the desired location, click [Done].
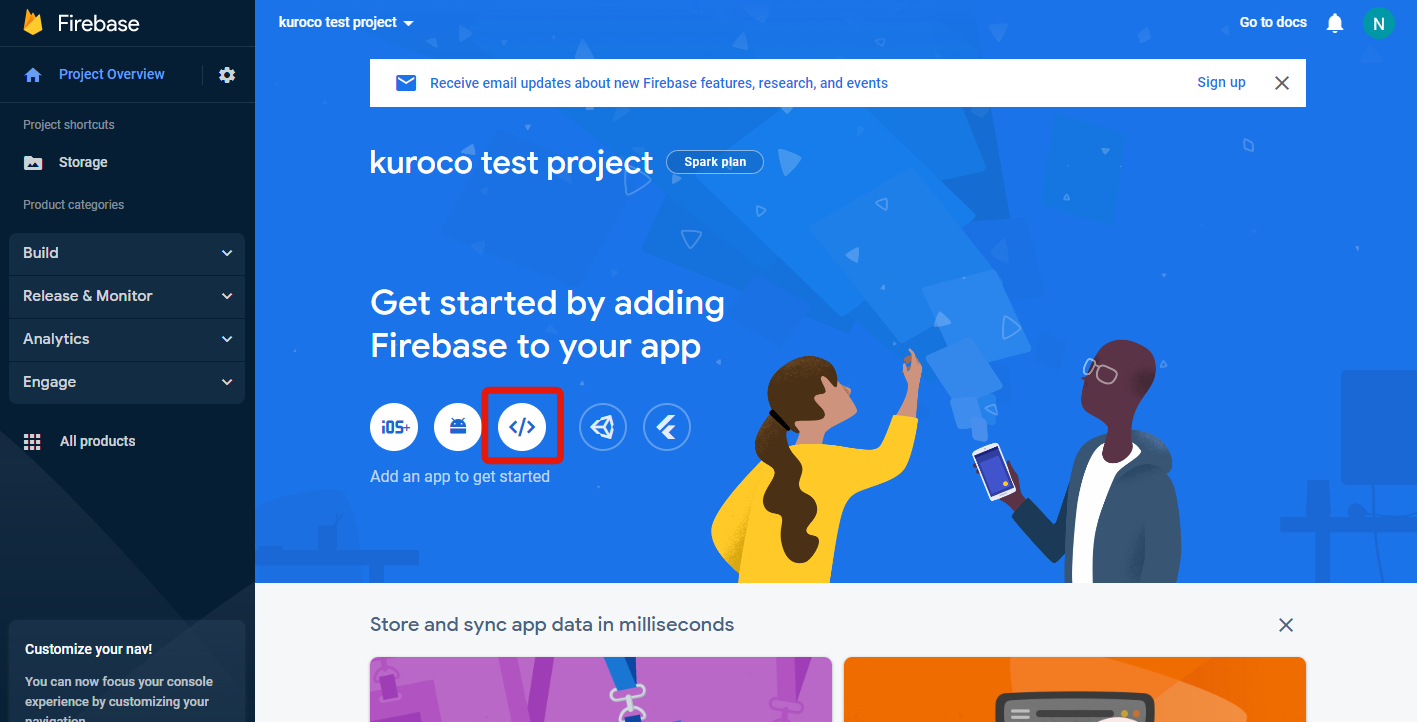
10. Additional settings for Firebase app
Select [Project Overview] on the side menu to return to the project main page, and click the WEB type app [</>] icon.
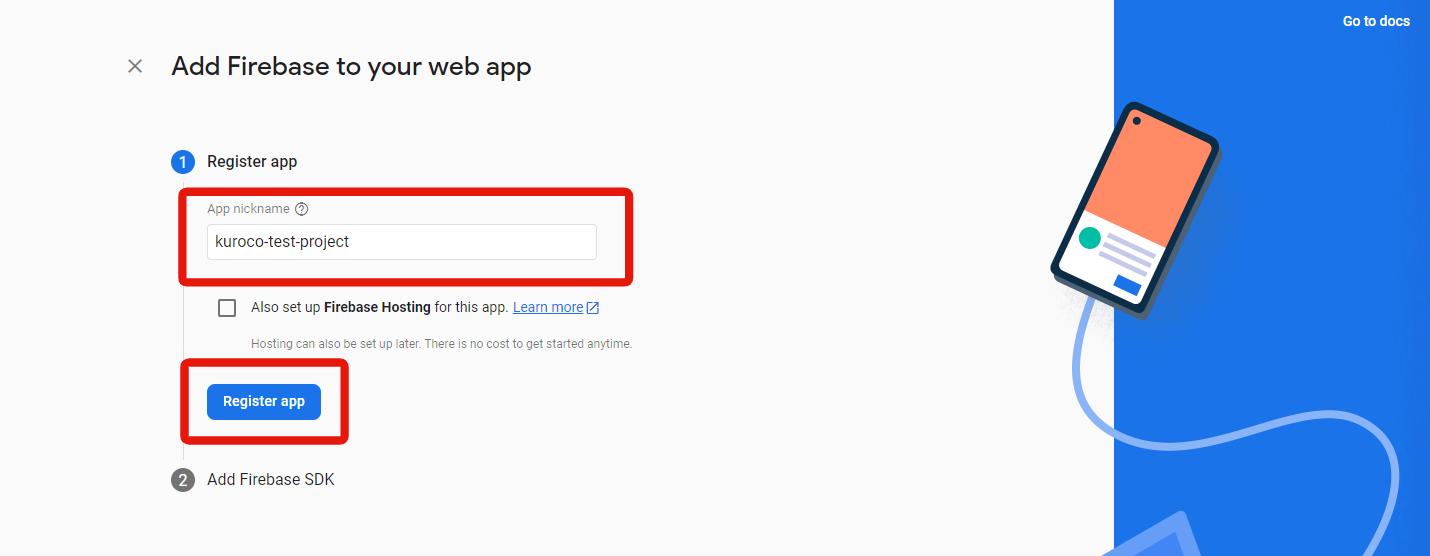
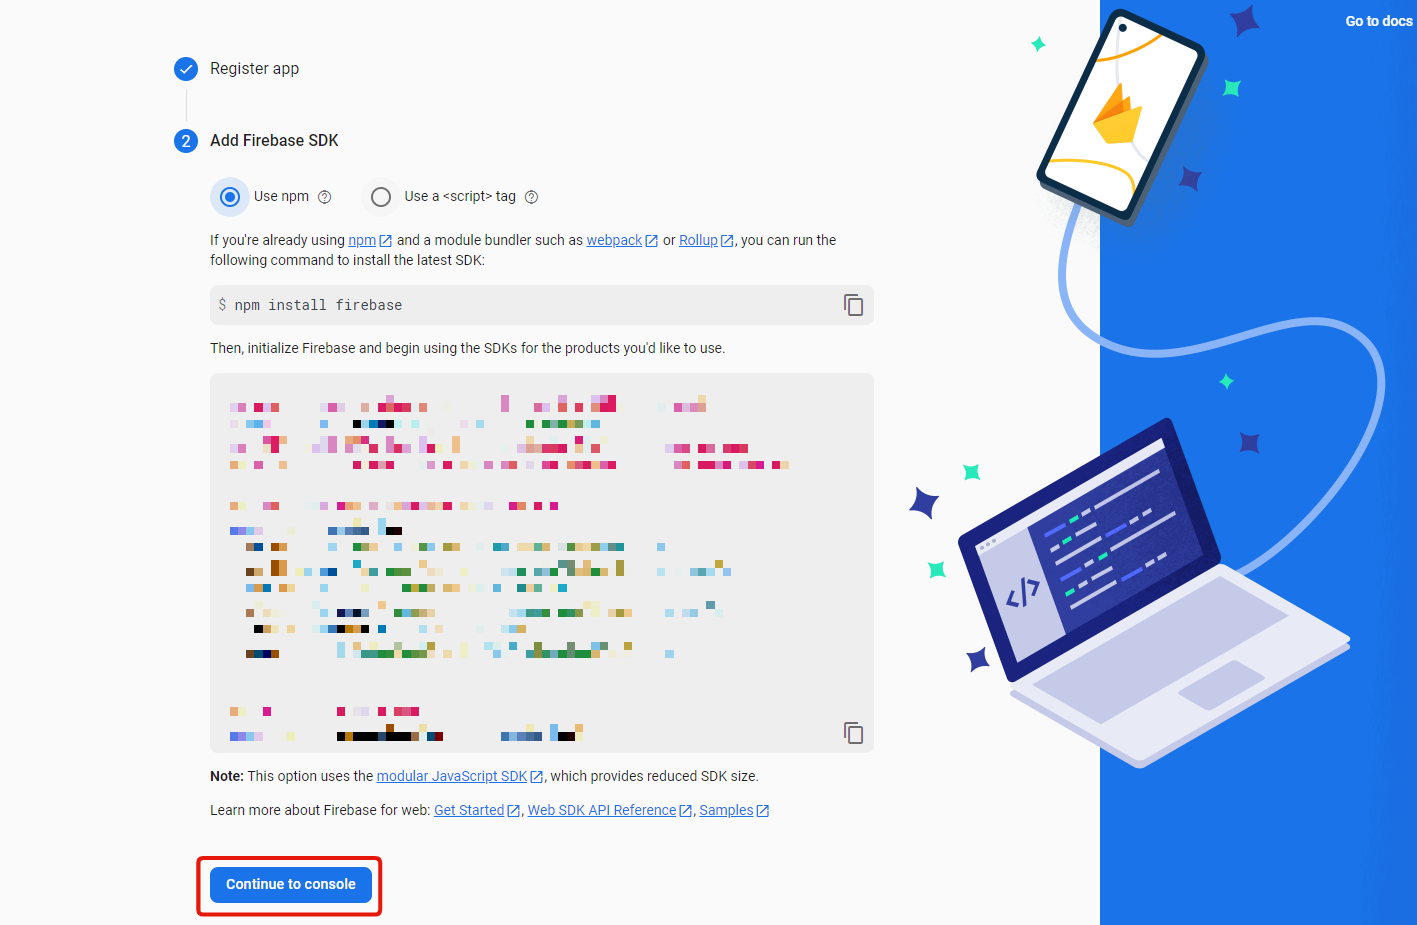
Enter the app nickname and click [Register App].
The "Add Firebase SDK" screen will be displayed. Click [Continue to the console].
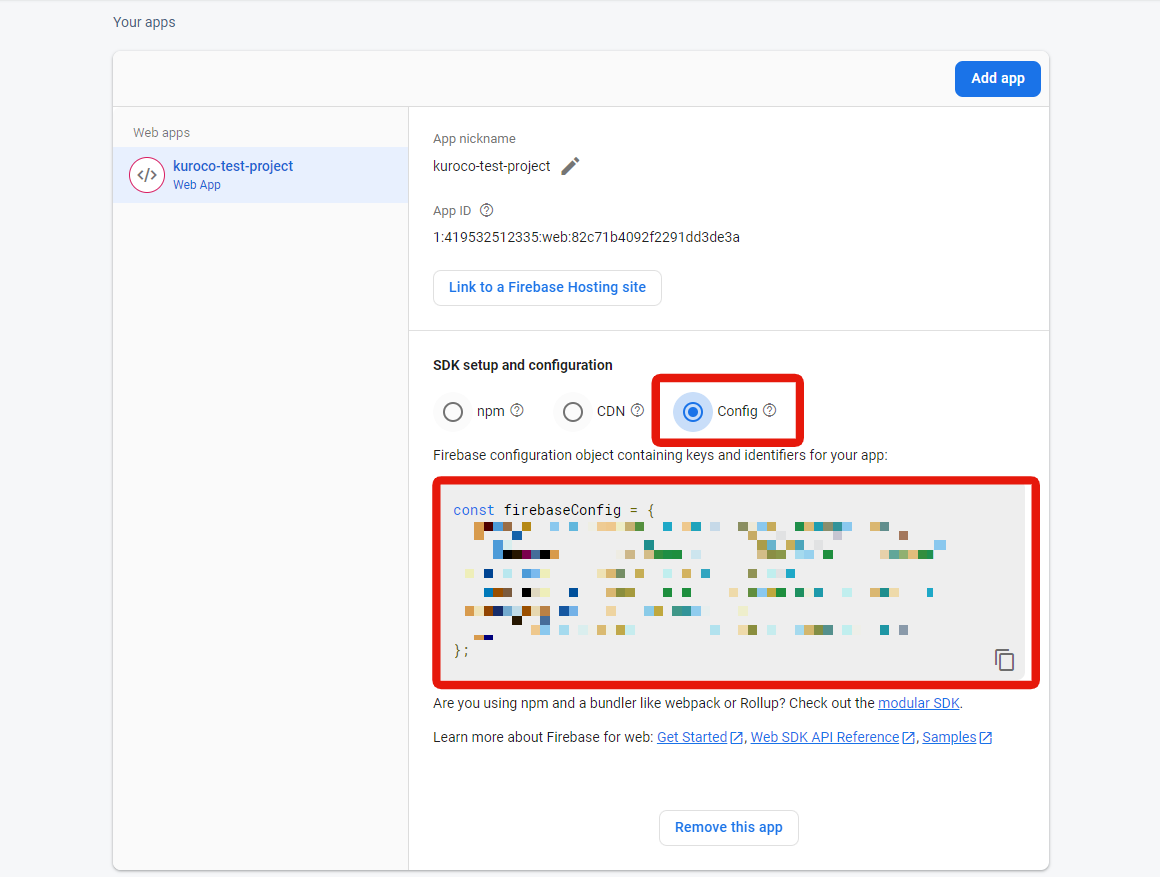
11. Get the FirebaseConfig
Click the gear icon next to "Project Overview" to access the [Project settings] screen.
Scroll down the page, under "Your apps" -> "SDK setup and configuration", select "Config".
The firebaseConfig will be displayed. Copy it, it will be used later.
Kuroco settings
We will be focusing on the Kuroco's management screen in the following steps.
12. Set up the credentials, obtained in steps 8 and 11 above, on the Firebase's setting screen
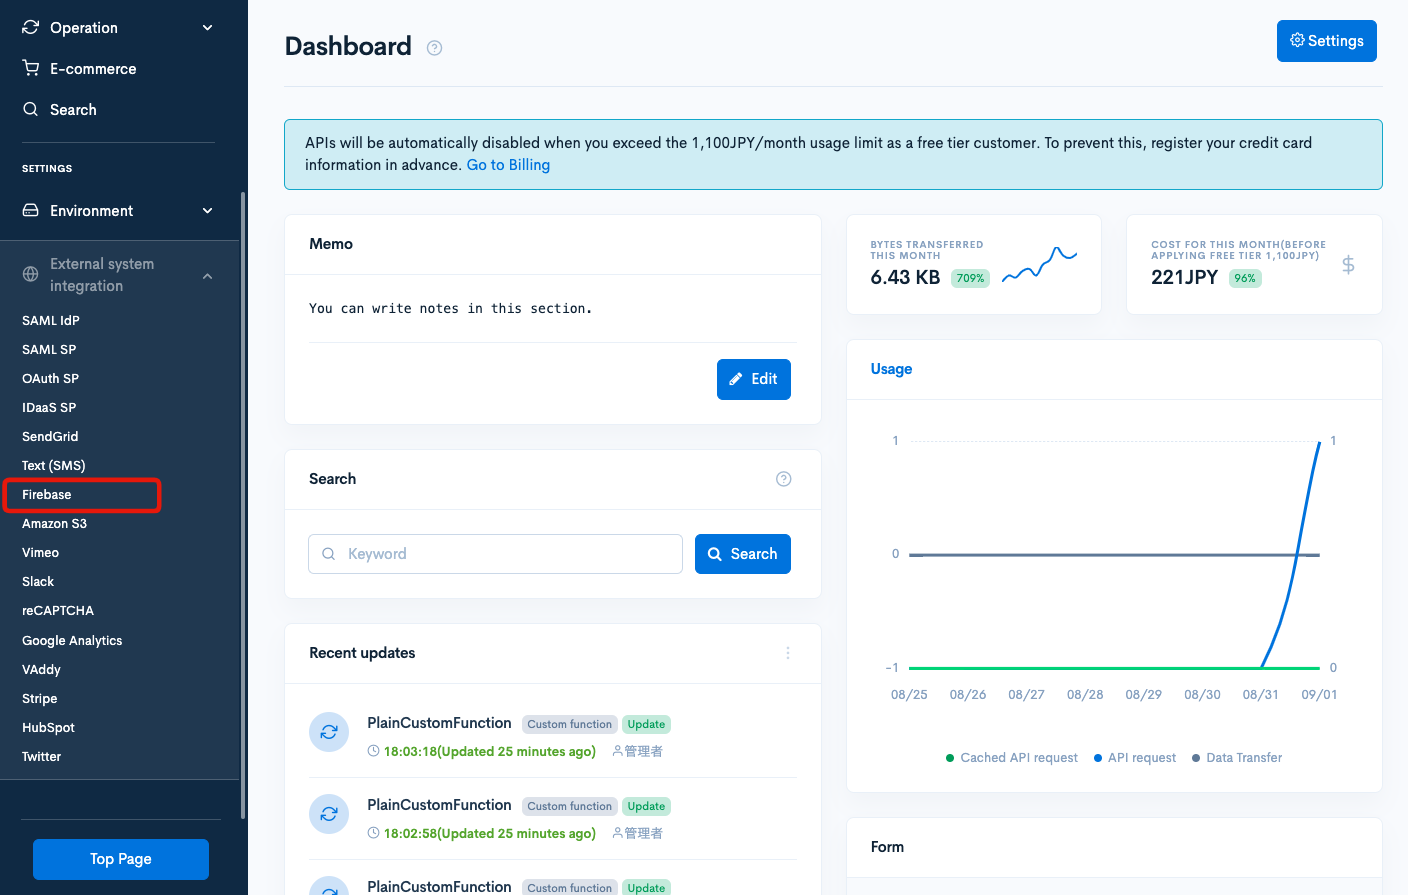
Click [External system integration] -> [Firebase] on the side menu of Kuroco's management screen.
Upload the file obtained in "8. Download the private key" to 'Credentials'.
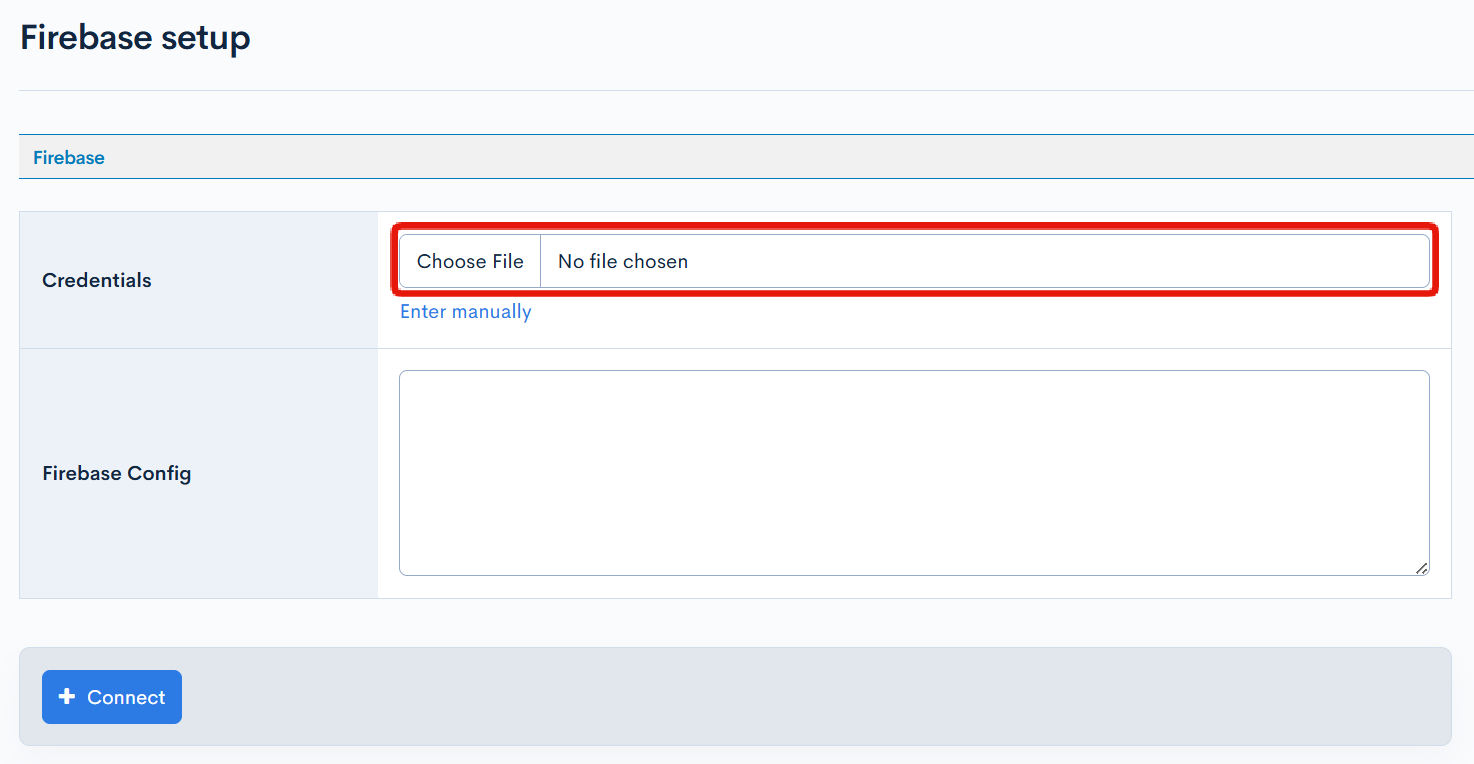
Next, paste the FirebaseConfig obtained in "11. Get FirebaseConfig" in the 'App Config' field.
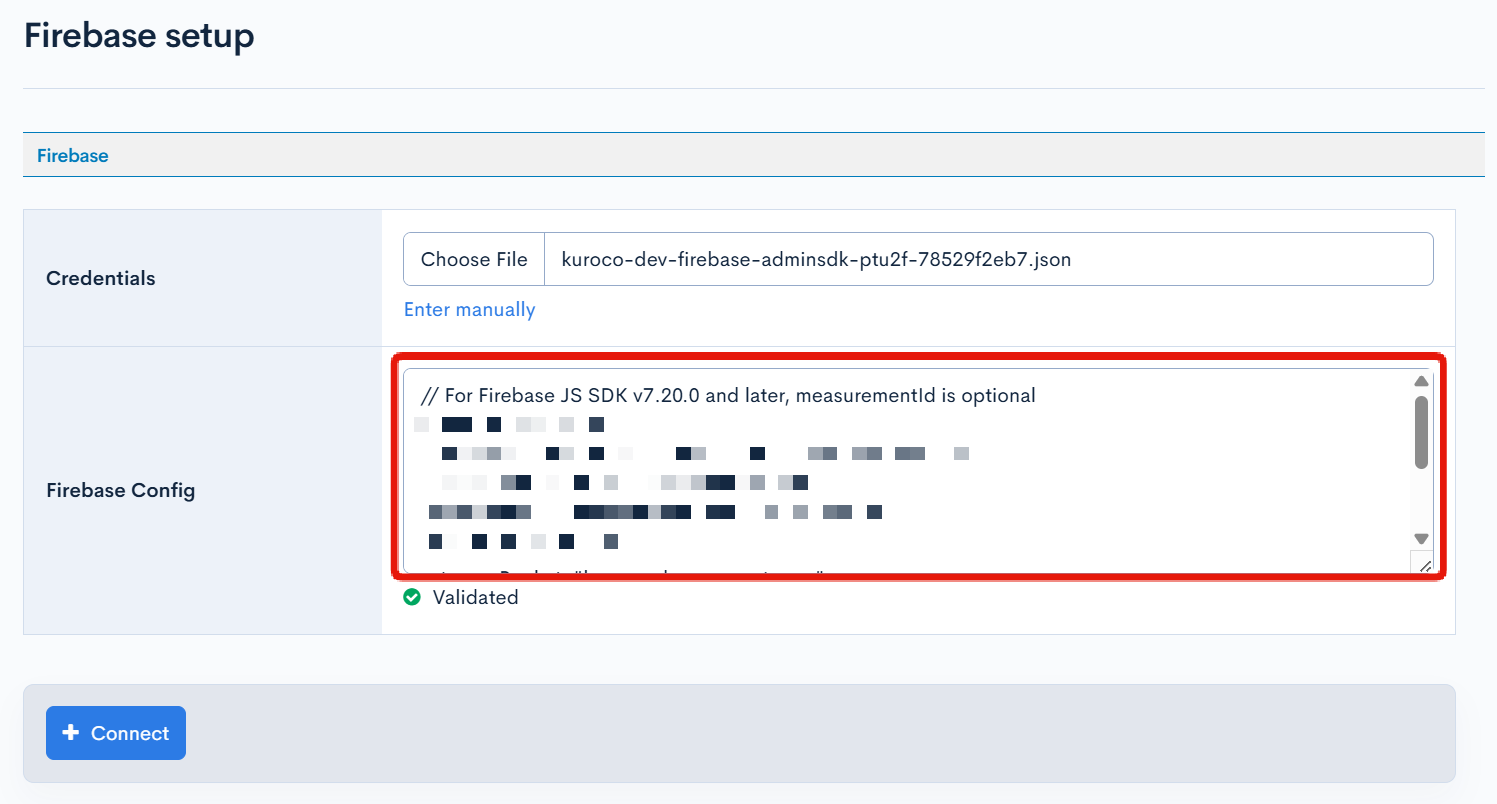
Click [Connect].

13. Enable Storage
Check [Enable] for "Storage" and click [Update].
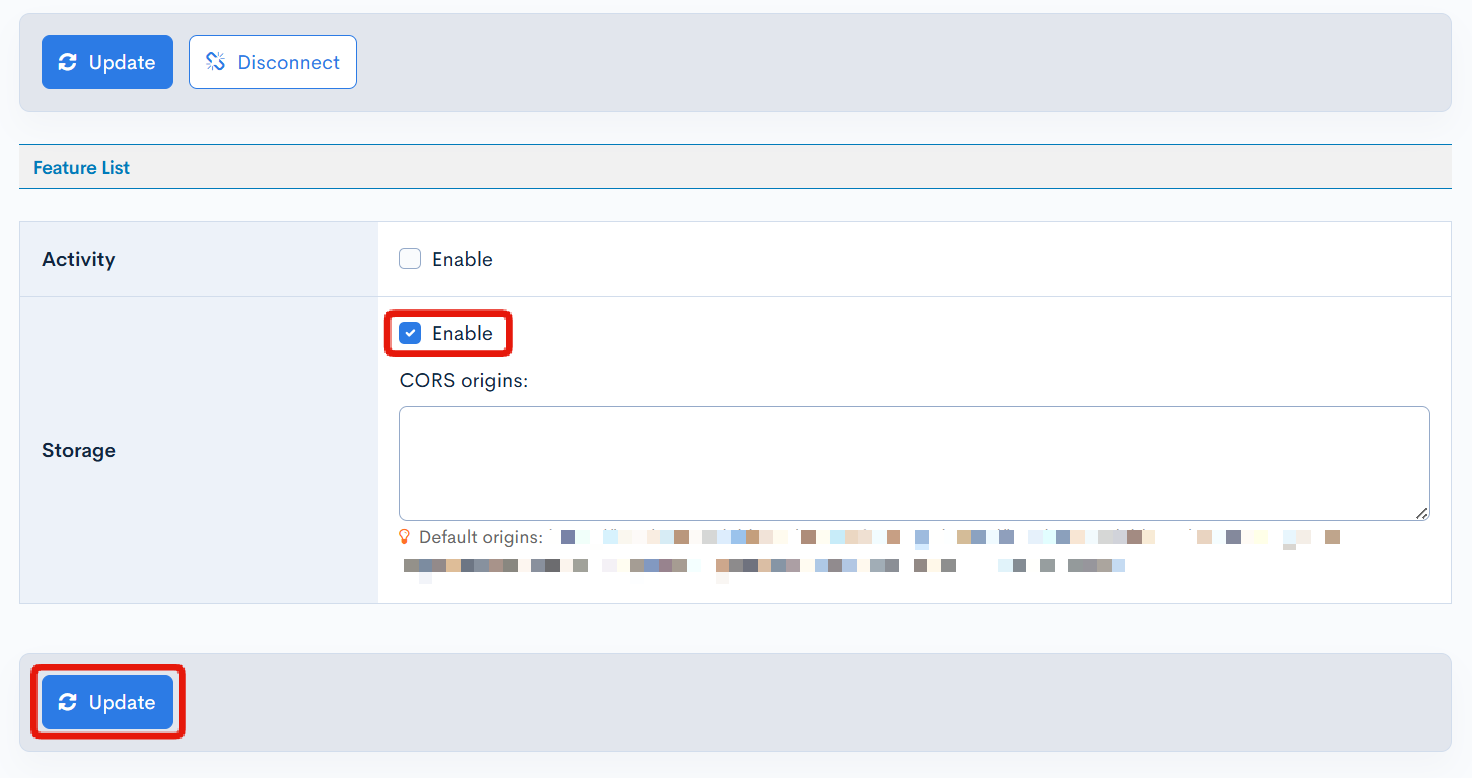
This completes the integration with Firebase.
Upload files
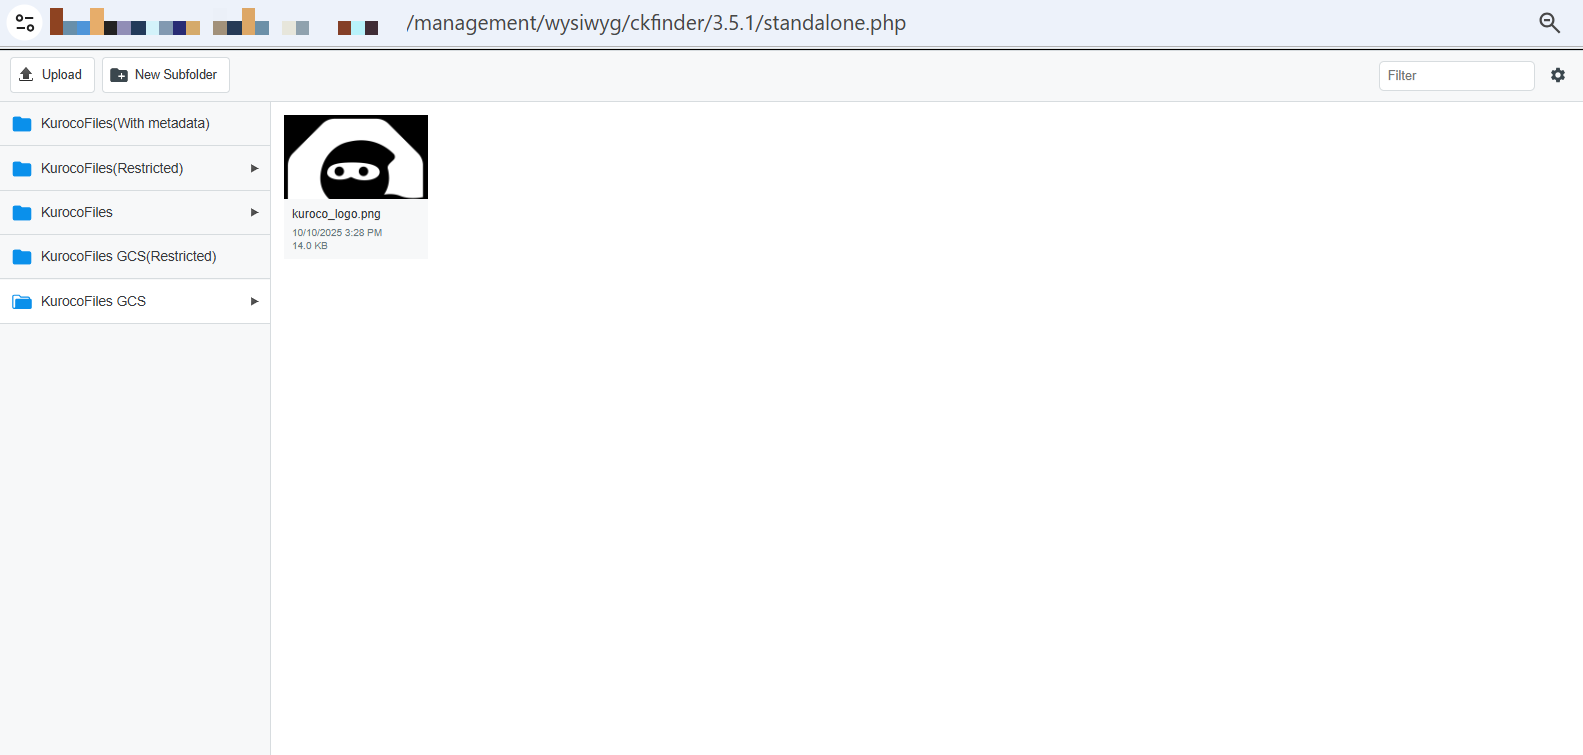
From File manager
In the sidebar menu, select [File manager] to access the GCS folder and upload your file.
From Content editor
File (upload to GCS)
On Kuroco's Content structure screen, select [File(upload to GCS)] in the field settings.
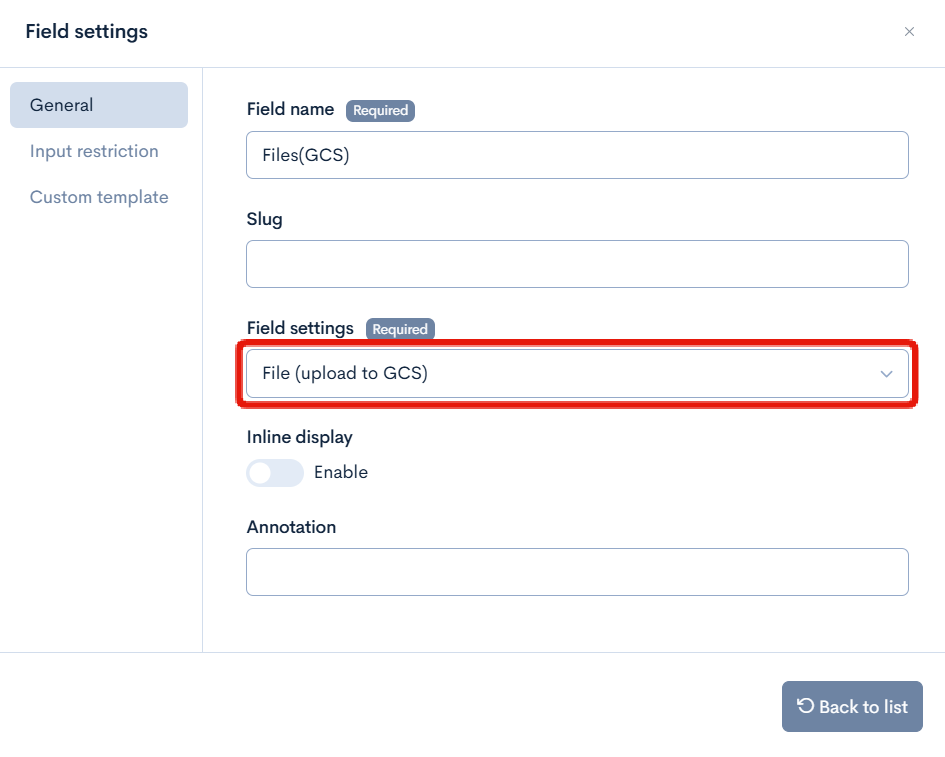
The file upload field will be displayed on the content edit screen.

If a file is uploaded from here, it will be uploaded to Firebase Storage.
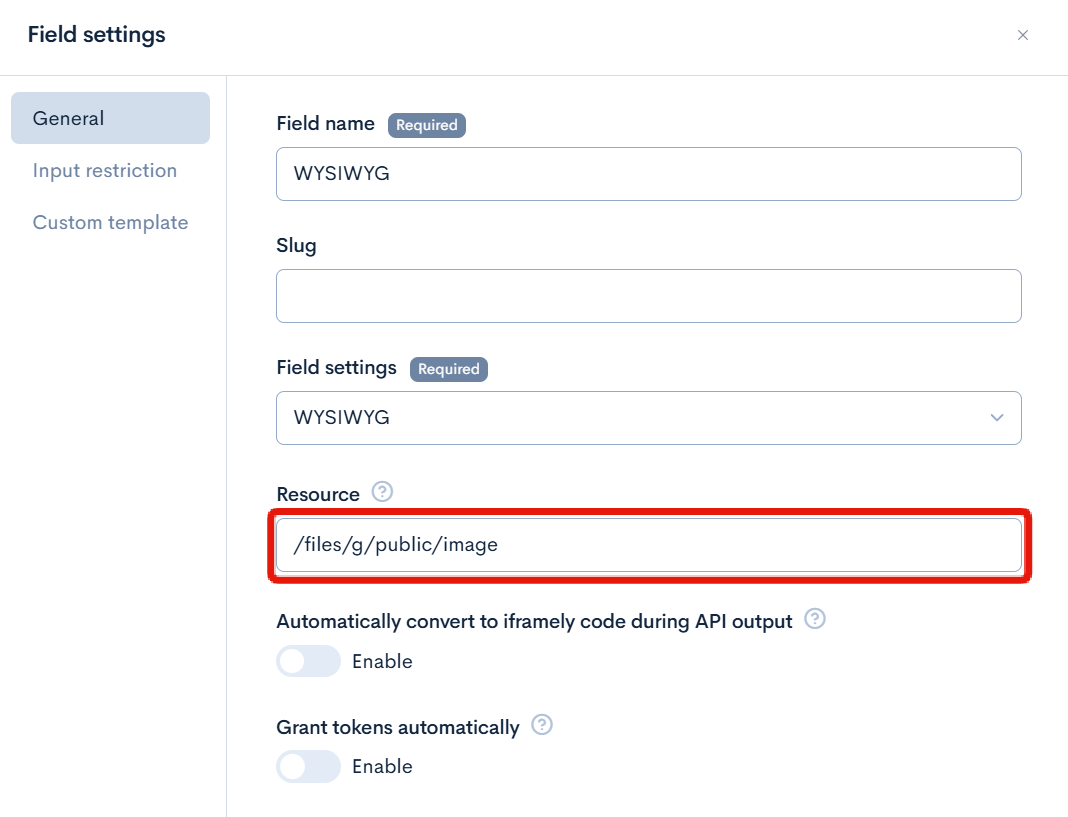
WYSIWYG
If you enter an GCS path in the “Resource” field under the general settings of a WYSIWYG field, any files uploaded via the WYSIWYG editor will be saved in the specified folder on GCS.
Support
If you have any other questions, please contact us or check out Our Slack Community.