Implement SCIM provisioning with Microsoft Entra ID
This tutorial explains how to implement SCIM provisioning with Microsoft Entra ID.
By using SCIM (System for Cross-domain Identity Management), you can automate the creation, update, and deletion of members from Microsoft Entra ID to Kuroco.
SCIM provisioning is a feature that automatically synchronizes member information from the IdP (Microsoft Entra ID) to the SP (Kuroco). This is different from SSO login functionality.
For SSO login implementation, please refer to the following documents:
- OAuth authentication: Implement SSO with OAuth authentication using Microsoft
- IDaaS (Azure AD B2C): Use IDaaS to Implement Microsoft Entra External ID (formerly Azure AD B2C) SSO
Prerequisites
This tutorial requires the following:
- A Microsoft Entra ID tenant account
- An account with the Cloud Application Administrator role or higher in Microsoft Entra ID
- Access to the Kuroco admin panel
Overview of SCIM provisioning
SCIM provisioning synchronizes member information through the following flow:
- When a user is assigned to an enterprise application in Microsoft Entra ID, member information is sent to Kuroco via the SCIM protocol.
- Kuroco automatically creates or updates members based on the received information.
- When a user assignment is removed on the Microsoft Entra ID side, the corresponding member in Kuroco is deactivated.
Add a member extension field
SCIM provisioning requires a member extension field to store the External ID from Microsoft Entra ID. Create this field in advance.
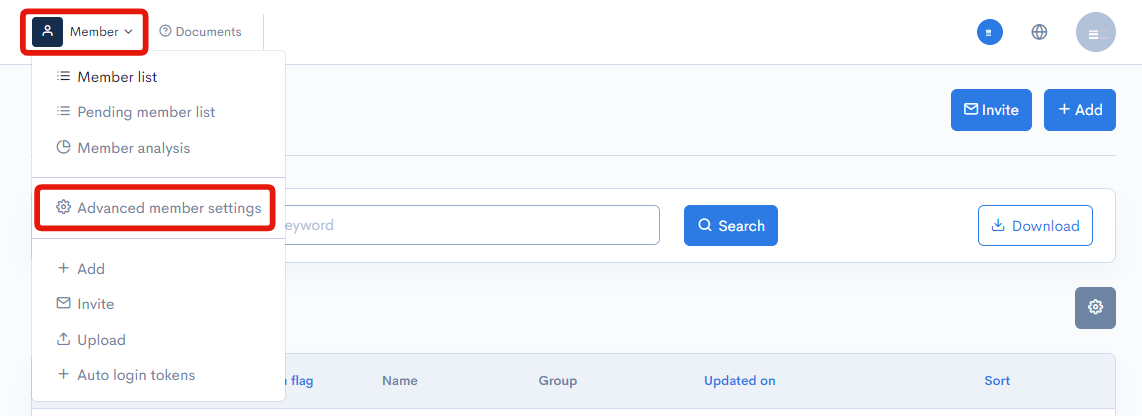
1. Access the member extension field settings page In the Kuroco admin panel, click [Member] above the member list, then from the dropdown menu that appears, click [Member advanced settings].
2. Add a member extension field for External SCIM ID From [Set extension fields for registered members], open [Extension field settings] and create a member extension field with the following settings.

| Field | Value |
|---|---|
| Field name | External SCIM ID (any preferred name) |
| Identifier | external_scim_id (any preferred name) |
| Type | Text |
This member extension field is used to store the Microsoft Entra ID user object ID. It serves as a supplementary linking method when member ID-based linking is not available. See the "Member linking priority" section at the end of this document for details.
Add SCIM SP settings on Kuroco admin panel
Next, add SCIM SP settings on the Kuroco admin panel.
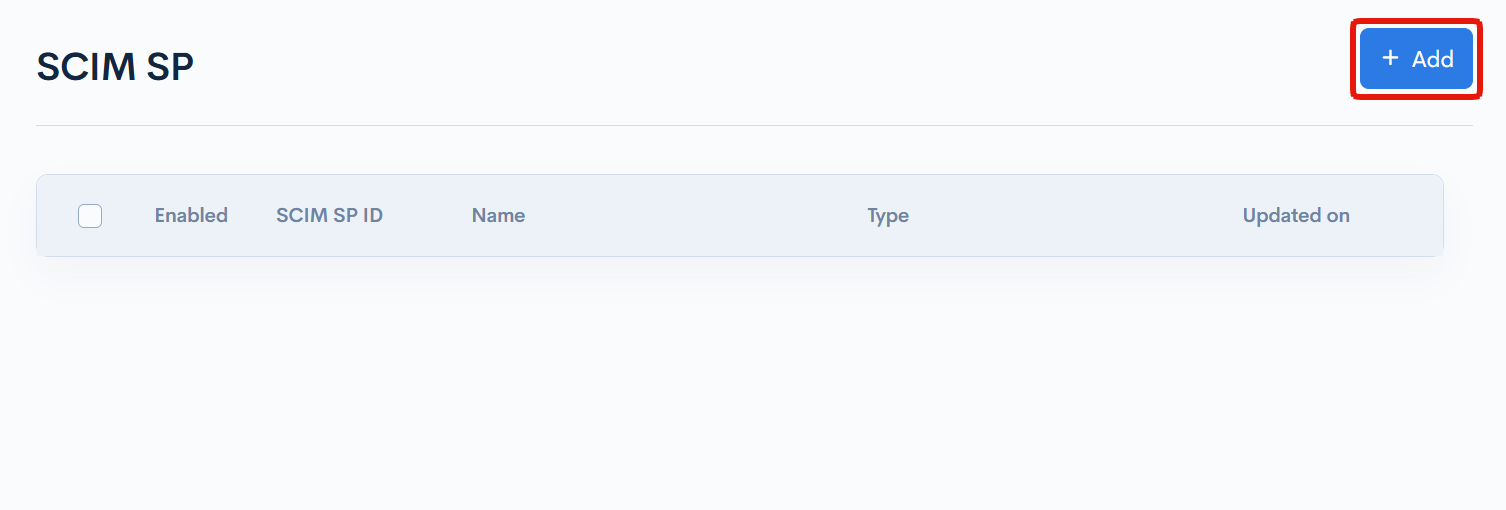
1. Access the SCIM SP settings page
Click [External system integration] -> SCIM SP to access the SCIM SP list page.
Click the [Add] button to add a new SCIM SP.
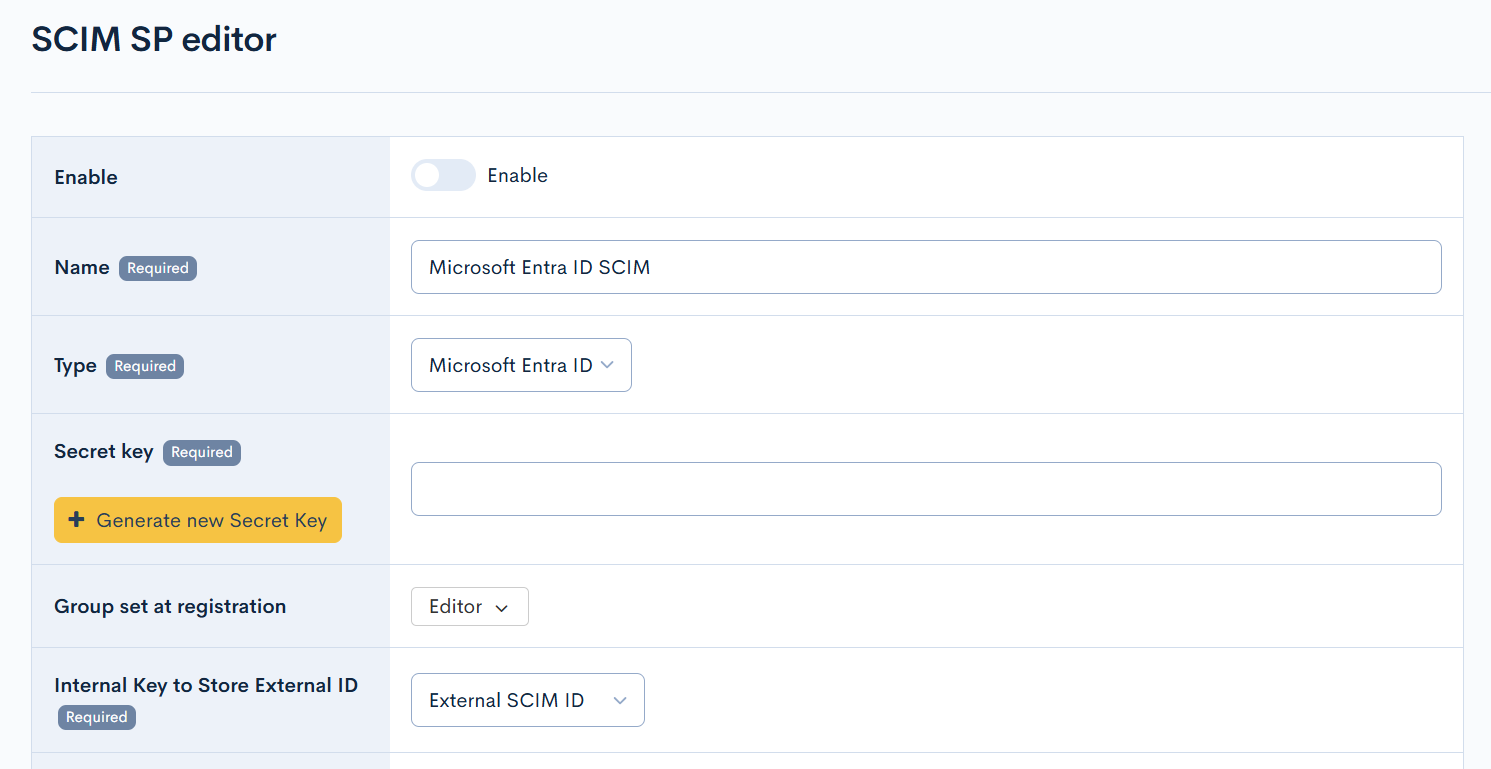
2. Enter SCIM SP settings
Enter the following items on the SCIM SP edit page. Leave the [Enable] checkbox unchecked at this stage.
| Field | Value |
|---|---|
| Enable | Uncheck (will be enabled later) |
| Name | Enter a preferred name. (e.g., Microsoft Entra ID SCIM) |
| Type | Select Microsoft Entra ID |
| Group Set During Registration | Set the group to which automatically registered members will belong. |
| Internal Key to Store External ID | Select the member extension field created earlier (External SCIM ID) |
Additionally, configure the following mappings in [Member attribute mapping].
| External Attribute Key | Internal Attribute Key | Description |
|---|---|---|
name.givenName | Given name | Given name |
name.familyName | Family name | Family name |
userName | Email address | Email address |
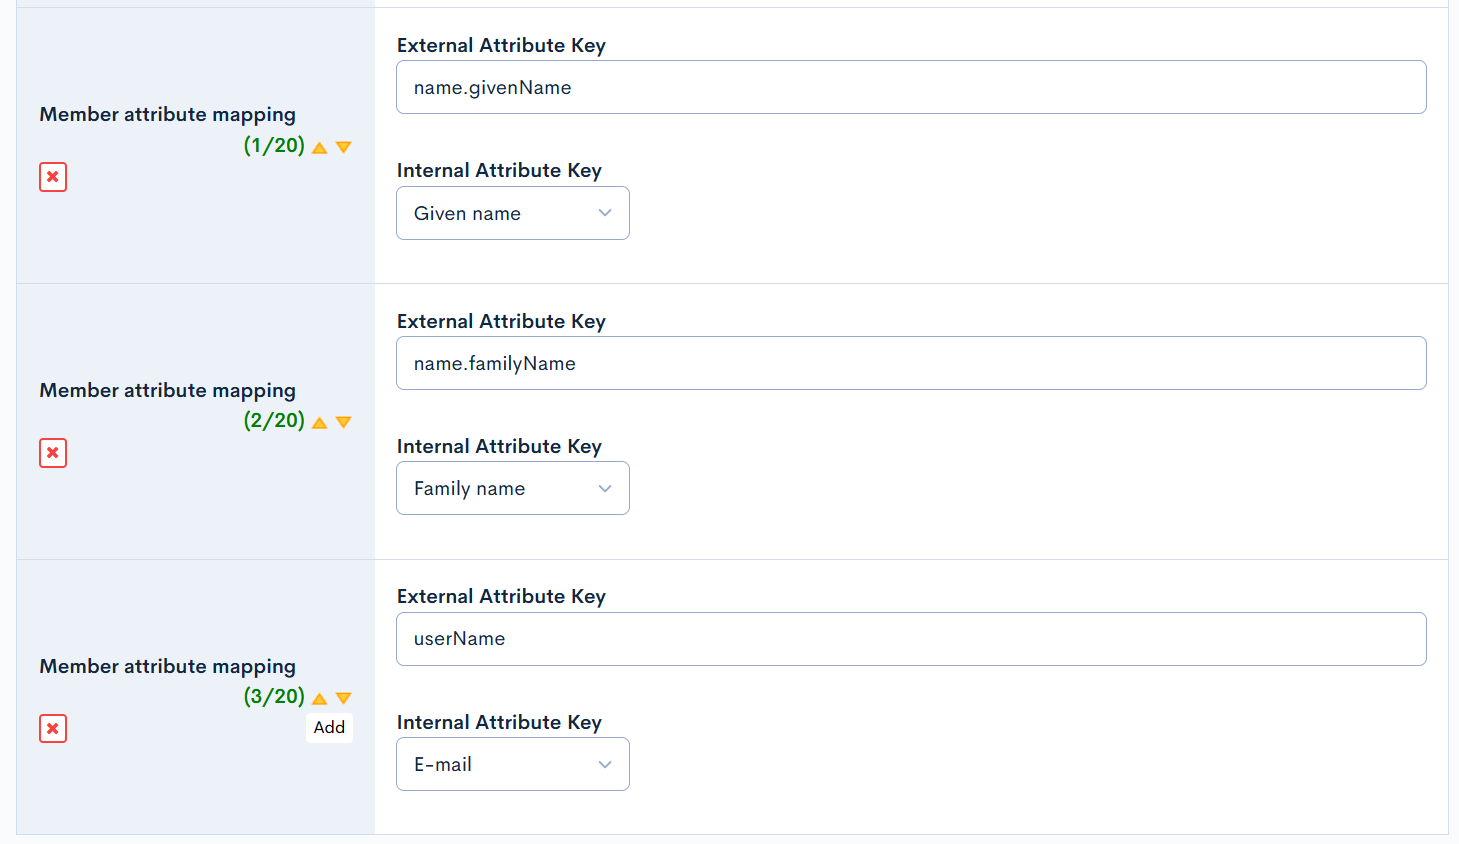
Without configuring Member attribute mapping, basic information such as names and email addresses will not be synchronized to Kuroco. At minimum, configure the mappings listed above.
Only one SCIM SP can be enabled at a time.
After entering the information, click the [Add] button.
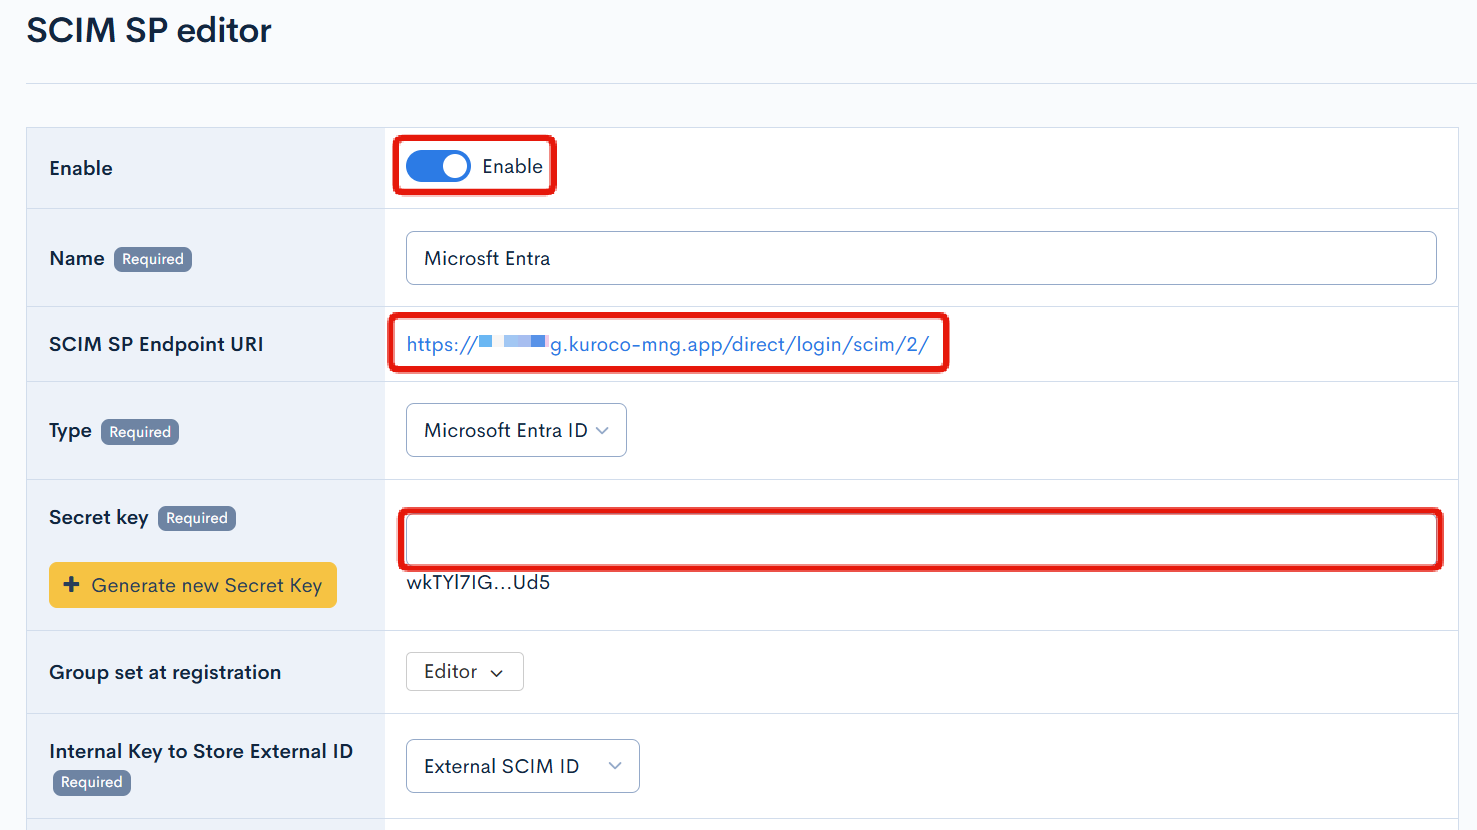
3. Copy the SCIM SP Endpoint URI and Secret Key
After adding, click the created SCIM SP setting to open the edit screen. Copy the following information. These will be used in the Microsoft Entra ID enterprise application settings.
- SCIM SP Endpoint URI: The tenant URL to be configured in Microsoft Entra ID
- Secret Key: The secret token to be configured in Microsoft Entra ID (It will be entered when you click "Generate new Secret Key".)
After noting the value, enable [Enable] and update.
Configure Microsoft Entra ID
Next, create an enterprise application in Microsoft Entra admin center and configure SCIM provisioning.
The screen may change depending on Microsoft specifications.
1. Access Microsoft Entra admin center
Sign in to Microsoft Entra admin center.
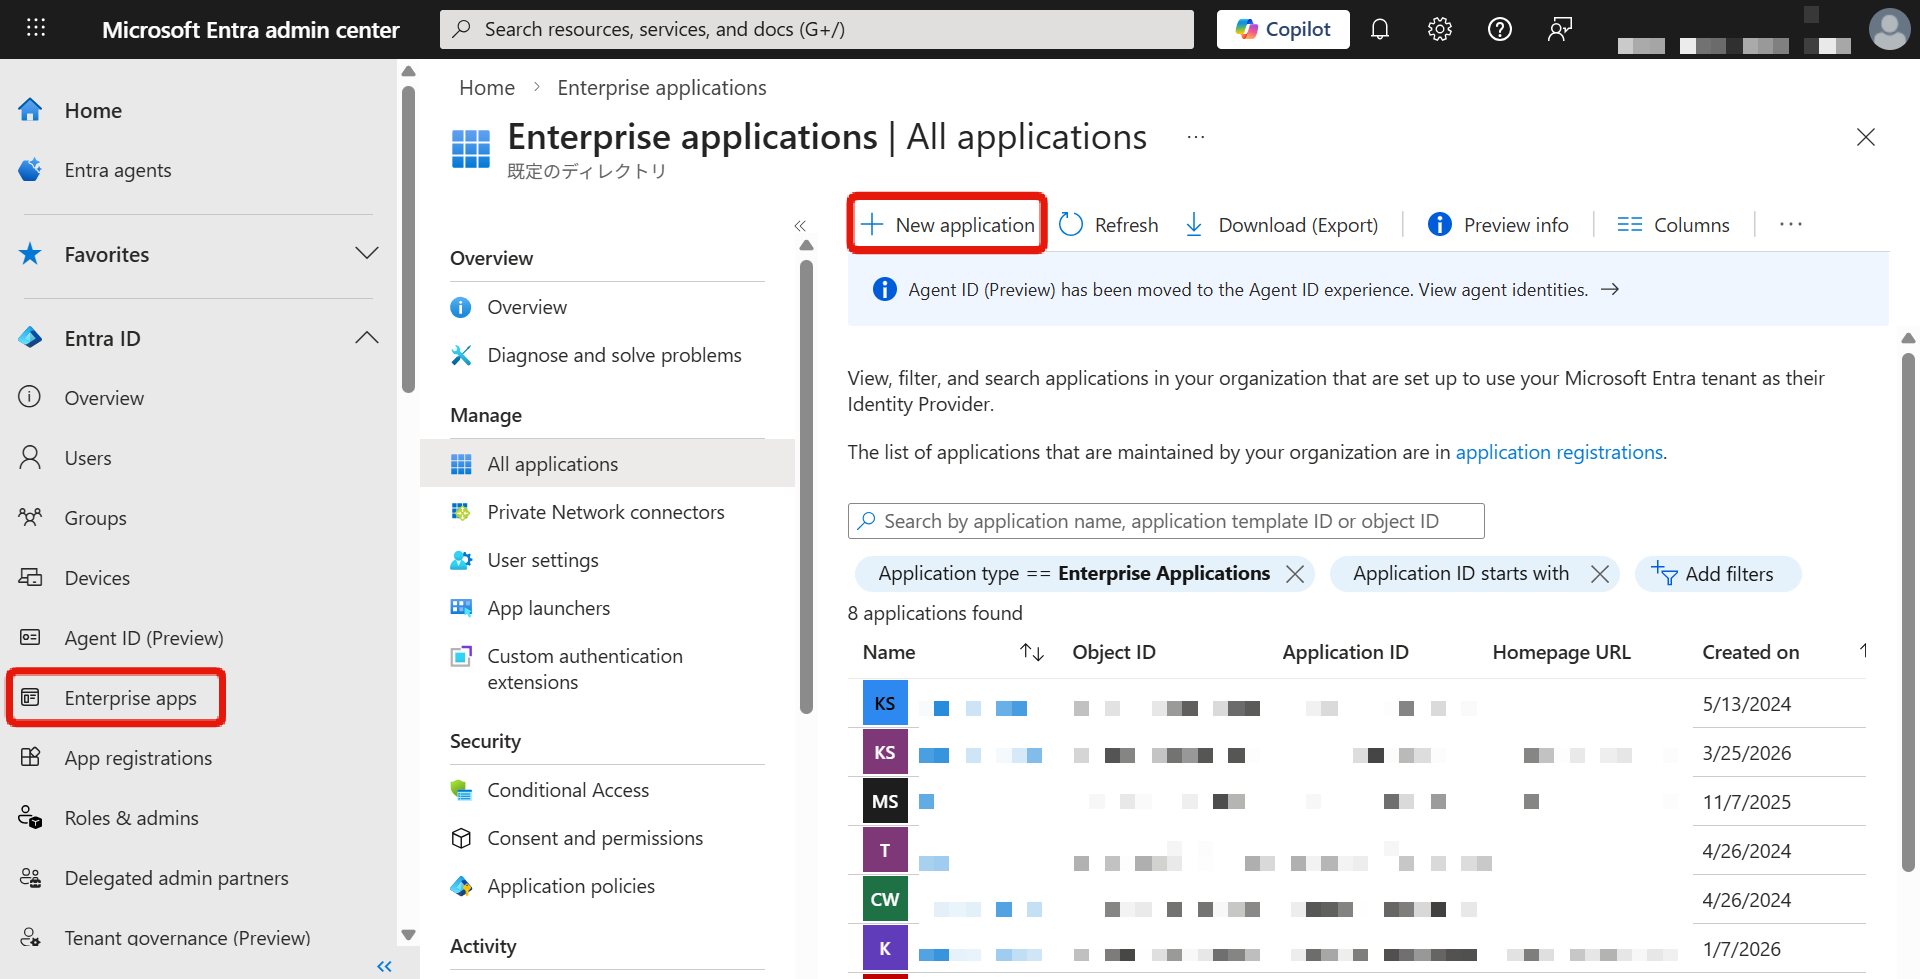
2. Create an enterprise application
In the left navigation, click [Entra ID] -> [Enterprise apps].
Click [New application].
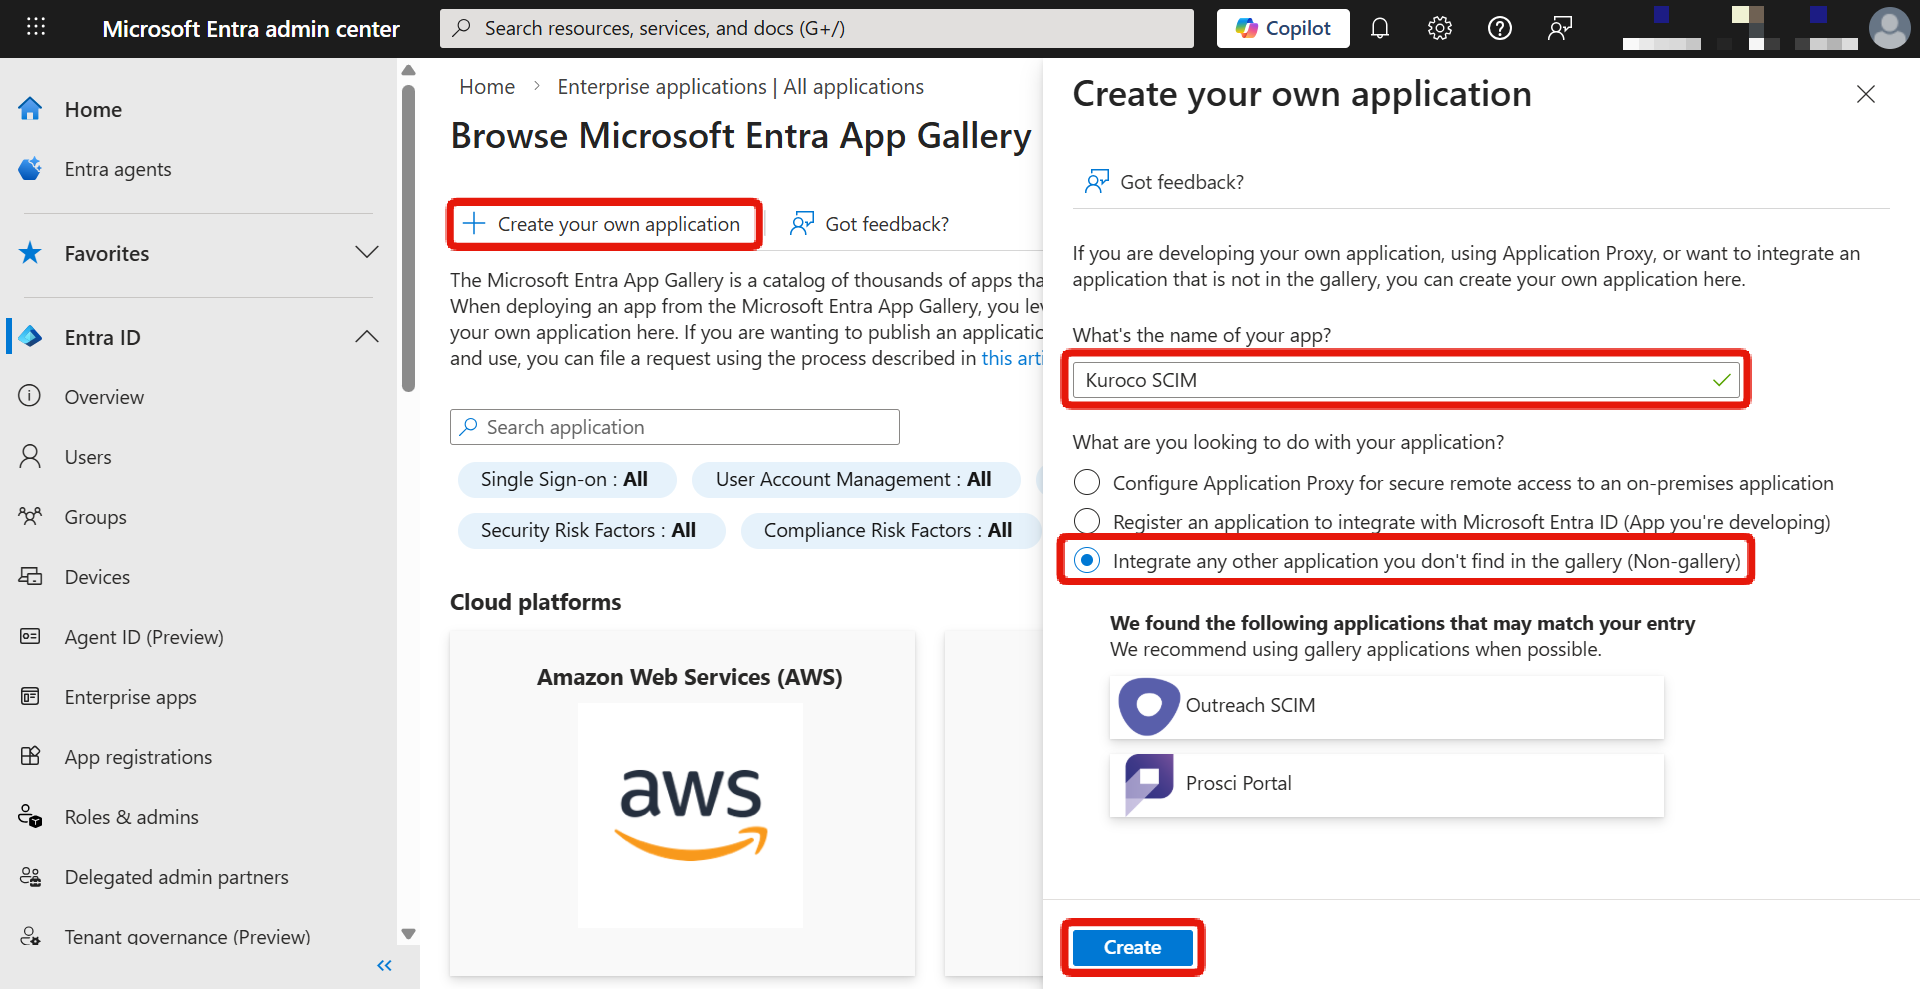
3. Create your own application
Click [Create your own application].
Enter the application name (e.g., Kuroco SCIM), select [Integrate any other application you don't find in the gallery (Non-gallery)], and click [Create].
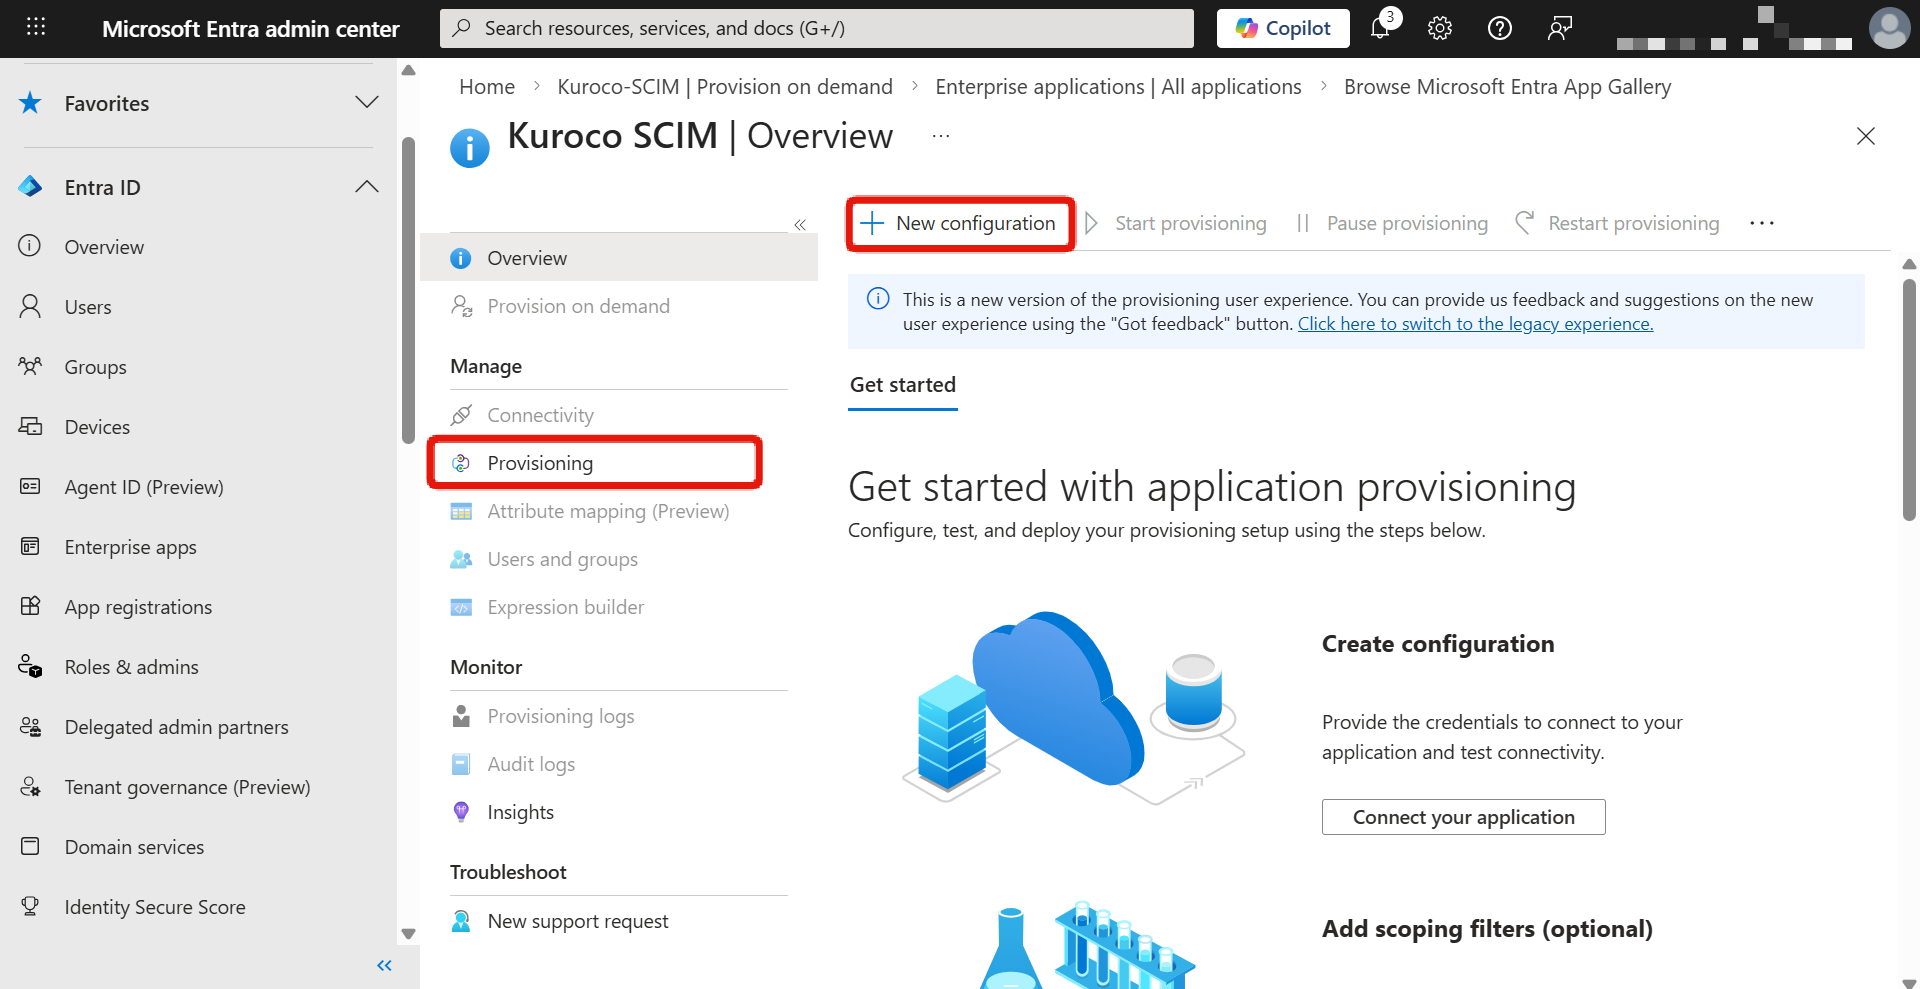
4. Set up provisioning
On the created application overview screen, click [Provisioning] in the left menu, then click [New configuration].
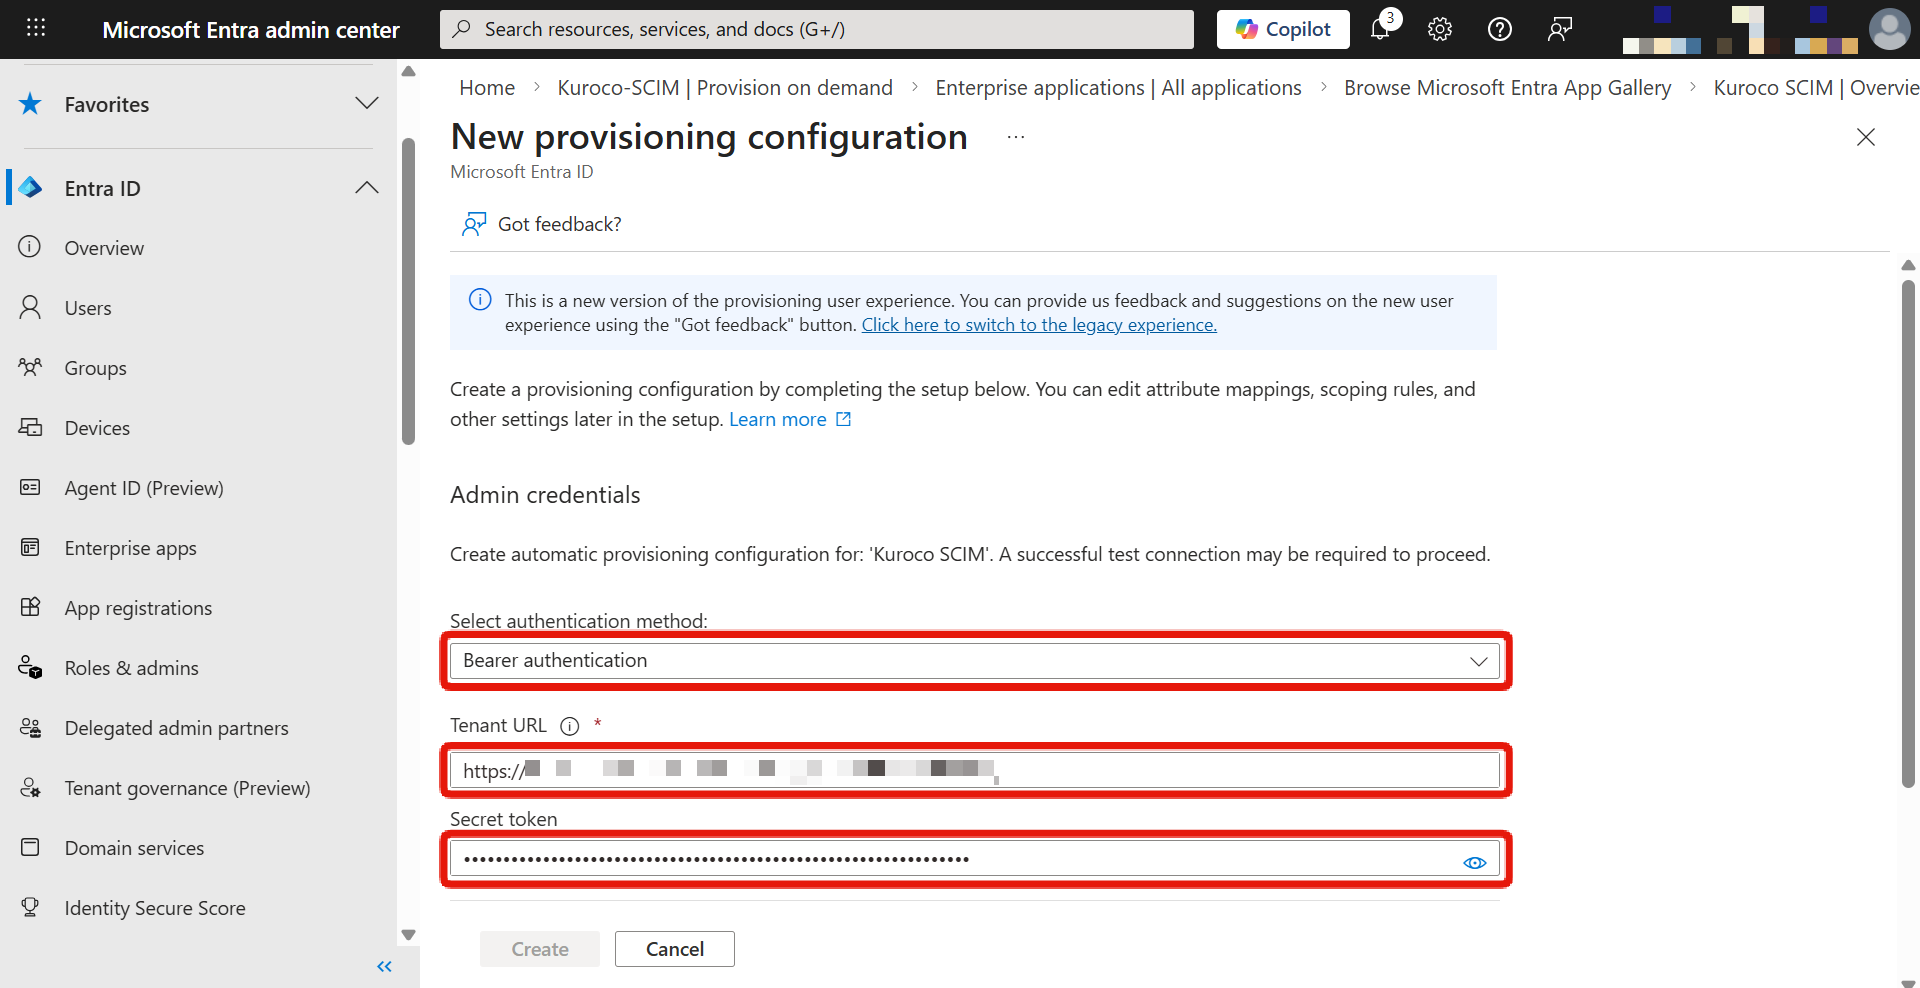
5. Enter admin credentials
Enter the following values in the [Admin Credentials] section.
| Field | Value |
|---|---|
| Select authentication method | Bearer authentication |
| Tenant URL | The [SCIM SP Endpoint URI] value copied from the Kuroco SCIM SP edit screen |
| Secret Token | The [Secret Key] value copied from the Kuroco SCIM SP edit screen |
6. Test the connection
Click [Test Connection] to verify the connection from Microsoft Entra ID to Kuroco.
After confirming the connection is successful, click [Create].

If the test connection fails, check the following:
- The Kuroco SCIM SP setting is enabled
- The Tenant URL and Secret Token are entered correctly
7. Review attribute mappings (optional)
In the [Mappings] section, you can review and edit how Microsoft Entra ID attributes are mapped to Kuroco.
If the default mappings are acceptable, you can skip this step.
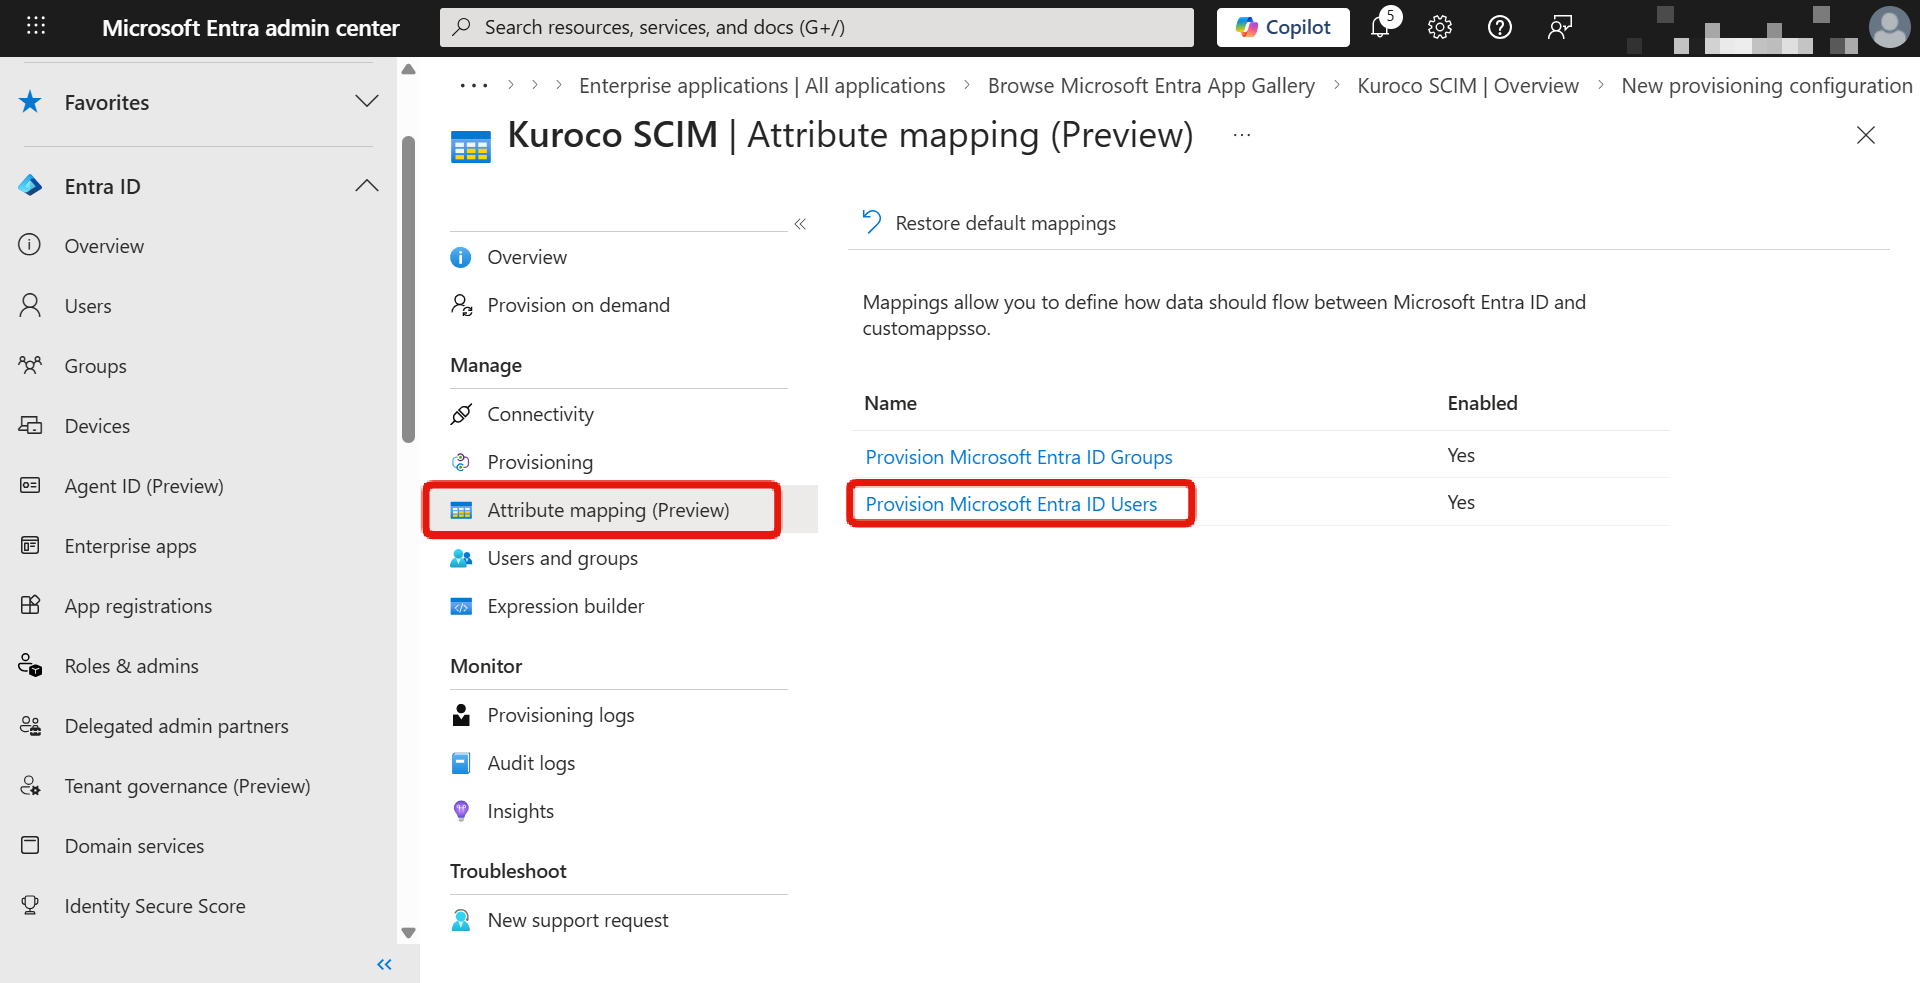
The Member attribute mapping settings on the Kuroco side and the attribute mapping settings on the Microsoft Entra ID side must be consistent with each other.
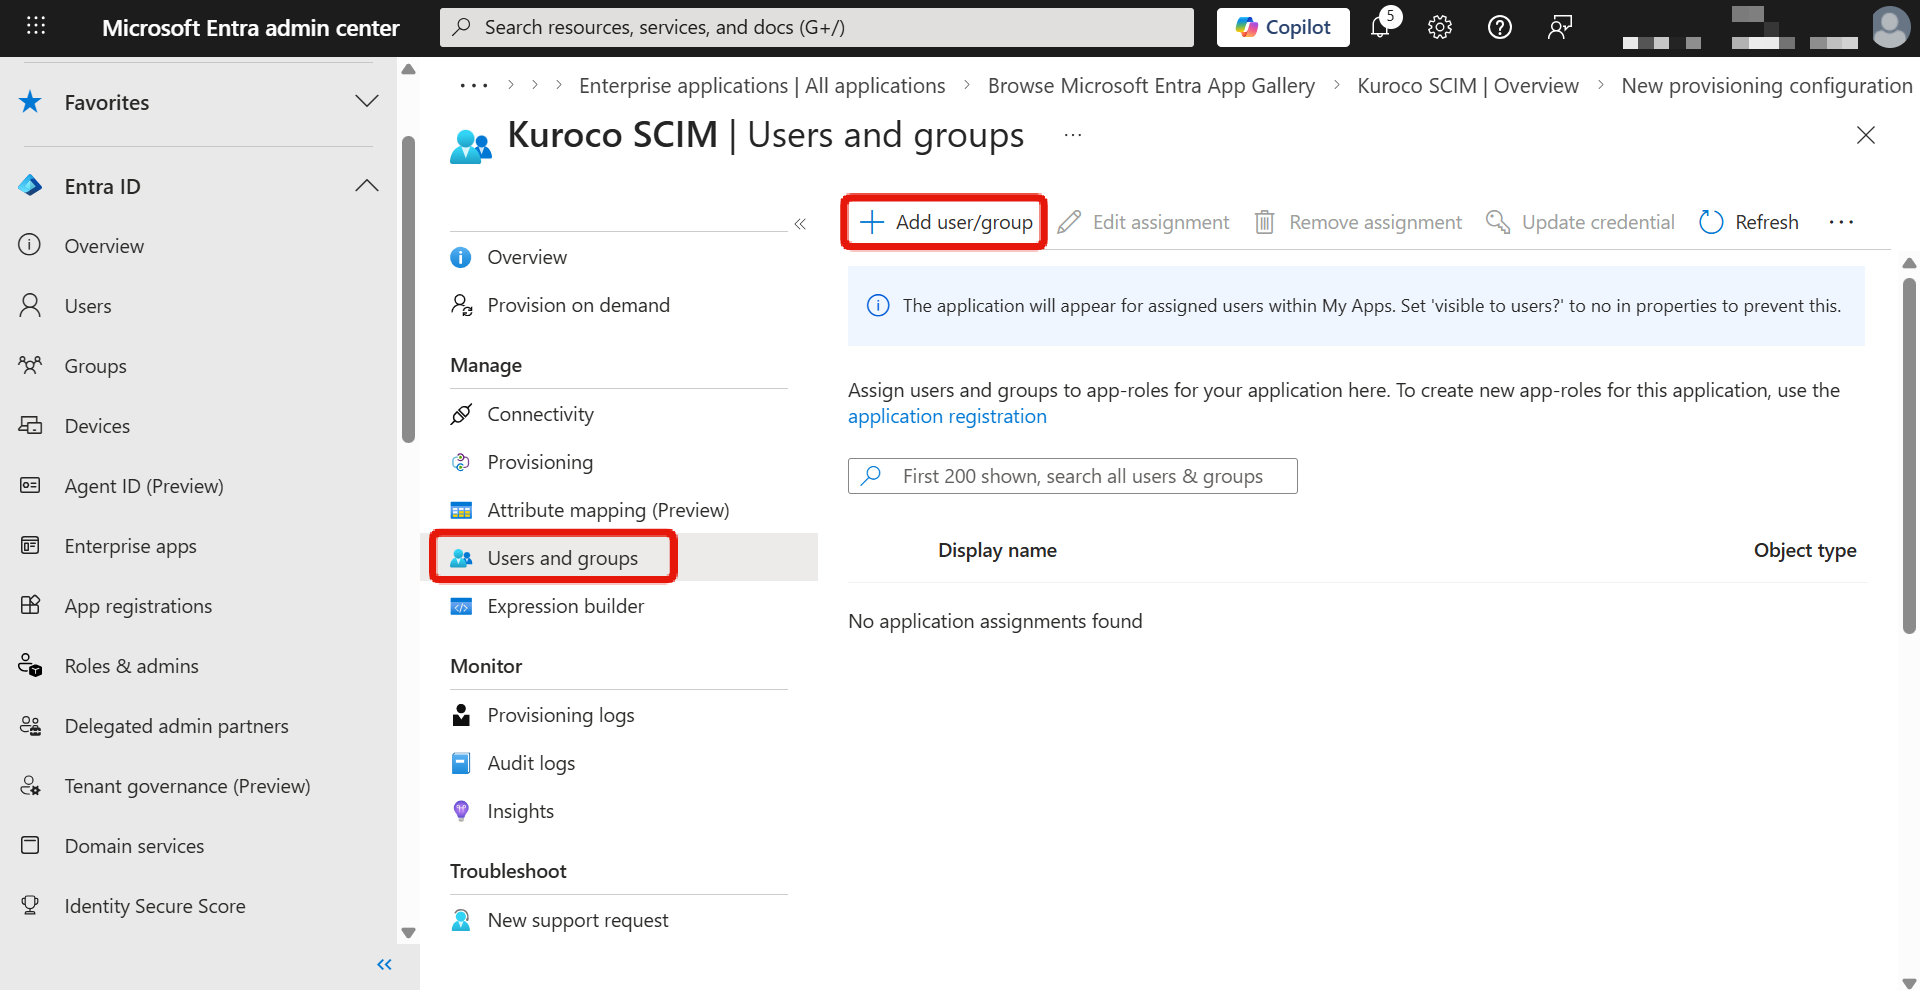
8. Assign users and groups
Return to the application overview screen and click [Users and groups].
Click [Add user/group] and assign the users or groups that will be subject to SCIM provisioning.
9. Start provisioning
Return to the [Provisioning] screen, turn on [Provisioning Status], and save.
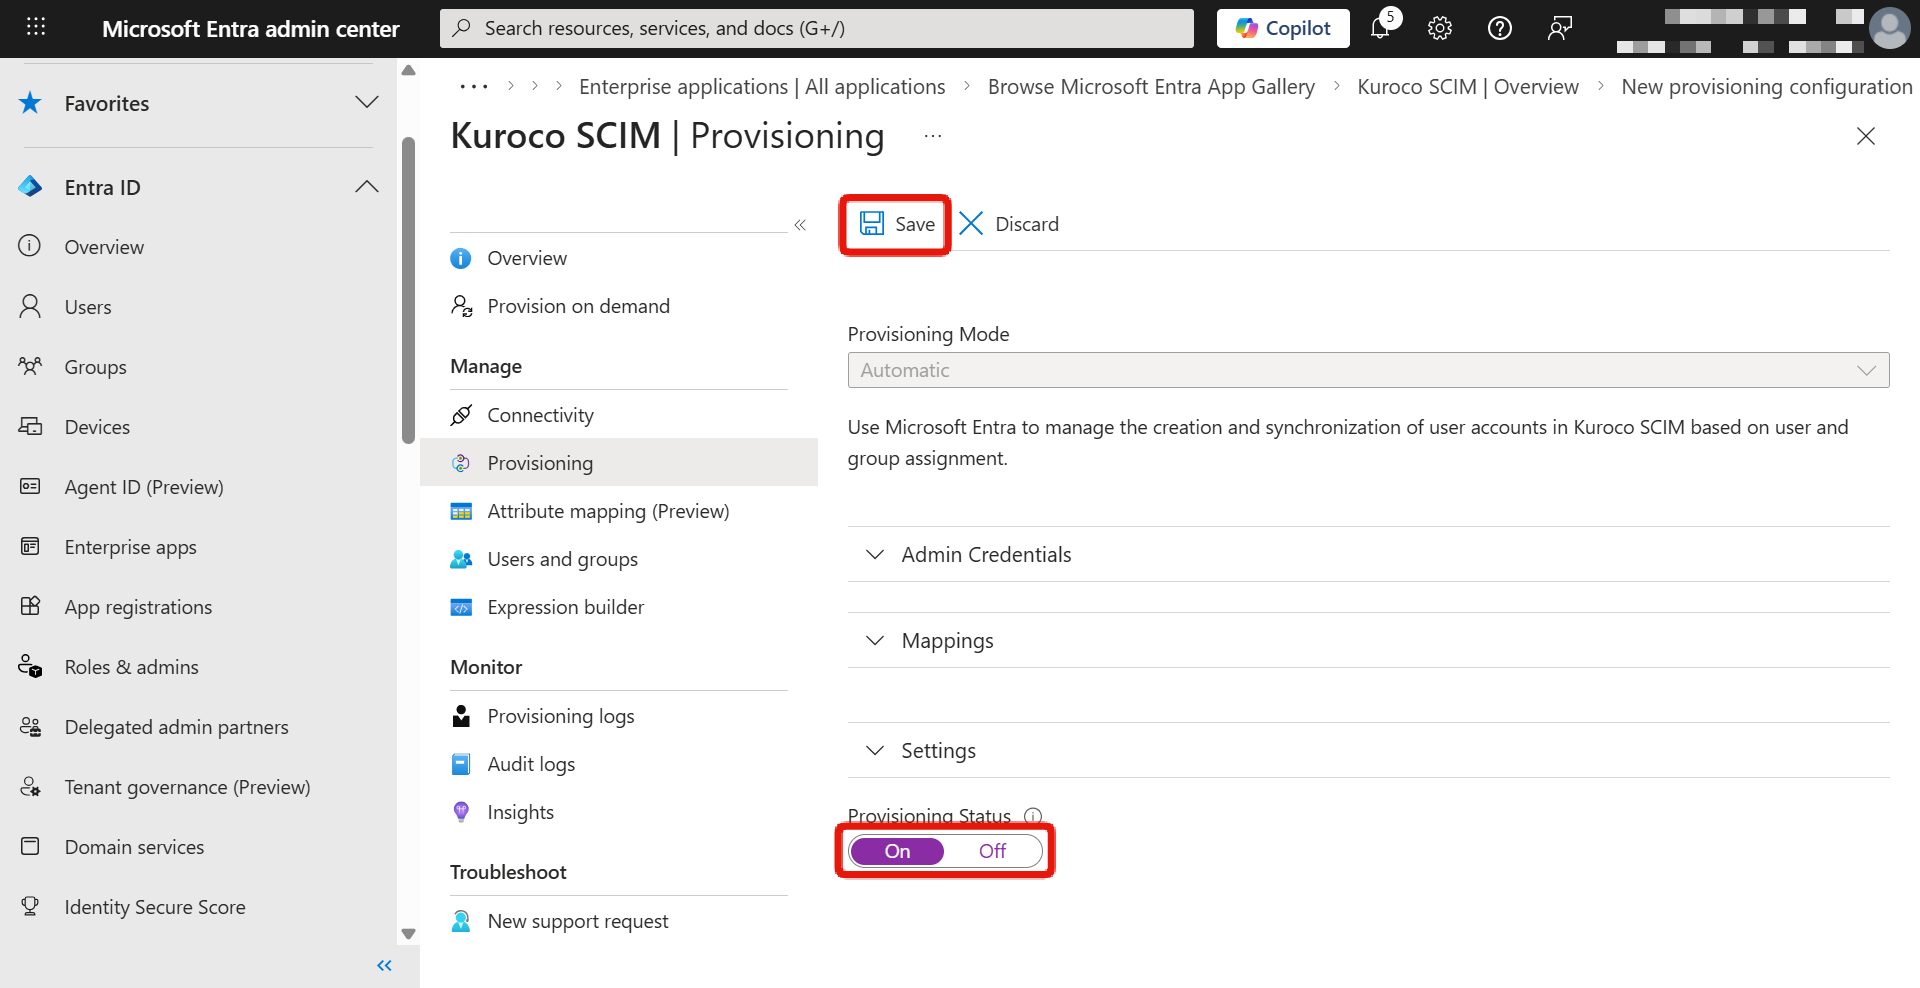
The initial provisioning cycle typically takes 20 to 40 minutes. Subsequent synchronizations are automatically executed at approximately 40-minute intervals.
Verification
Verify that SCIM provisioning is working correctly.
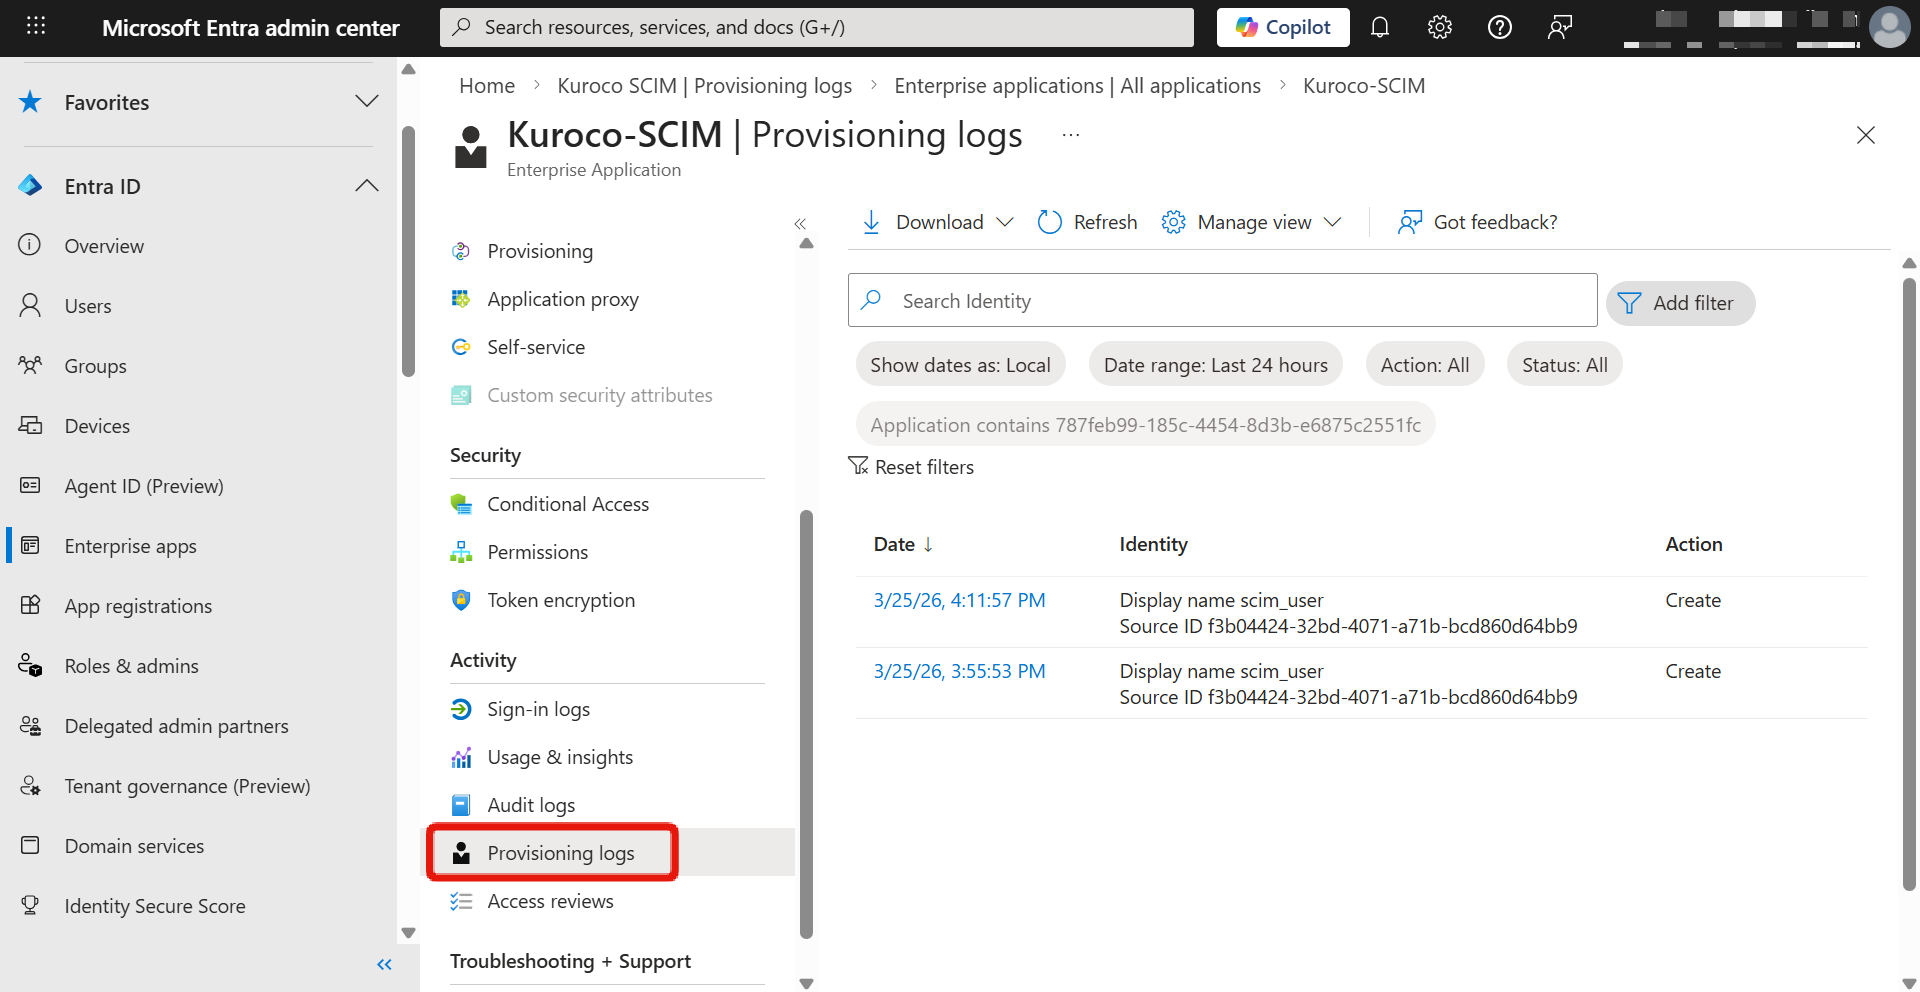
1. Check provisioning logs in Microsoft Entra admin center
In the Microsoft Entra admin center, click [Provisioning] -> [Provisioning logs] for the created enterprise application.
Verify that provisioning is successful.
2. Verify members in Kuroco
In the Kuroco admin panel, click [Member management] -> [Member] and verify that members synchronized from Microsoft Entra ID are displayed.
If provisioning is not working correctly, check the following:
- The Kuroco SCIM SP setting is enabled
- Provisioning is started in Microsoft Entra ID
- The Tenant URL and Secret Token are correct
- Target users or groups are assigned to the enterprise application
Operational role assignment
After implementing SCIM provisioning, Microsoft Entra ID and Kuroco each manage different areas.
Managed on the Microsoft Entra ID side
The following information is managed on the Microsoft Entra ID side and is automatically synchronized to Kuroco via SCIM provisioning.
- User creation and deletion (activation/deactivation)
- Mapped member attribute information (such as names and email addresses)
- Group creation/deletion and member assignment to groups
- Assignment of users and groups to the Entra ID enterprise application
Managed on the Kuroco side
The following settings are not included in SCIM provisioning synchronization and are managed in the Kuroco admin panel.
- Group permission settings (group creation and member assignment are synchronized from Entra ID, but the permissions granted to each group must be configured on the Kuroco side)
- Access permissions for Kuroco content and APIs
- SCIM SP settings maintenance
If you directly edit member attributes that are synchronized via SCIM provisioning (such as names or email addresses) from the Kuroco admin panel, they will be overwritten with the Entra ID information during the next provisioning synchronization. Please make member information changes on the Microsoft Entra ID side.
SCIM provisioning synchronizes group creation and member group assignments, but does not synchronize group permissions (such as access rights). Please configure permissions for groups synchronized from Entra ID in the Kuroco admin panel.
Member linking priority
When SCIM provisioning matches user information sent from Microsoft Entra ID with existing Kuroco members, the following priority order is used.
| Priority | Linking method | Description |
|---|---|---|
| 1 | Member ID | After provisioning is executed, the Kuroco member ID is linked to the Entra ID user. In subsequent synchronizations, this member ID-based linking is used with the highest priority. |
| 2 | Internal Key to Store External ID | When member ID-based linking is not available (e.g., during the initial provisioning), the system attempts to match using the External ID stored in the Internal Key to Store External ID. |
| 3 | Email address | If linking is not possible with either of the above methods, the system attempts to match by email address. |
| 4 | New creation | If no existing member can be linked by any method, a new member is created. |
During the initial provisioning, member ID-based linking does not yet exist, so linking is performed using the Internal Key to Store External ID or email address. Once linking is established, member ID-based linking takes priority in subsequent synchronizations.
Support
If you have any other questions, please contact us or check out Our Slack Community.