Basic settings
The "Basic settings" tab of the notification editor allows you to configure the settings of the selected notification.
Accessing the screen
Existing notification
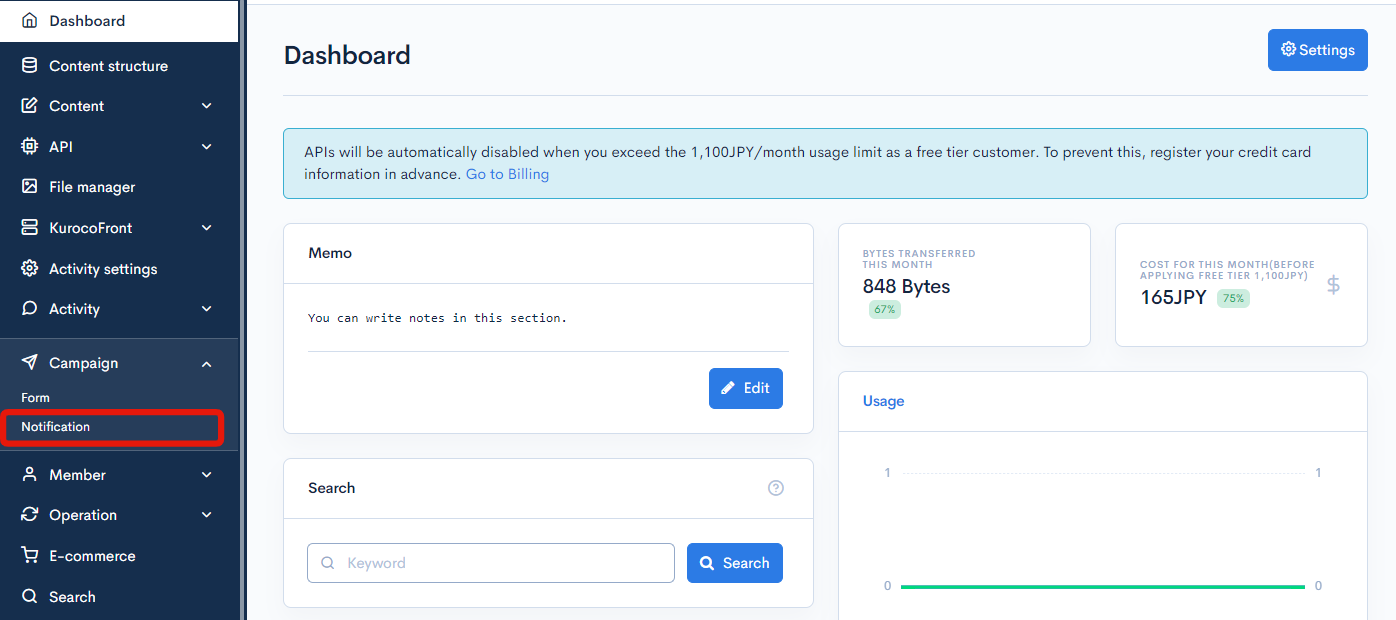
In the left sidebar menu, select [Campaign] -> [Notification].

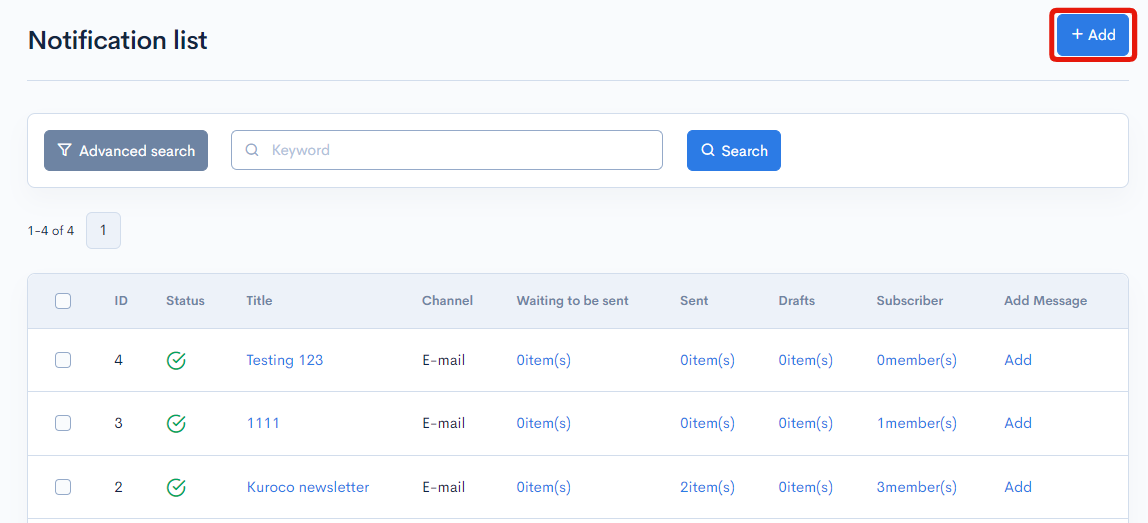
From the Notification list, click the title of the notification you want to edit.

Create new notification
In the left sidebar menu, select [Campaign] -> [Notification].

In the upper right corner of the Notification list screen, click [Add].

Fields
tip
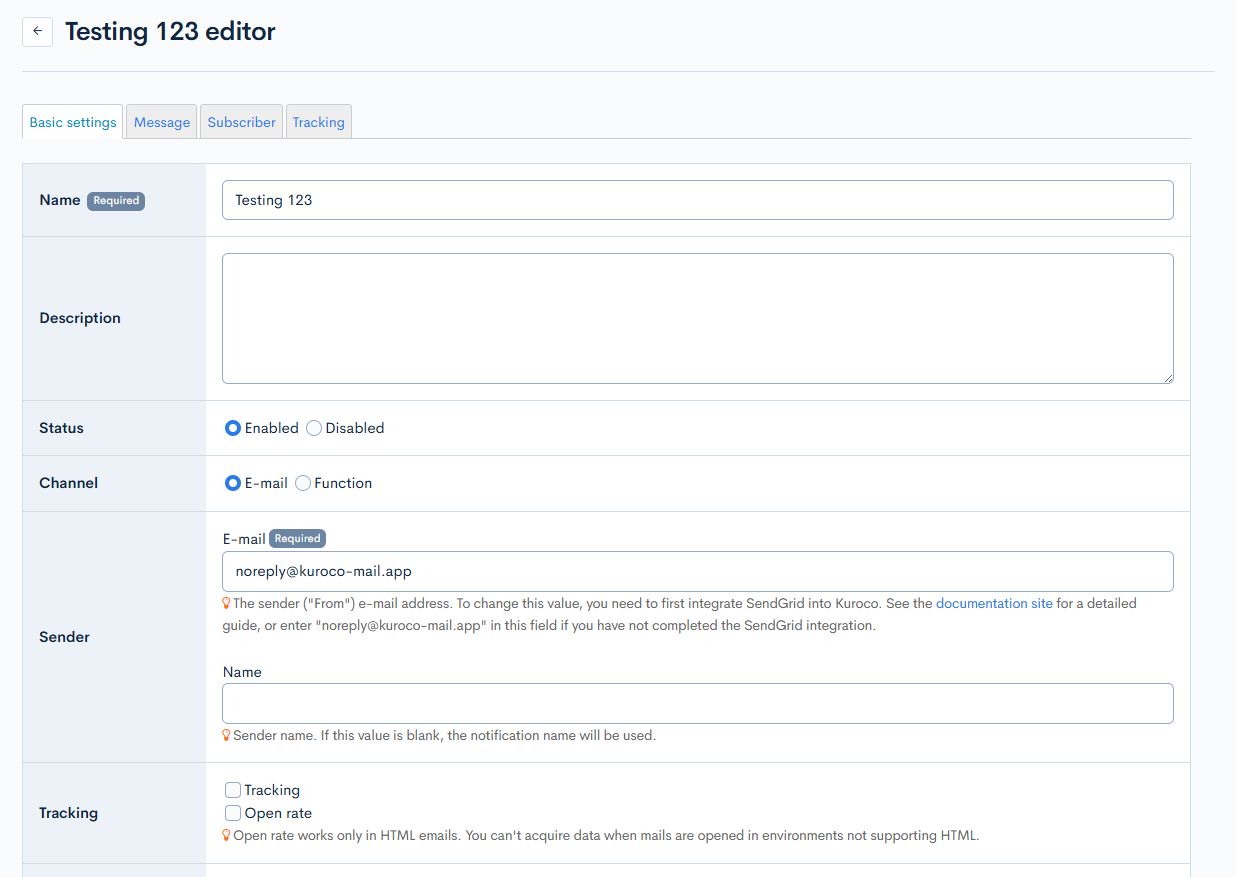
The page tabs ("Basic settings", "Messages", "Subscribers", and "Tracking") are only accessible for existing notifications. When creating a new notification, the editor displays all the fields from the "Basic settings" tab on a single page.
| Field | Description |
|---|---|
| Name | Title of the notification. |
| Description | Overview of the notification contents. |
| Status | Indicates if the notification is currently active. |
| Channel | The mode through which the alert is sent. |
| Sender | Enter the email address and sender name to become the sender in the "From" field of the email. If no sender name is entered, the display name will be applied. |
| Tracking | Select the data you want to track.
|
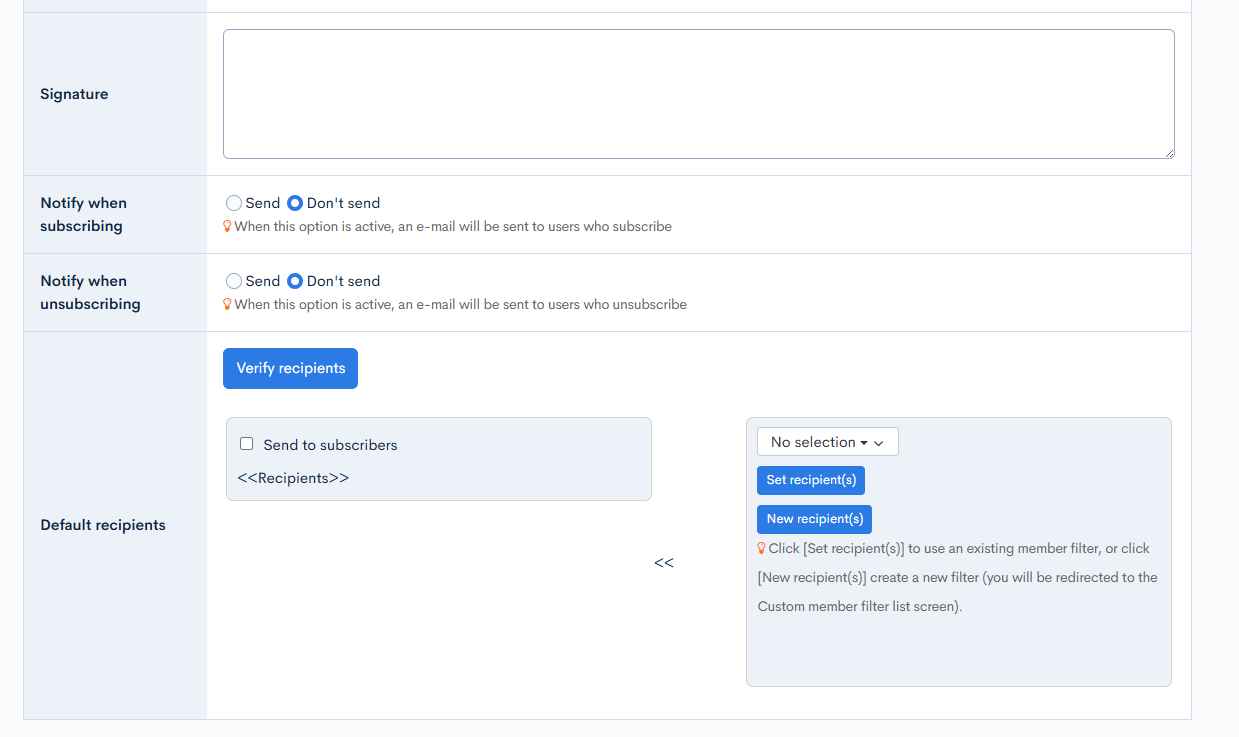
| Signature | The signature displayed at the end of the notification. |
| Notification when subscribing | Option to send users a confirmation message when they subscribe to the notification. |
| Notification when unsubscribing | Option to send users a confirmation message when they unsubscribe to the notification. |
| Default recipients | Select the notification recipients using the subscriber list and/or custom member filters.
|
| Basic settings access restriction | Option to restrict who can view the settings of this notification. If you select [Restricted], specify the authorized groups using the dropdown list (note: you need to set up the member group in advance. For a detailed guide, see Tutorial: Creating groups. |
| Message sending restriction | Option to restrict who can send messages in this notification. If you select [Restricted], specify the authorized groups using the dropdown list (note: you need to set up the member group in advance. For a detailed guide, see Tutorial: Creating groups. |
Other actions
Existing notification

| Button | Description |
|---|---|
| Update | Save any changes made on this screen. |
| Delete | Delete the current notification. |
New notification

| Button | Description |
|---|---|
| Add | Save the newly created notification. |
Related documents
Support
If you have any other questions, please contact us or check out Our Slack Community.


